Set up Ticketing and Azure DevOps
Connect Mondoo to Azure DevOps to create security remediation work items directly from the Mondoo App.
Set up ticketing in a space to allow users in the space to keep track of security tasks and add Azure DevOps issues directly from within the Mondoo App. Ticketing setup involves configuring Mondoo to integrate with Azure DevOps. Mondoo uses an app registration to communicate with Azure DevOps.
For an overview of ticketing, read Track and Fix Findings with Ticketing.
Prerequisites
- Owner or Editor access to the Mondoo space
- Owner access to your Azure DevOps organization
- Permission to create a service principal in Microsoft Entra ID (global administrator, application administrator or cloud application administrator)
Register and grant permissions to an Azure app
Like any service that integrates with Azure, Mondoo must have a Microsoft Entra ID app registration, a service principal in your Azure tenant. To learn about service principals, read Securing service principals in Microsoft Entra ID in the Microsoft Azure documentation.
-
Log into the Azure portal as a global administrator, application administrator or cloud application administrator.
-
Find and select Microsoft Entra ID.
-
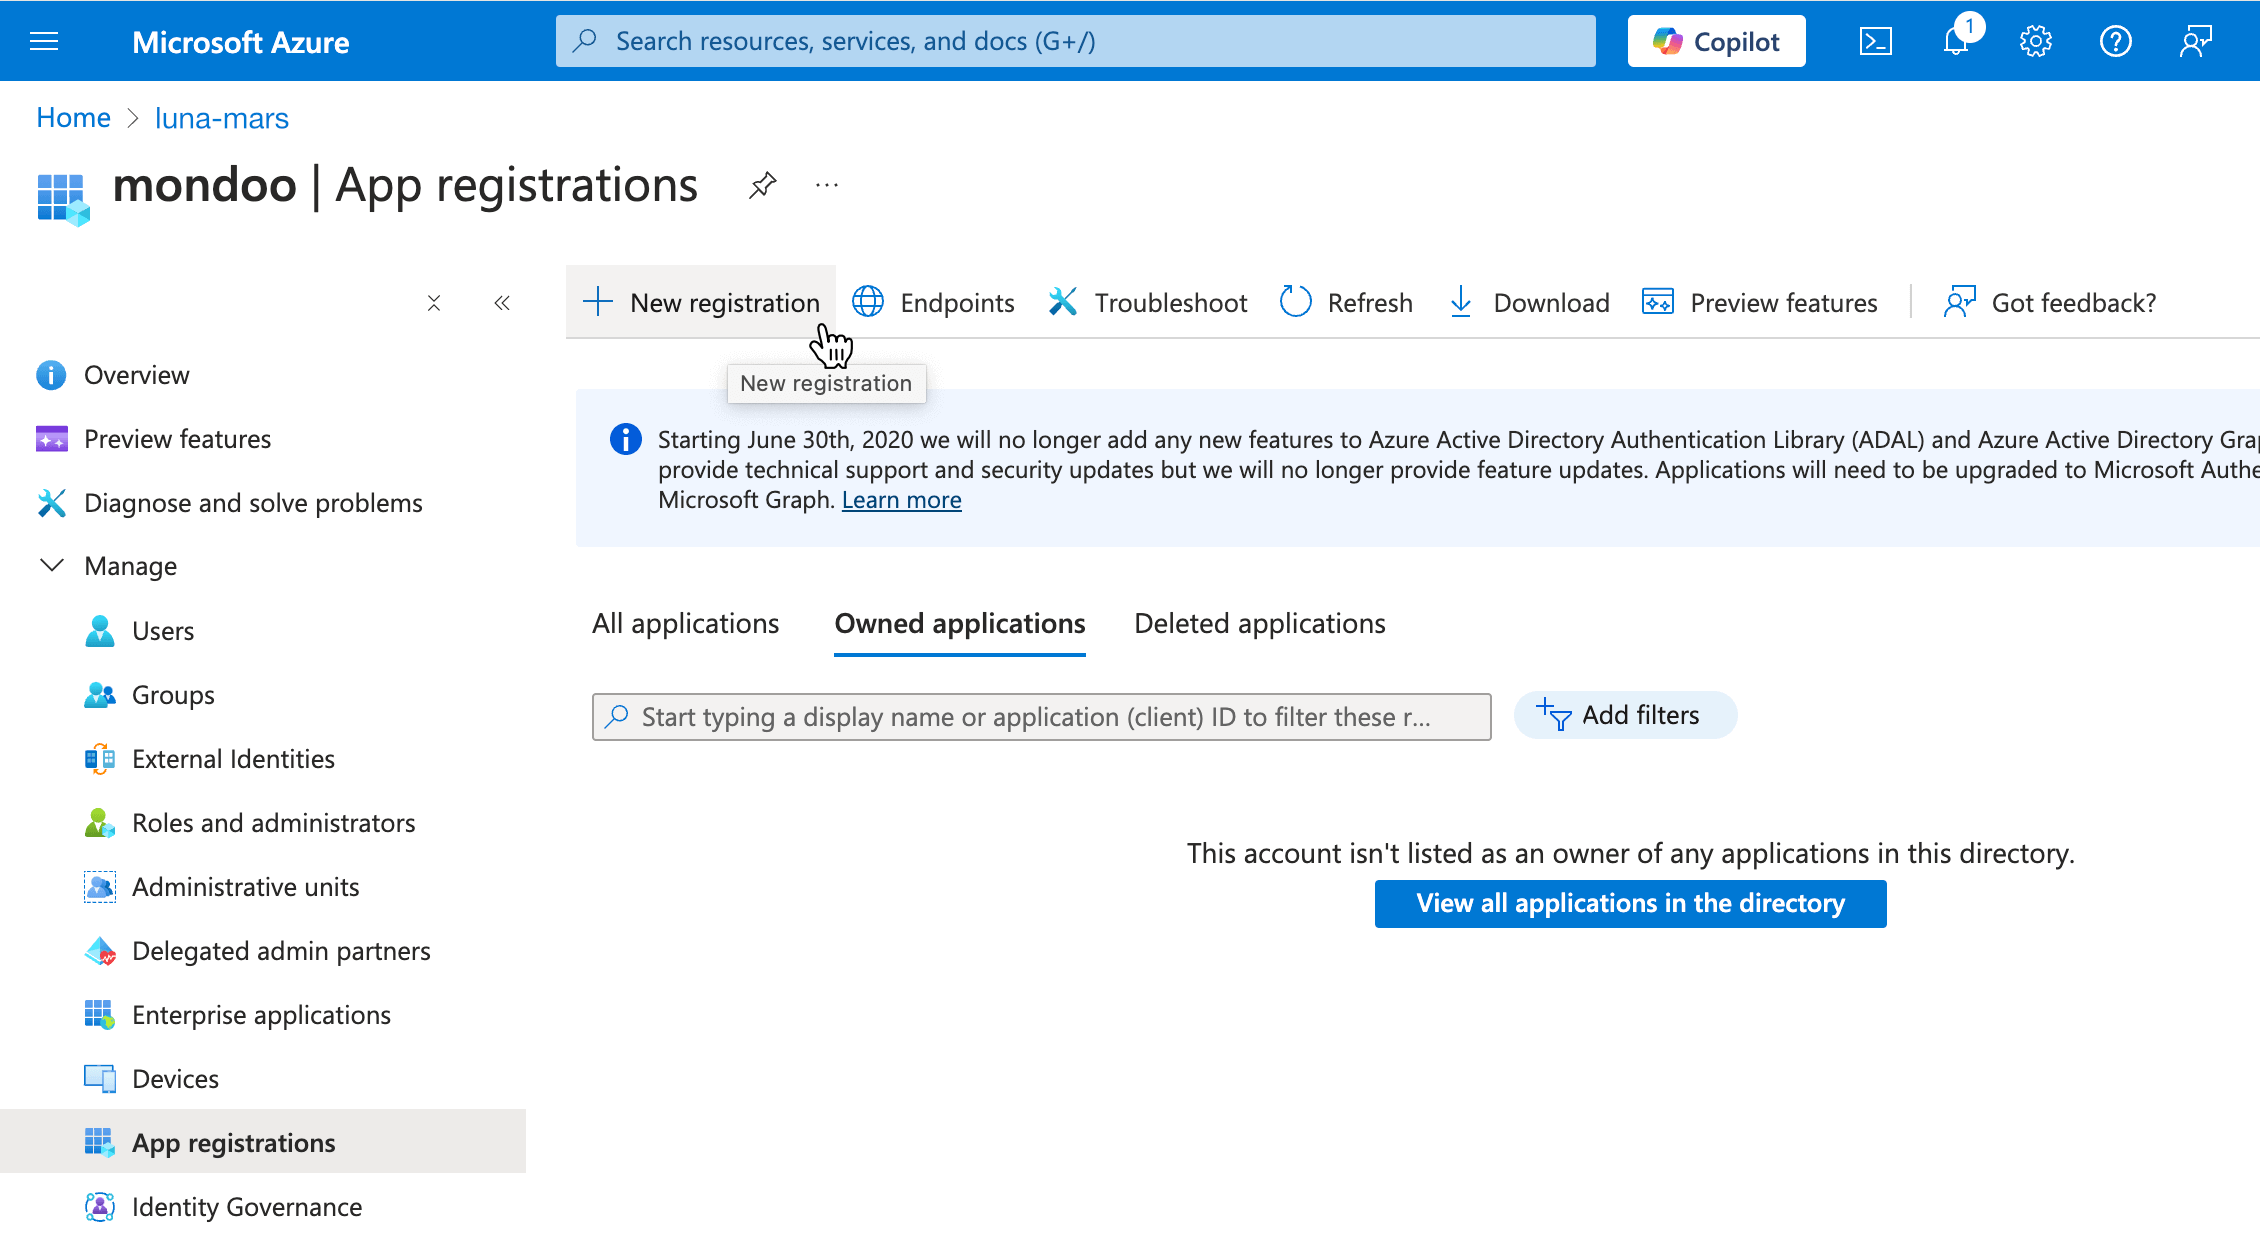
In the navigation sidebar, select App registrations.
-
In the toolbar, select New registration.
-
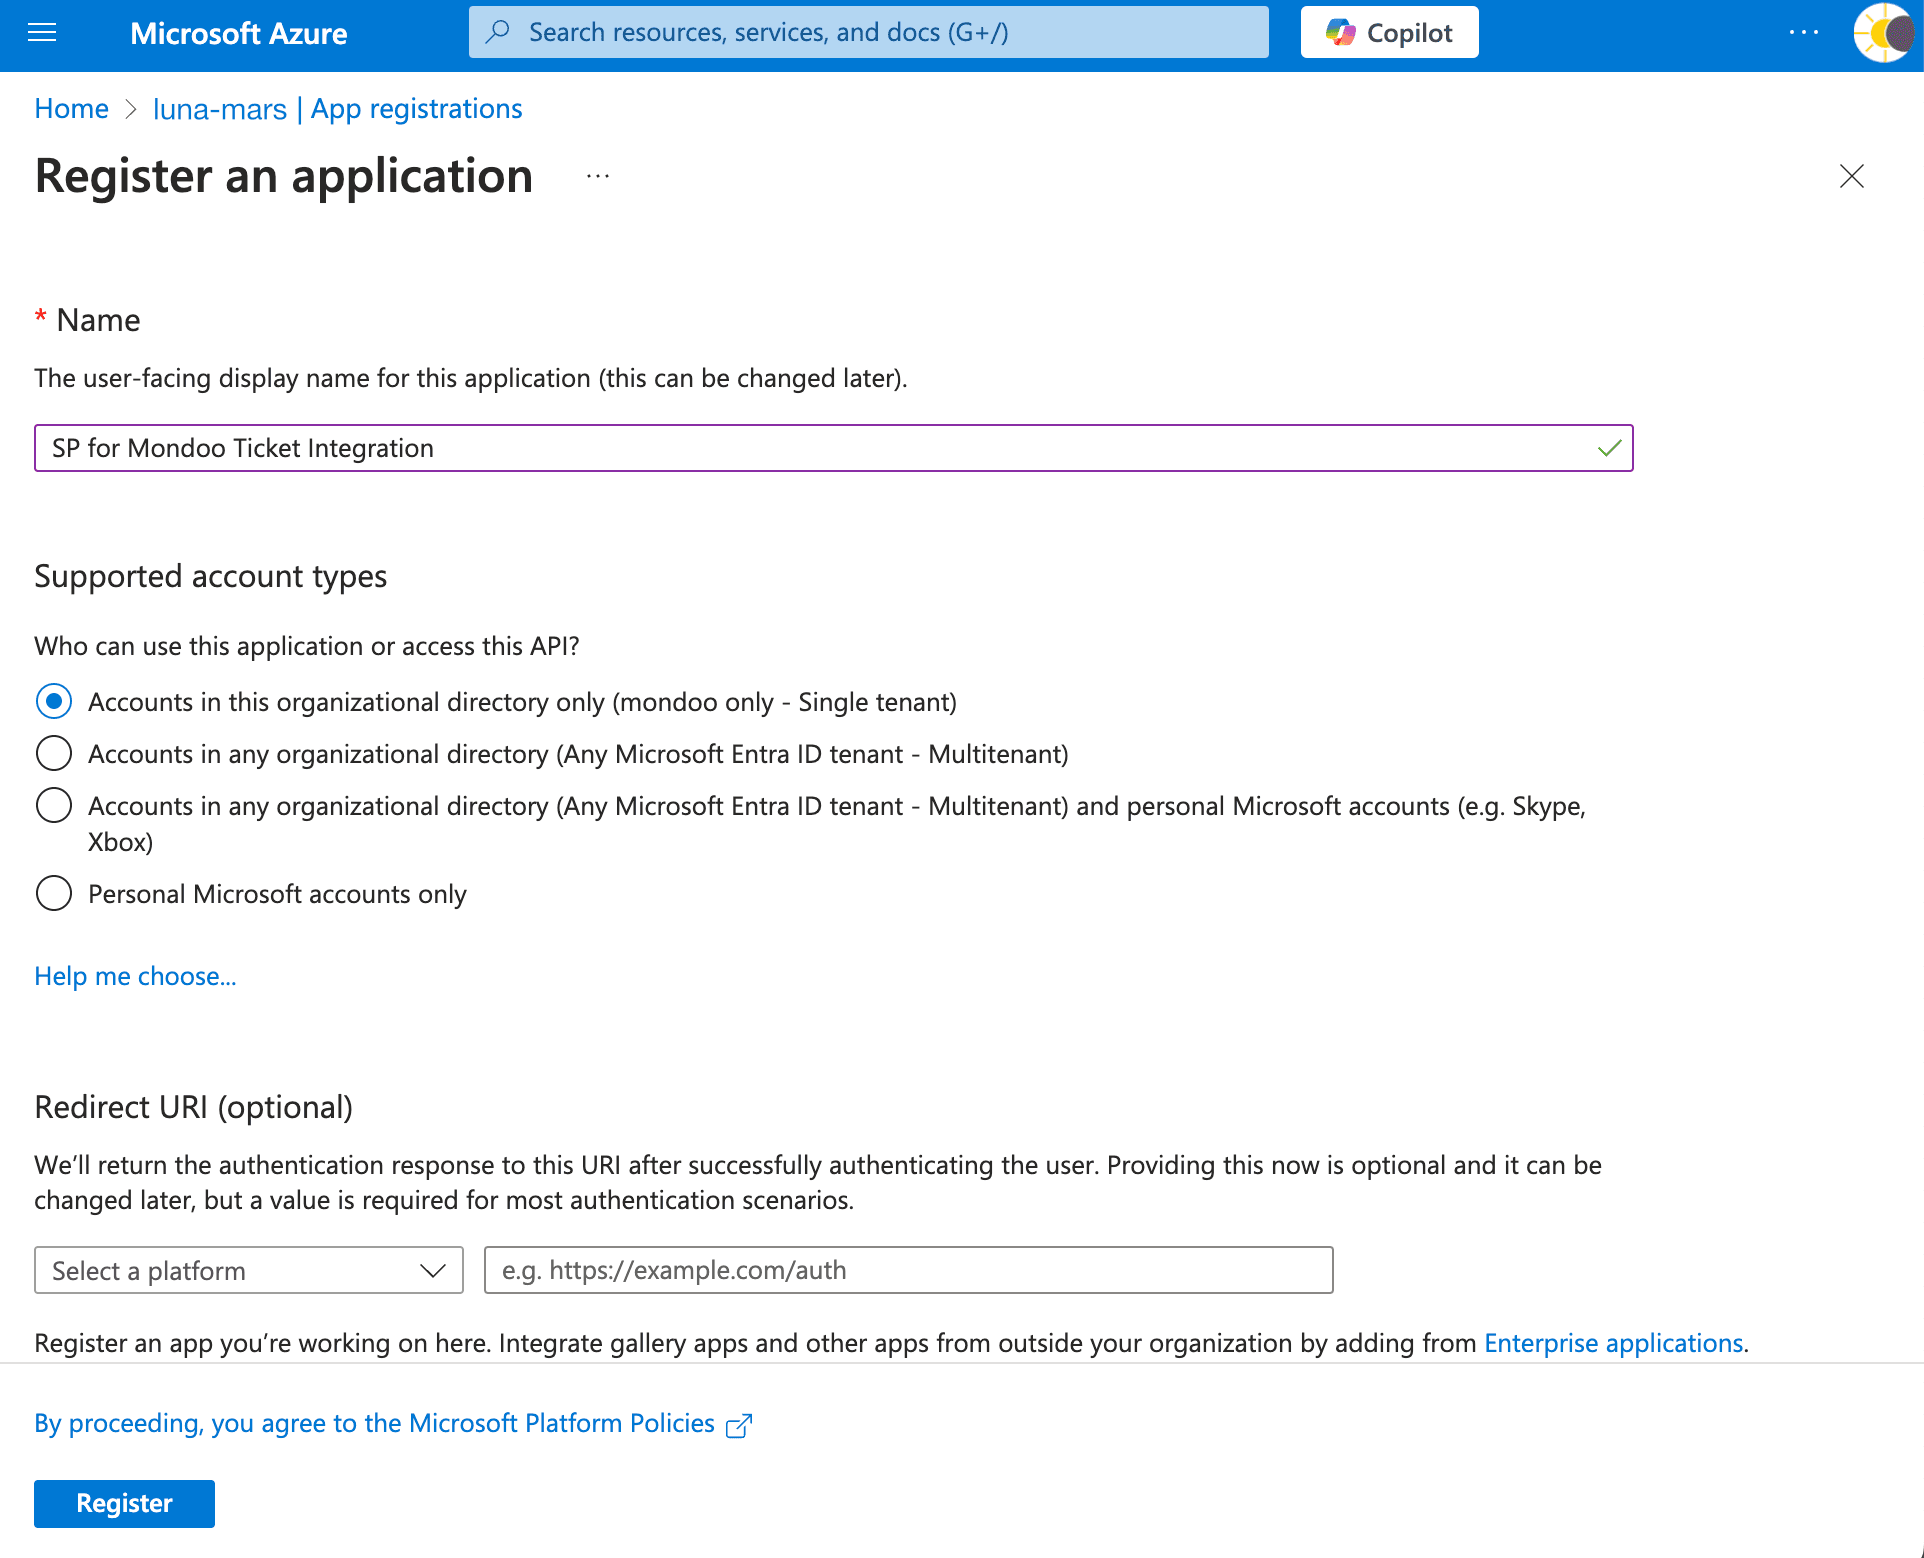
In the Name box, type a name that lets you recognize that this is a service principal for the Mondoo-DevOps integration.
-
Leave all other fields as the defaults and select the Register button.
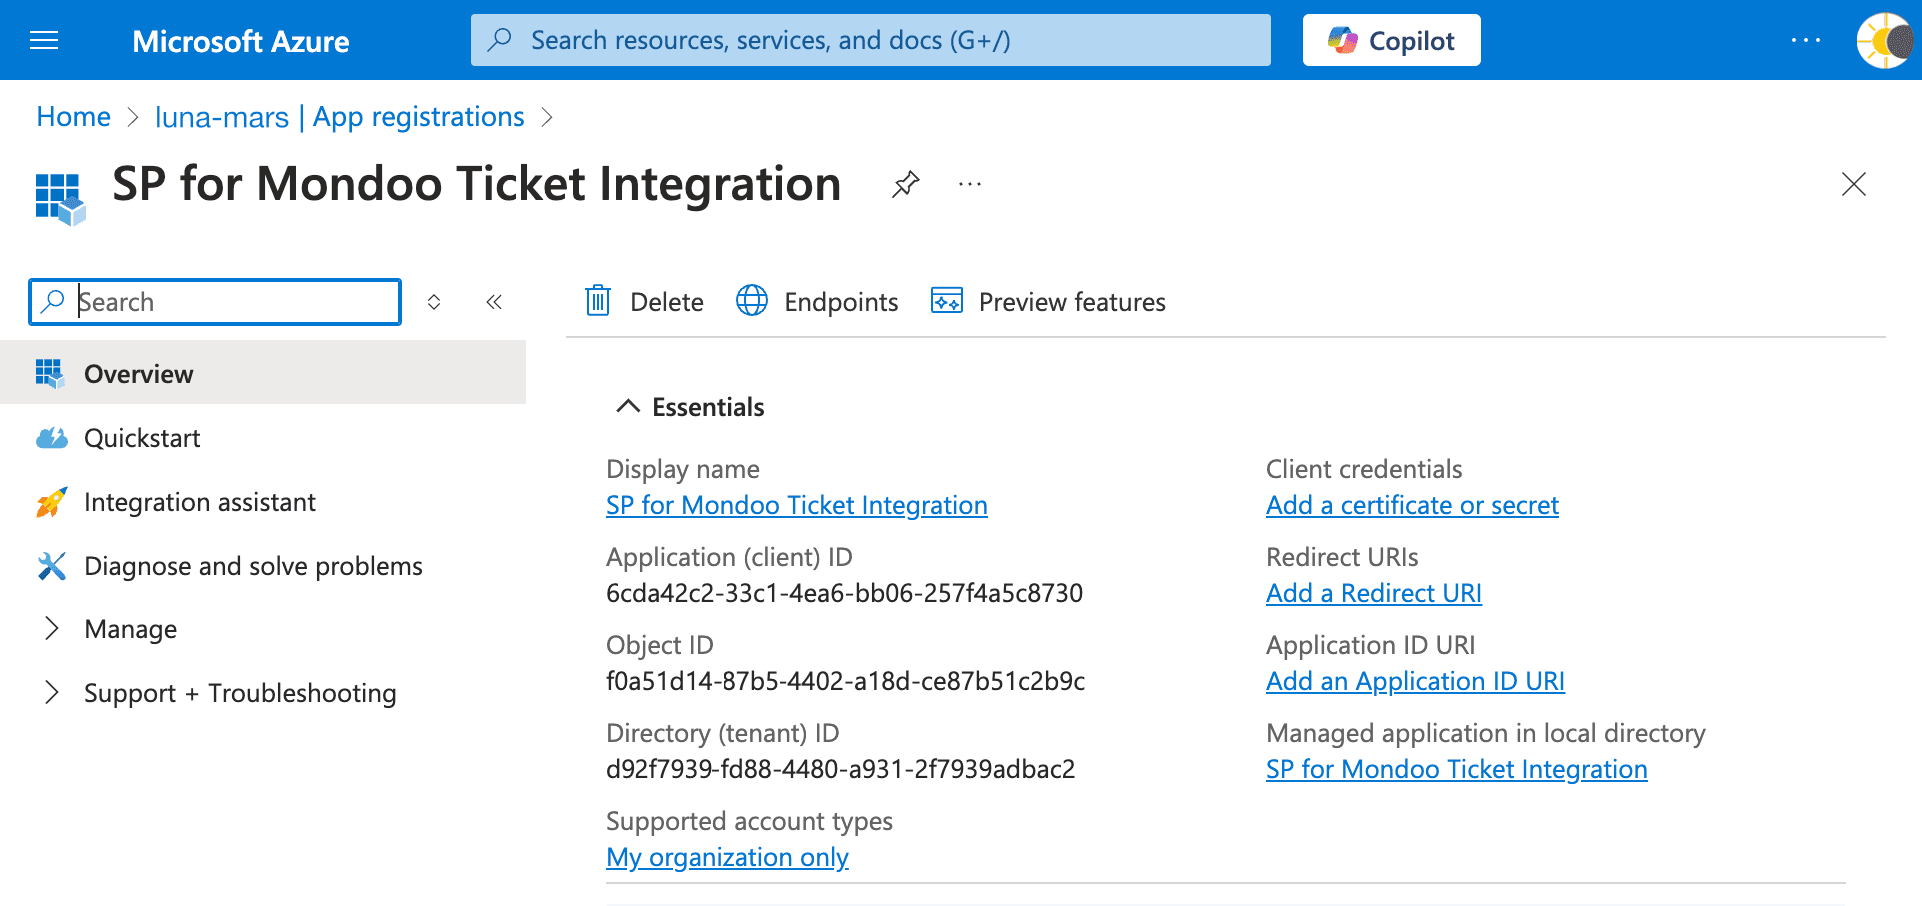
Azure creates the app registration and displays its details.
-
Under Client Credentials, select Add a certificate or secret.
-
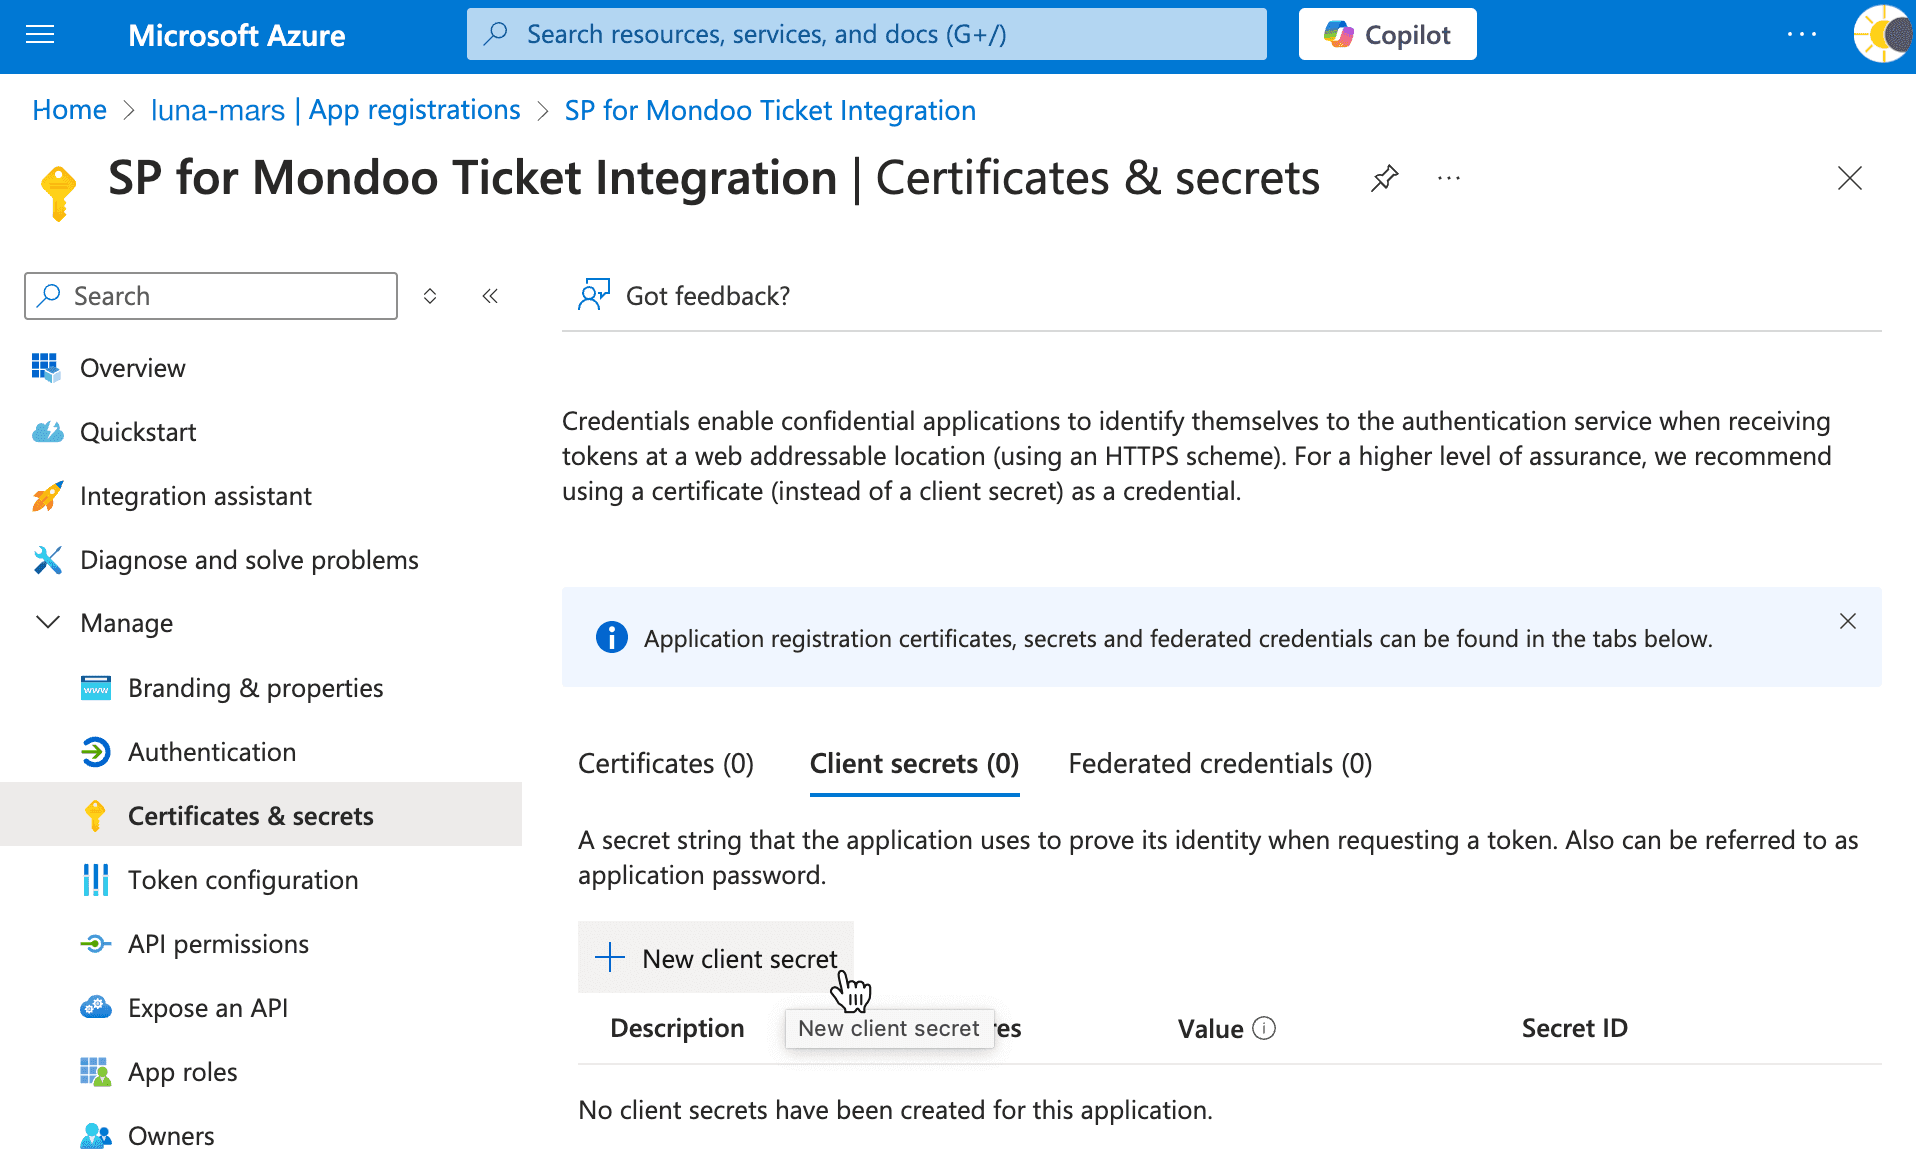
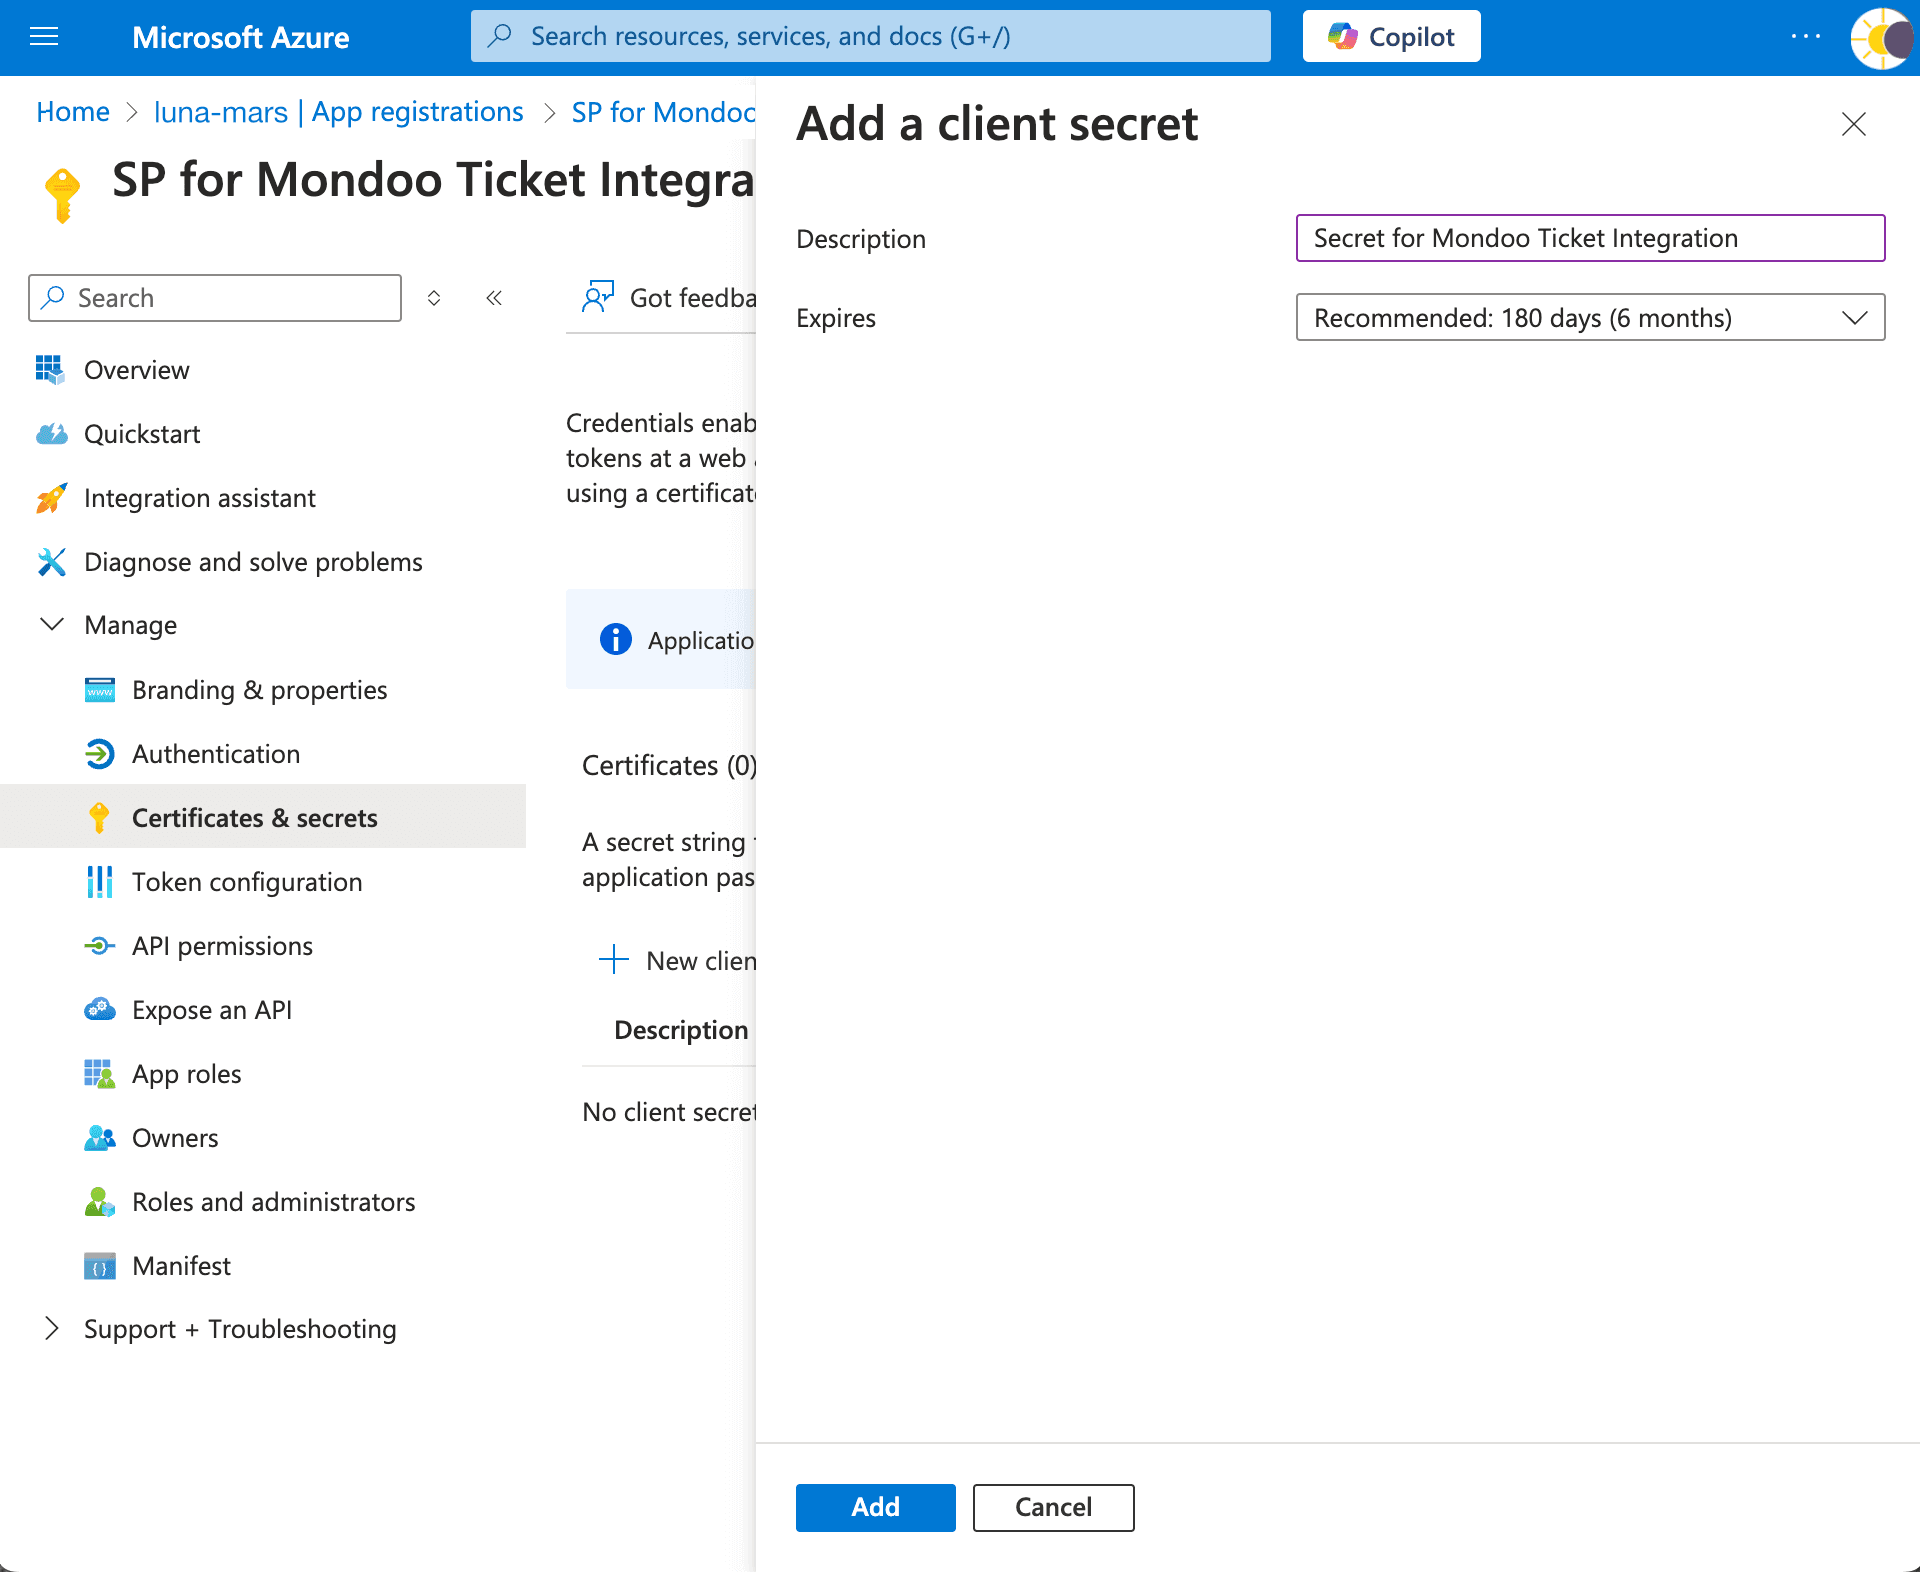
Select New client secret.
-
Give the client secret a name and select its expiration date. Make note of the expiration date in your records; when the client secret expires, the Mondoo-Azure DevOps integration will stop working until you create a new secret.
-
Select the Add button.
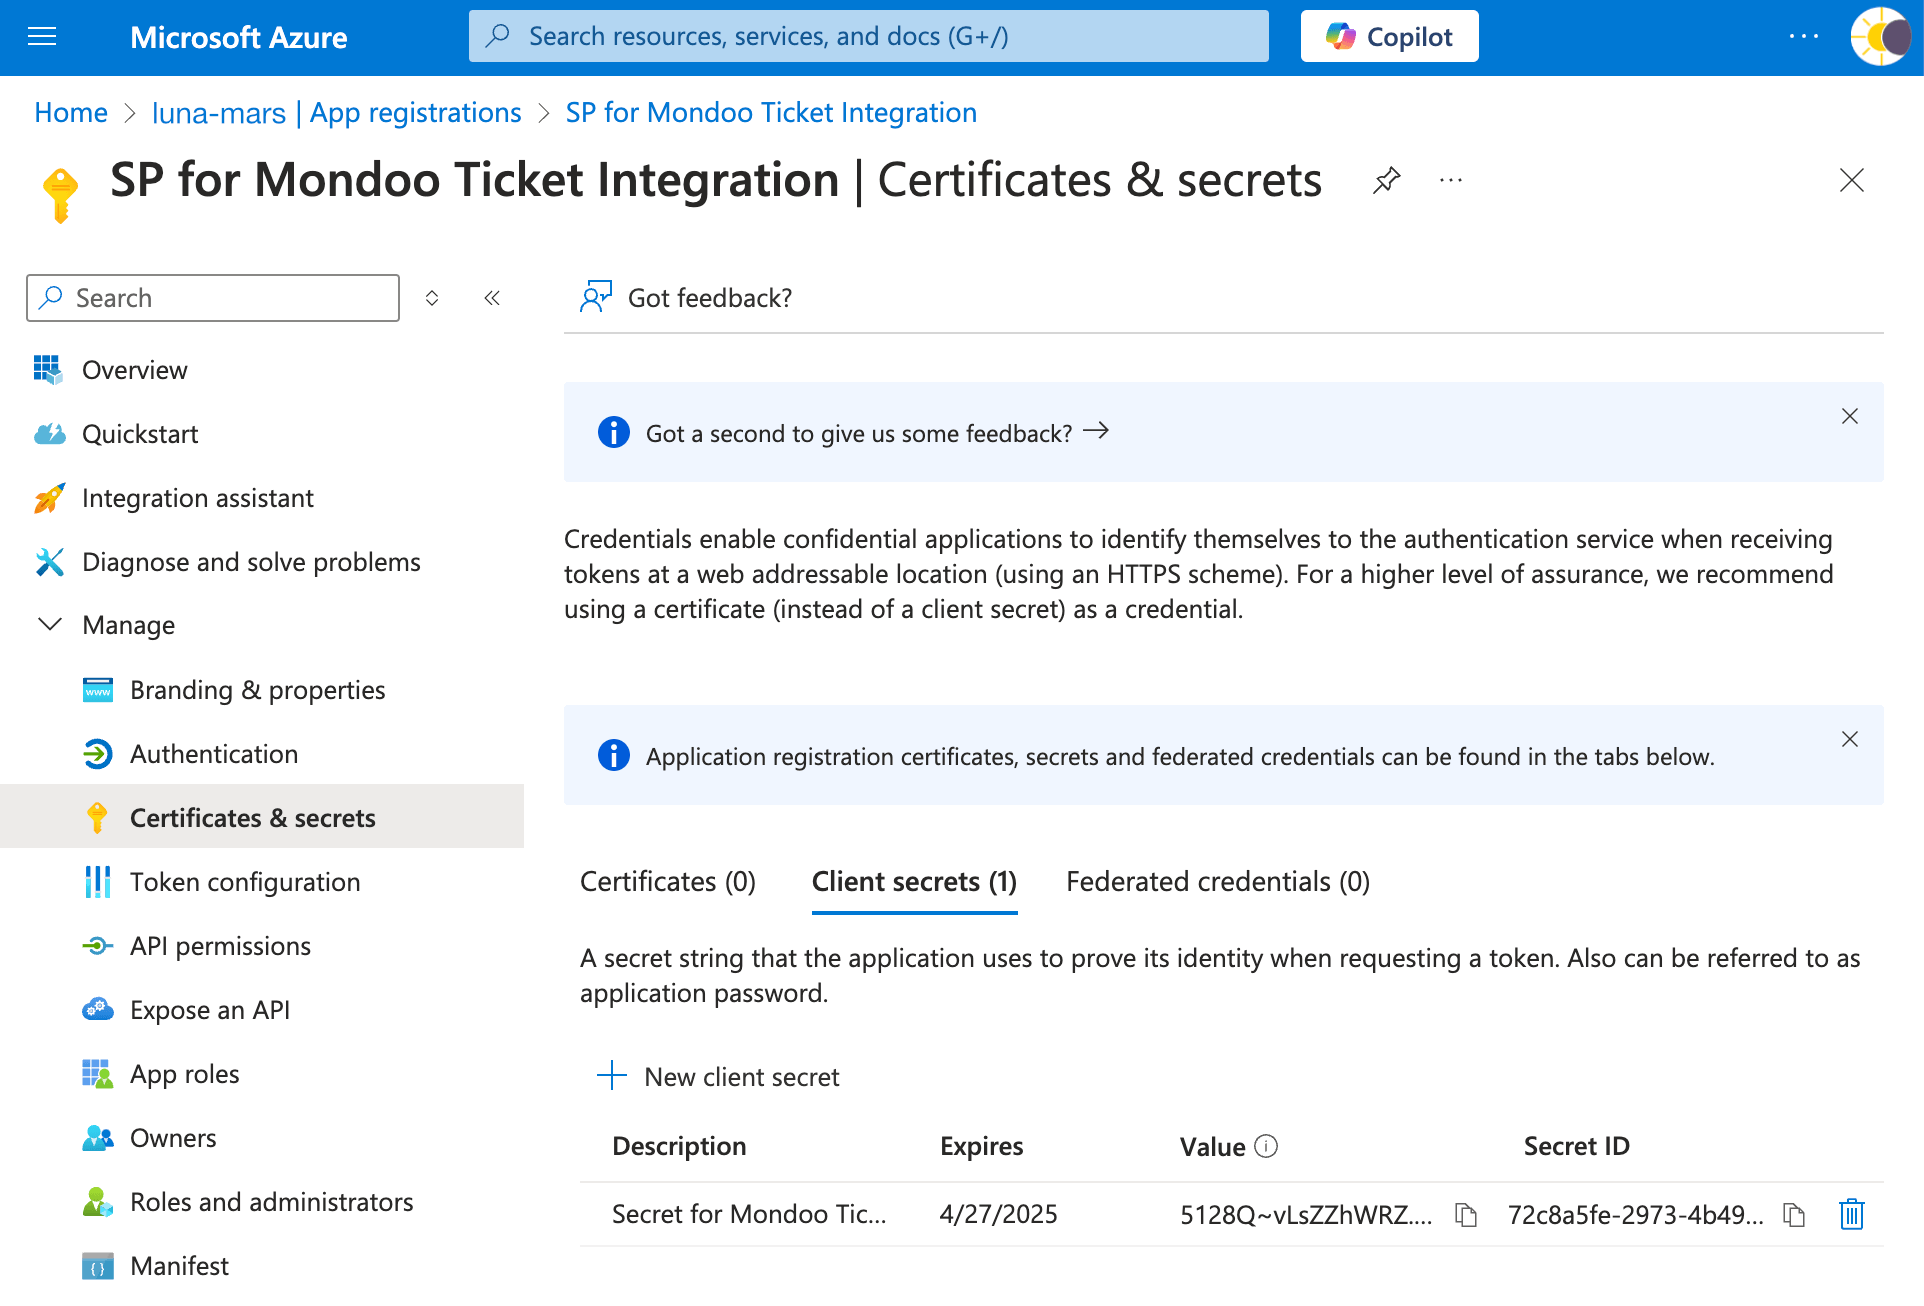
Don't close the Entra browser tab. You need this information for later steps.
Grant the app registration access to your Azure DevOps organization
When you create the app registration as instructed above, Entra saves it as a service principal. Like a user, you can grant a service principal different levels of access to perform tasks in Azure. The app registration you create needs permission to contribute to your Azure DevOps project.
-
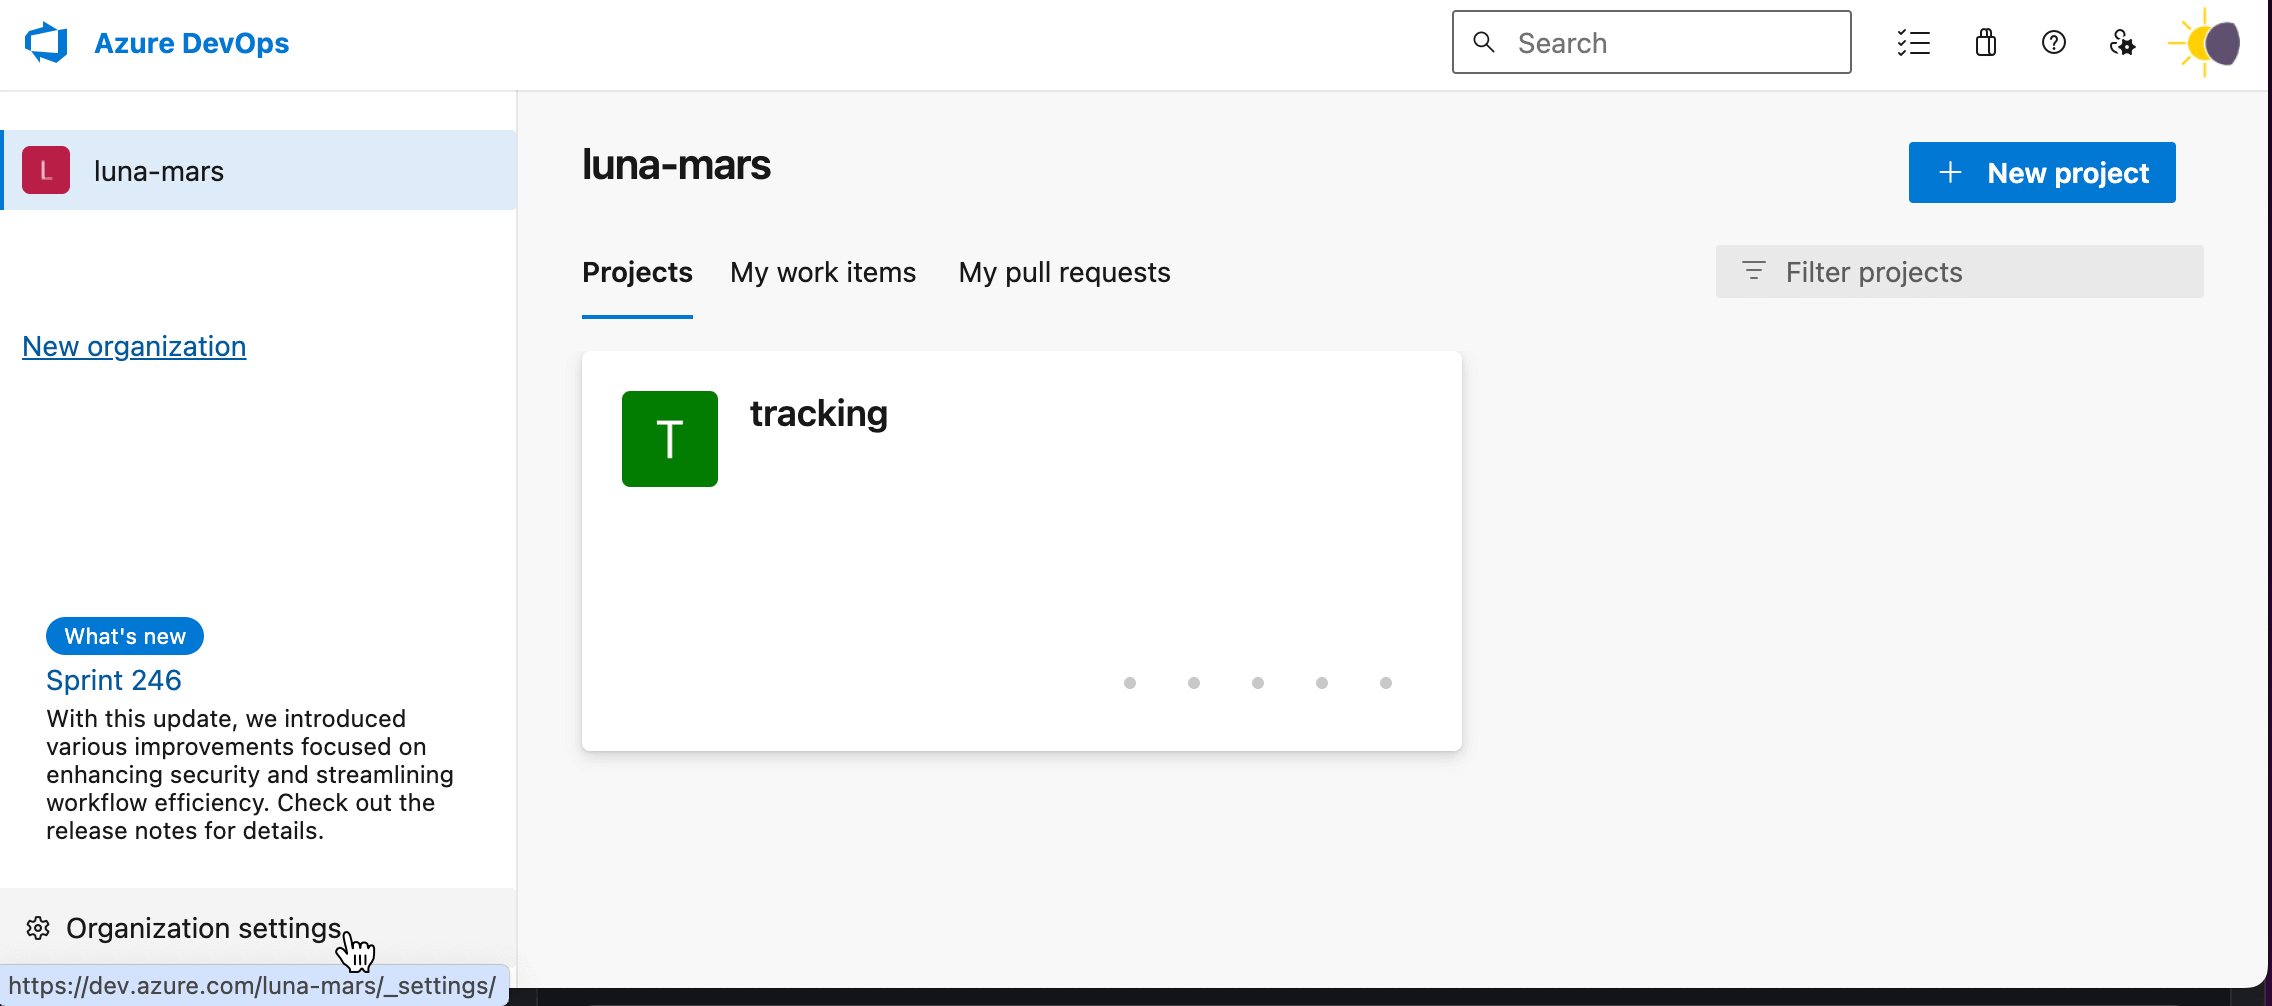
In a new tab or window in your browser, access your Azure DevOps organization.
-
At the bottom of the navigation sidebar, select Organization settings.
-
In the navigation sidebar, select Users.
-
Select the Add users button.
-
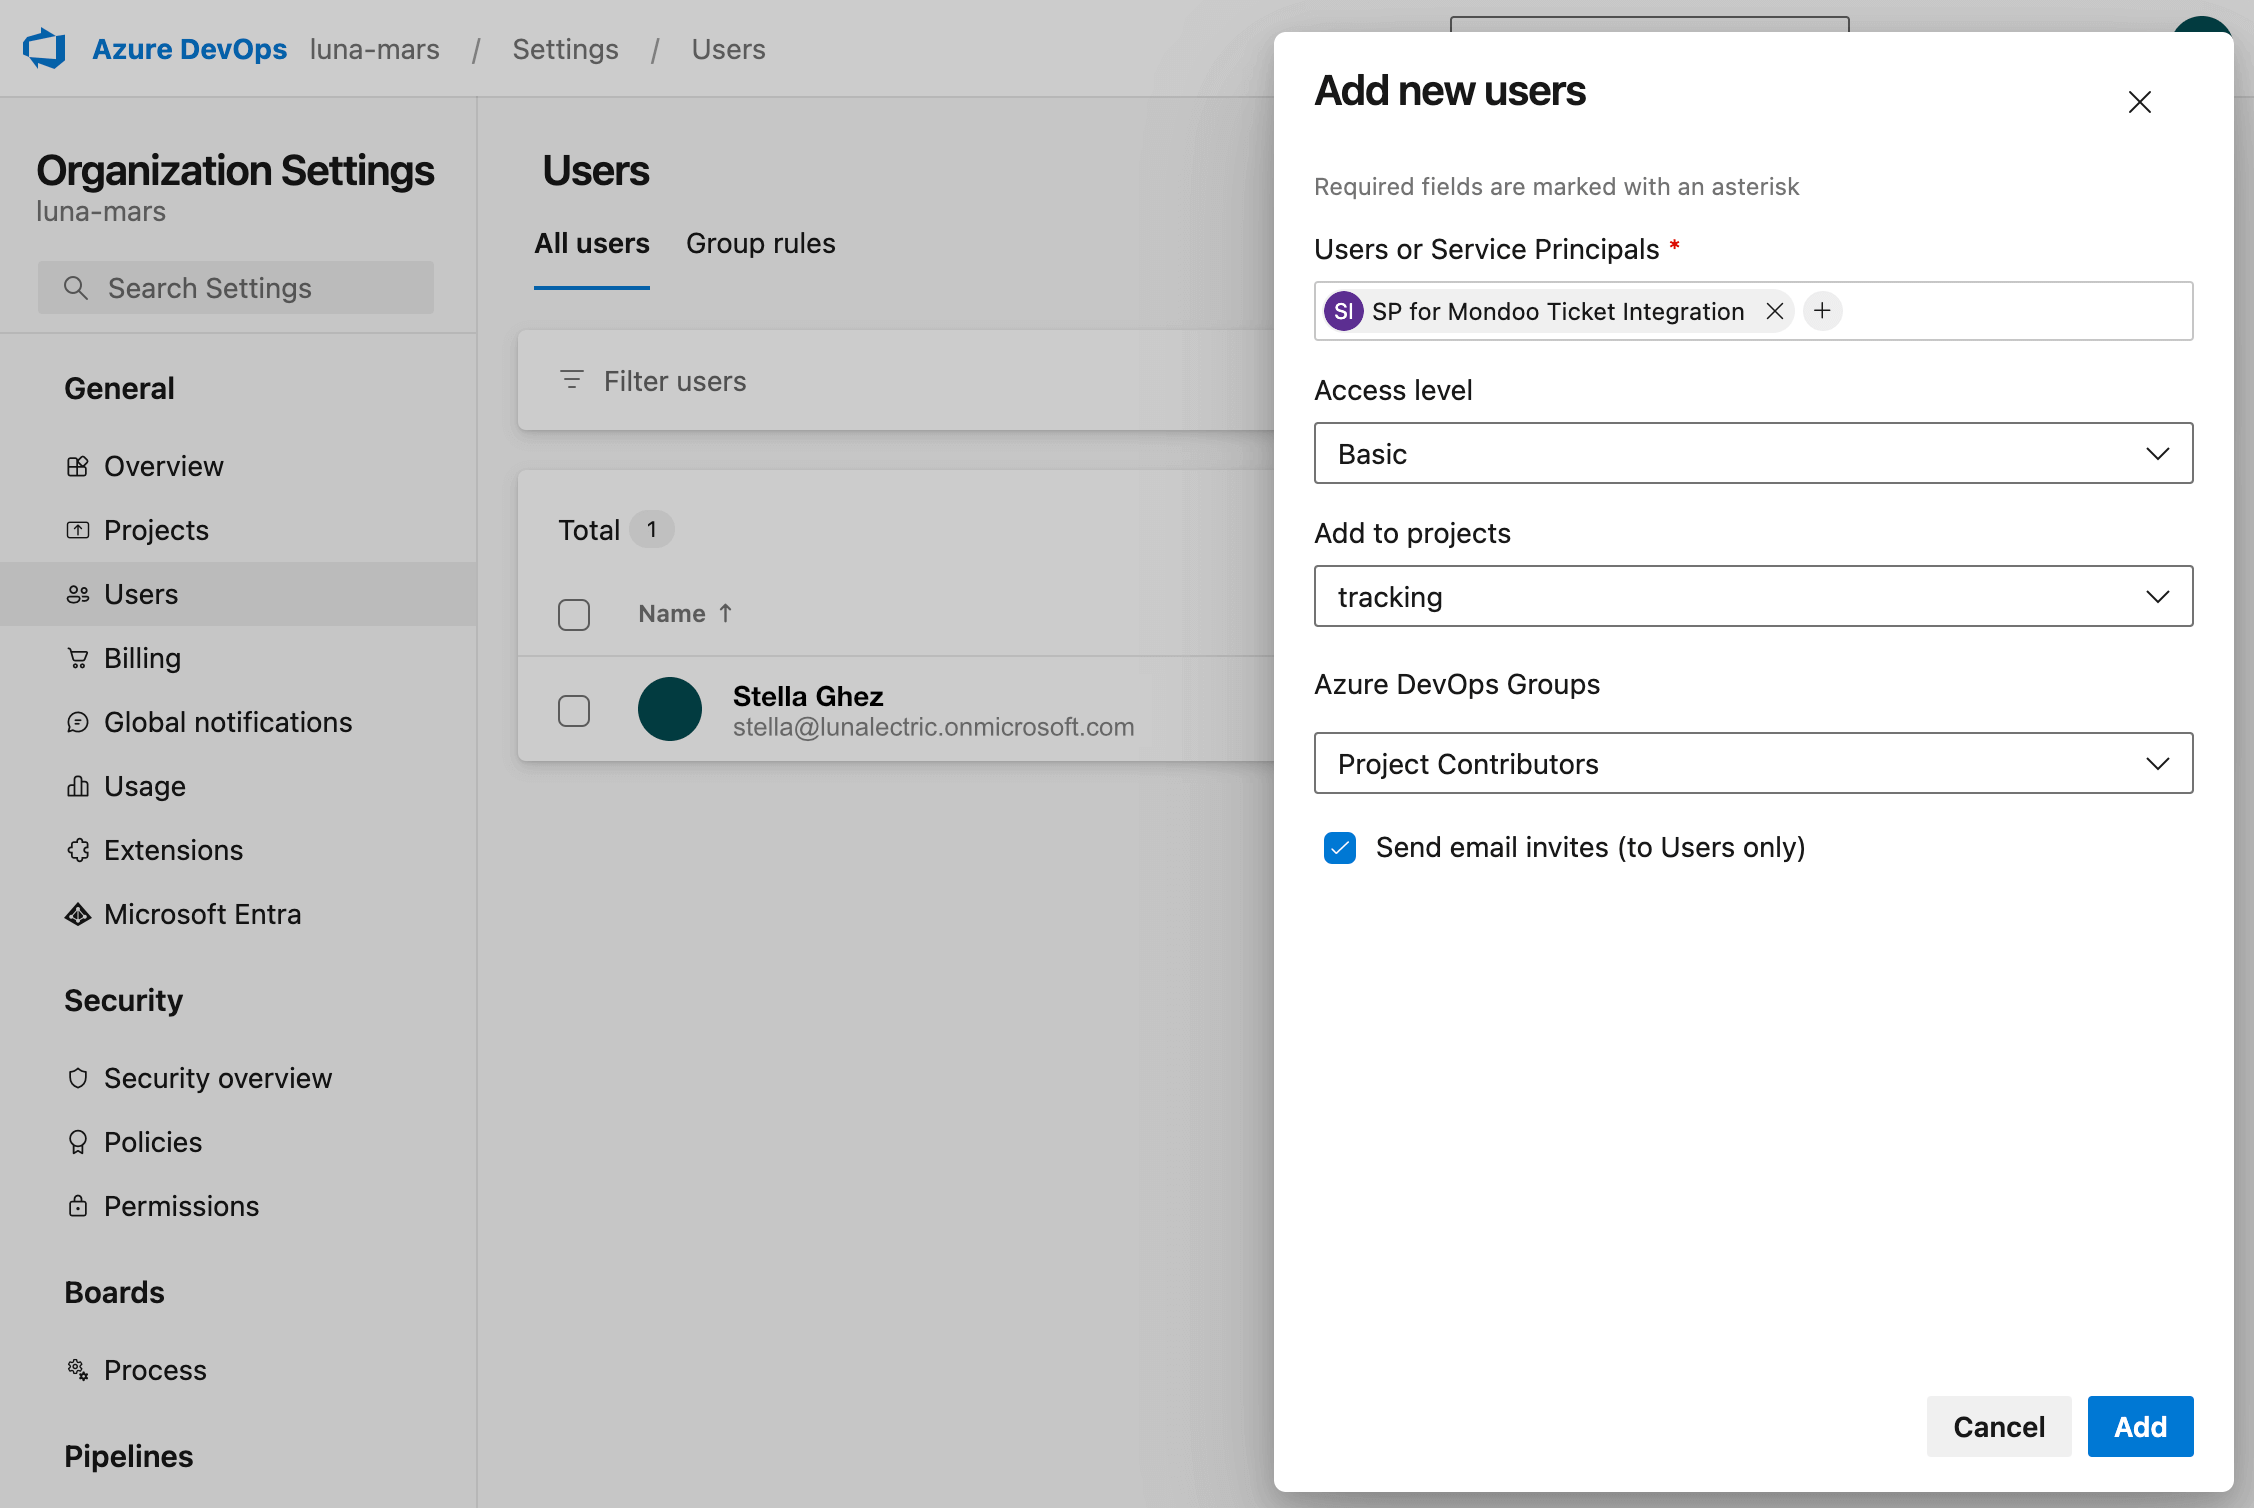
In the Users or Service Principals box, type and choose the name of the app registration you created for Mondoo.
-
Define this access for the Mondoo app registration service principal:
- Access level: Basic
- Add to projects: The project to which you want Mondoo to add issues
- Azure DevOps Groups: Project Contributors
-
Select the Add button to give the Mondoo app registration service principal the access it needs.
Don't close the browser tab containing the Azure DevOps organization settings. You need this information for later steps.
Add an Azure DevOps integration
-
In the Mondoo App, navigate to the space where you want to set up ticketing and, in the side navigation bar, select Integrations.
-
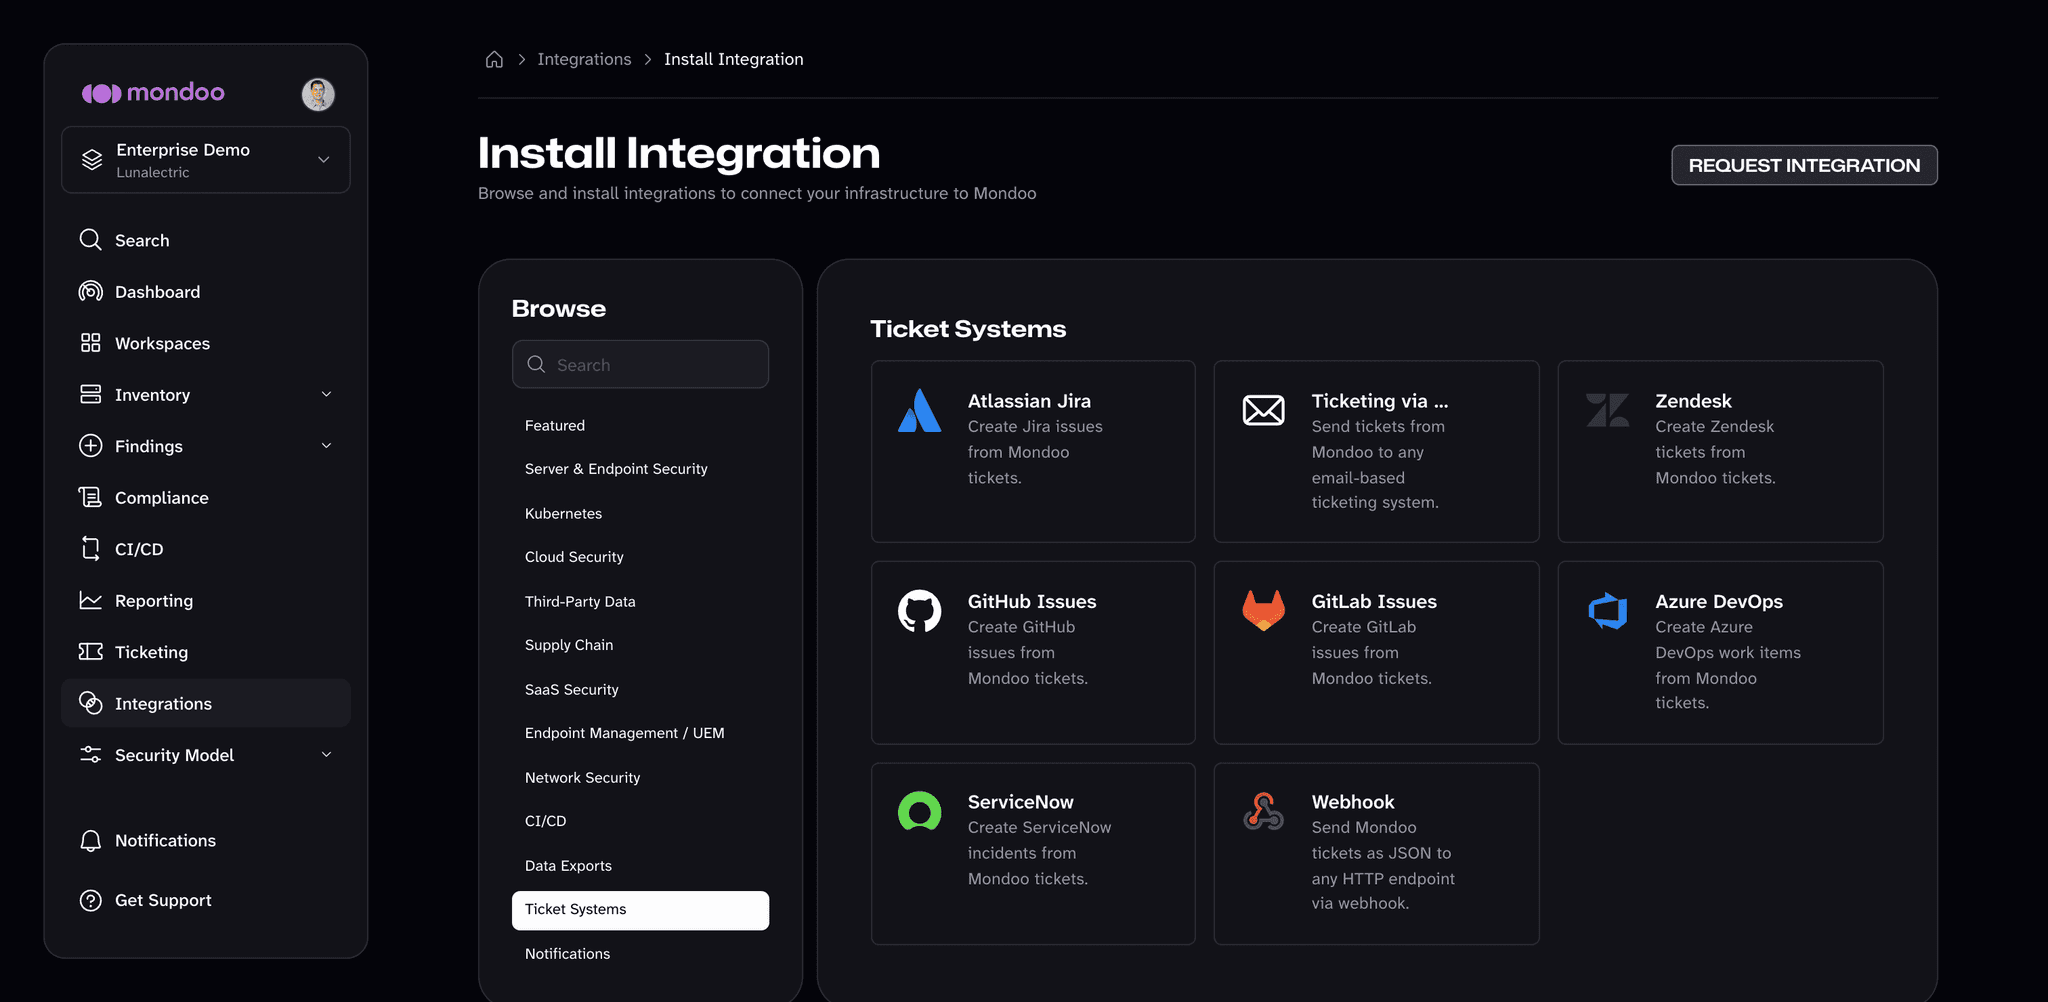
Select INSTALL, then choose the Ticket Systems category.
-
Select Azure DevOps.
-
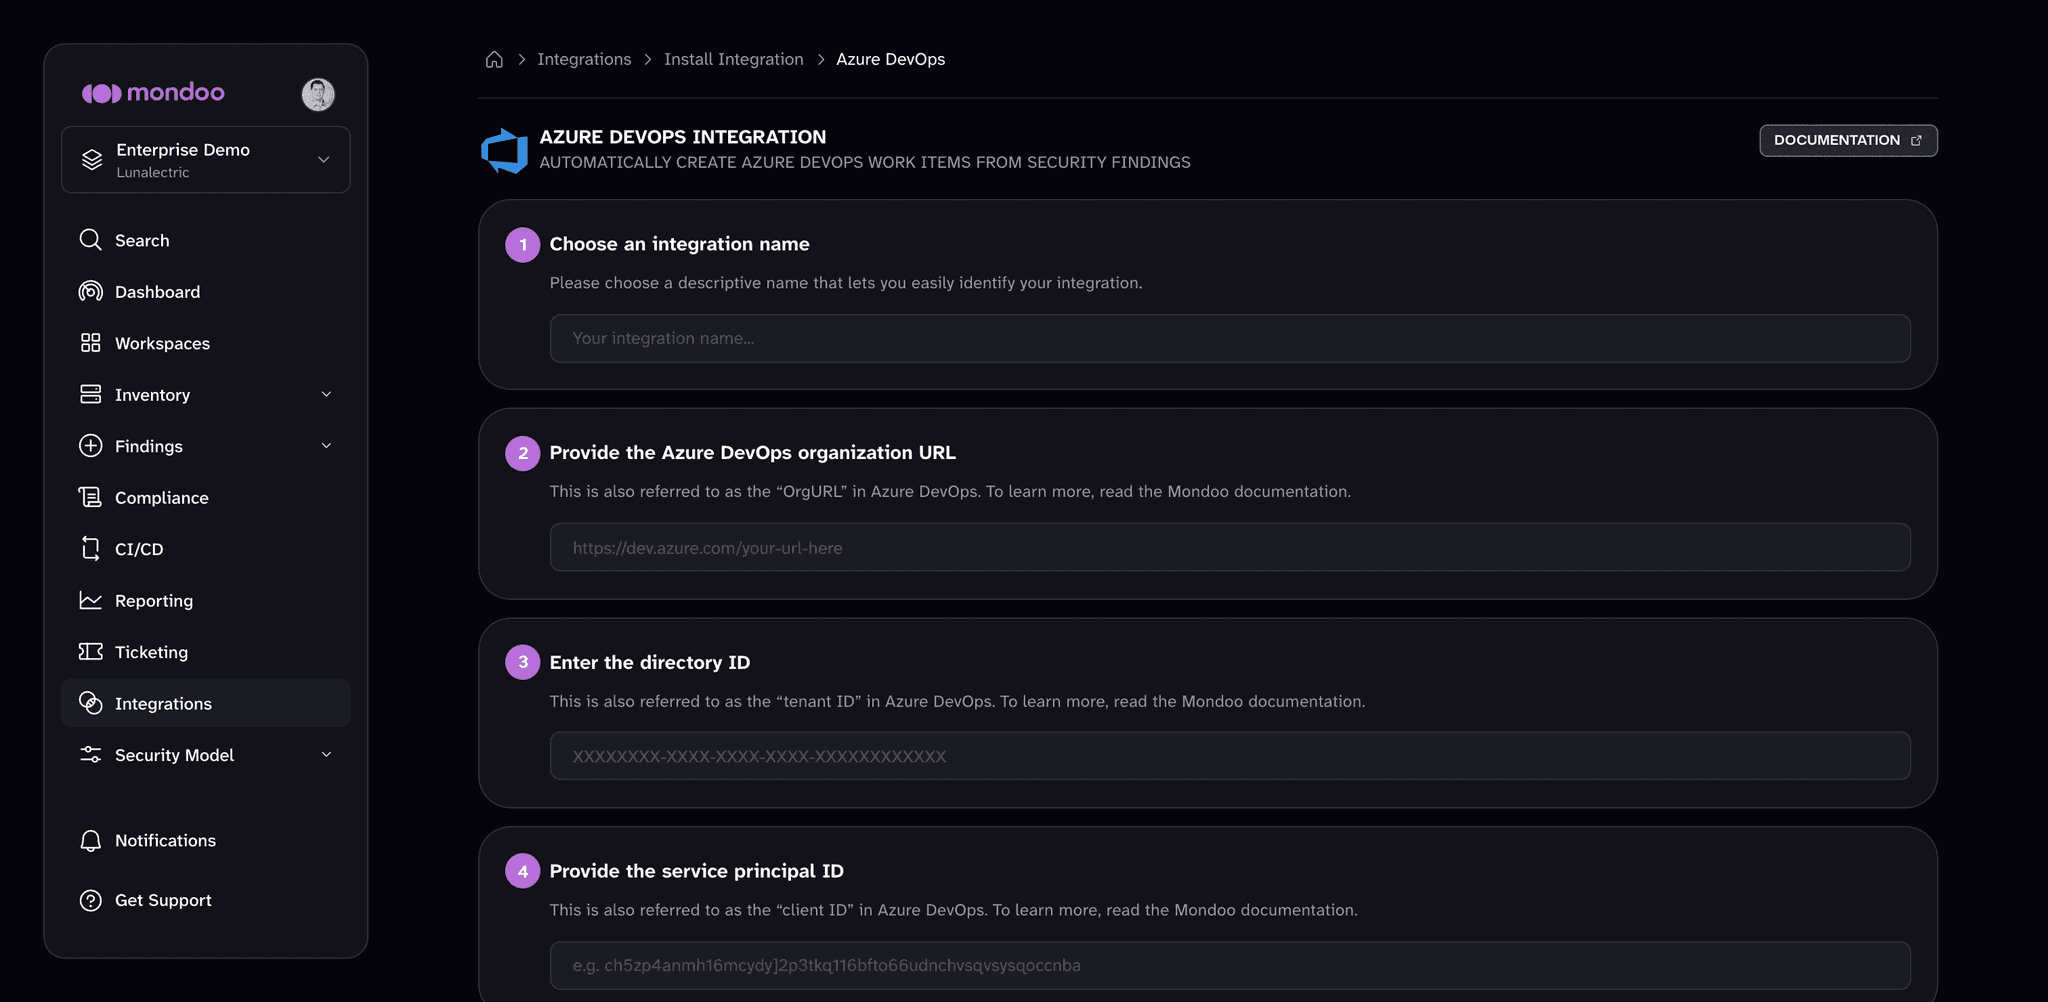
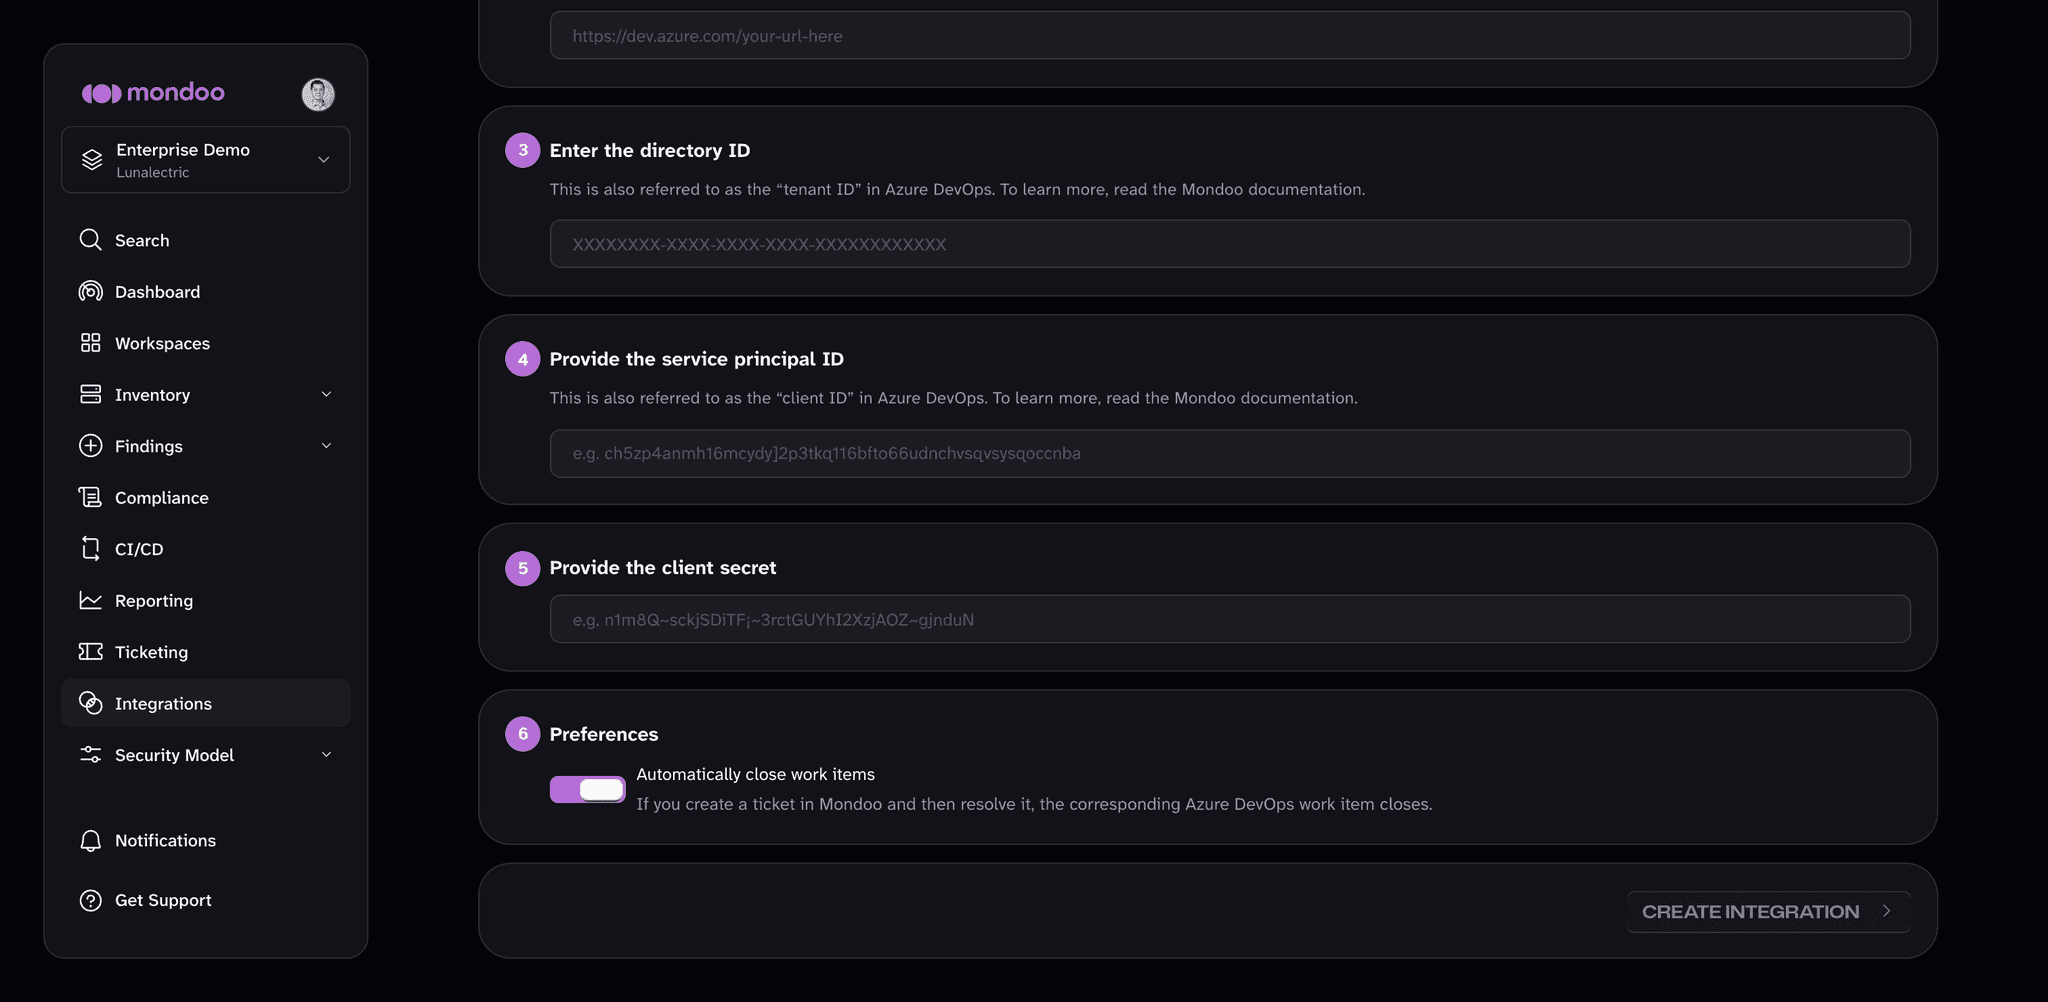
In the Choose an integration name box, enter a name for the integration. Make it a name that clearly shows this is an Azure DevOps integration.
-
In the Provide the Azure DevOps organization URL box, enter the organization URL (or OrgURL) for the DevOps organization to which you want Mondoo to add work items. This is the URL you use to access your DevOps organization in your browser, such as
https://dev.azure.com/lunalectric.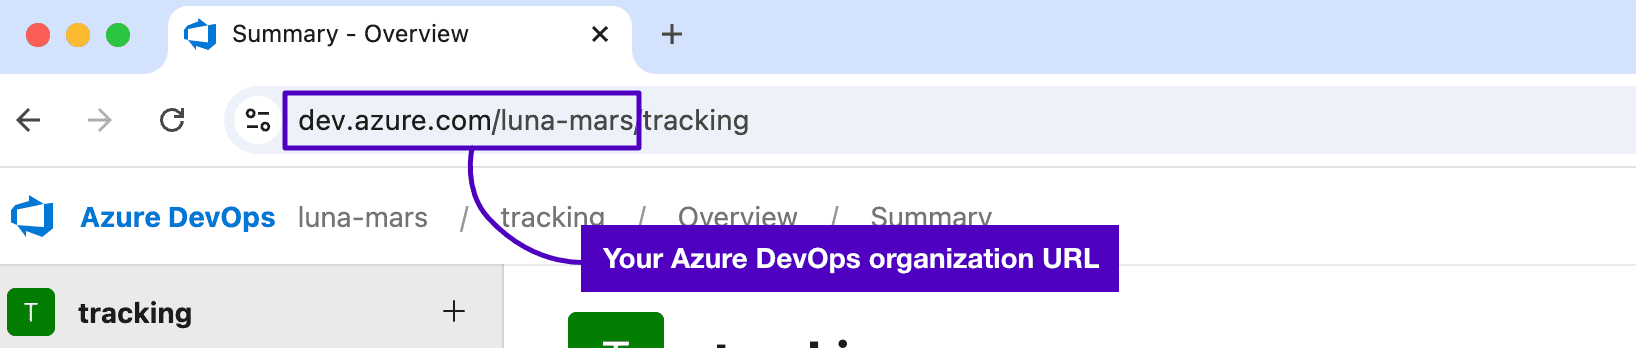
-
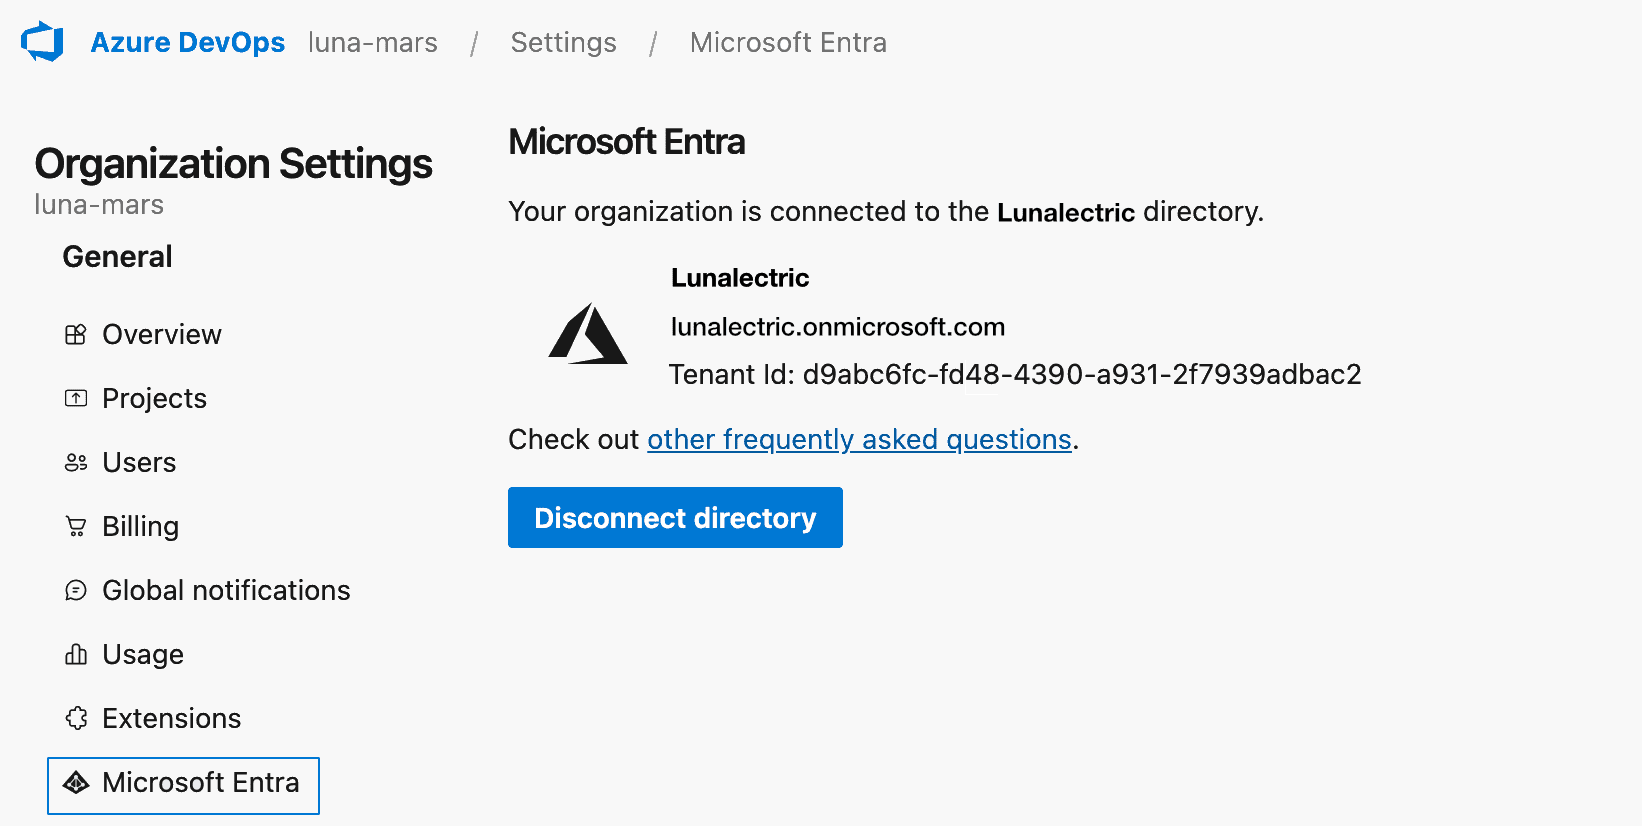
In the Enter the directory ID box, enter your Microsoft Entra tenant ID. To find this ID in Azure DevOps, access the Organization Settings and, in the navigation sidebar, select Microsoft Entra.
-
In the Provide the service principal ID box, paste the client ID of the app registration service principal you created in the steps above.
Find this in the Application (client) ID field in the app registration essentials.
-
In the Provide the client secret box, paste the value of the client secret you created for your app registration service principal.
Use the secret's Value, not its Secret ID. The Azure portal shows the full value only right after you create the secret, on the Certificates & secrets page. If you didn't copy it then, create a new client secret.
-
Under Preferences, Automatically close work items is on by default for new integrations: closing a ticket in Mondoo also closes the corresponding Azure DevOps work item. You can turn it off now, or later in the integration's settings.
-
Select the CREATE INTEGRATION button.
Mondoo creates the integration and opens its page.
-
To create an Azure DevOps work item for each drift ticket when an asset becomes more exposed to attack, select the pencil icon (Edit integration) on the integration's page, turn on Automatically create work items on drift, enter the client secret again, and save your changes. Drift tickets also require the space's Regression setting. To learn more, read Automatically create tickets on drift.