Automatically Set Up Azure Continuous Scanning
Use the automated setup to configure the Mondoo Azure integration to scan Azure subscriptions
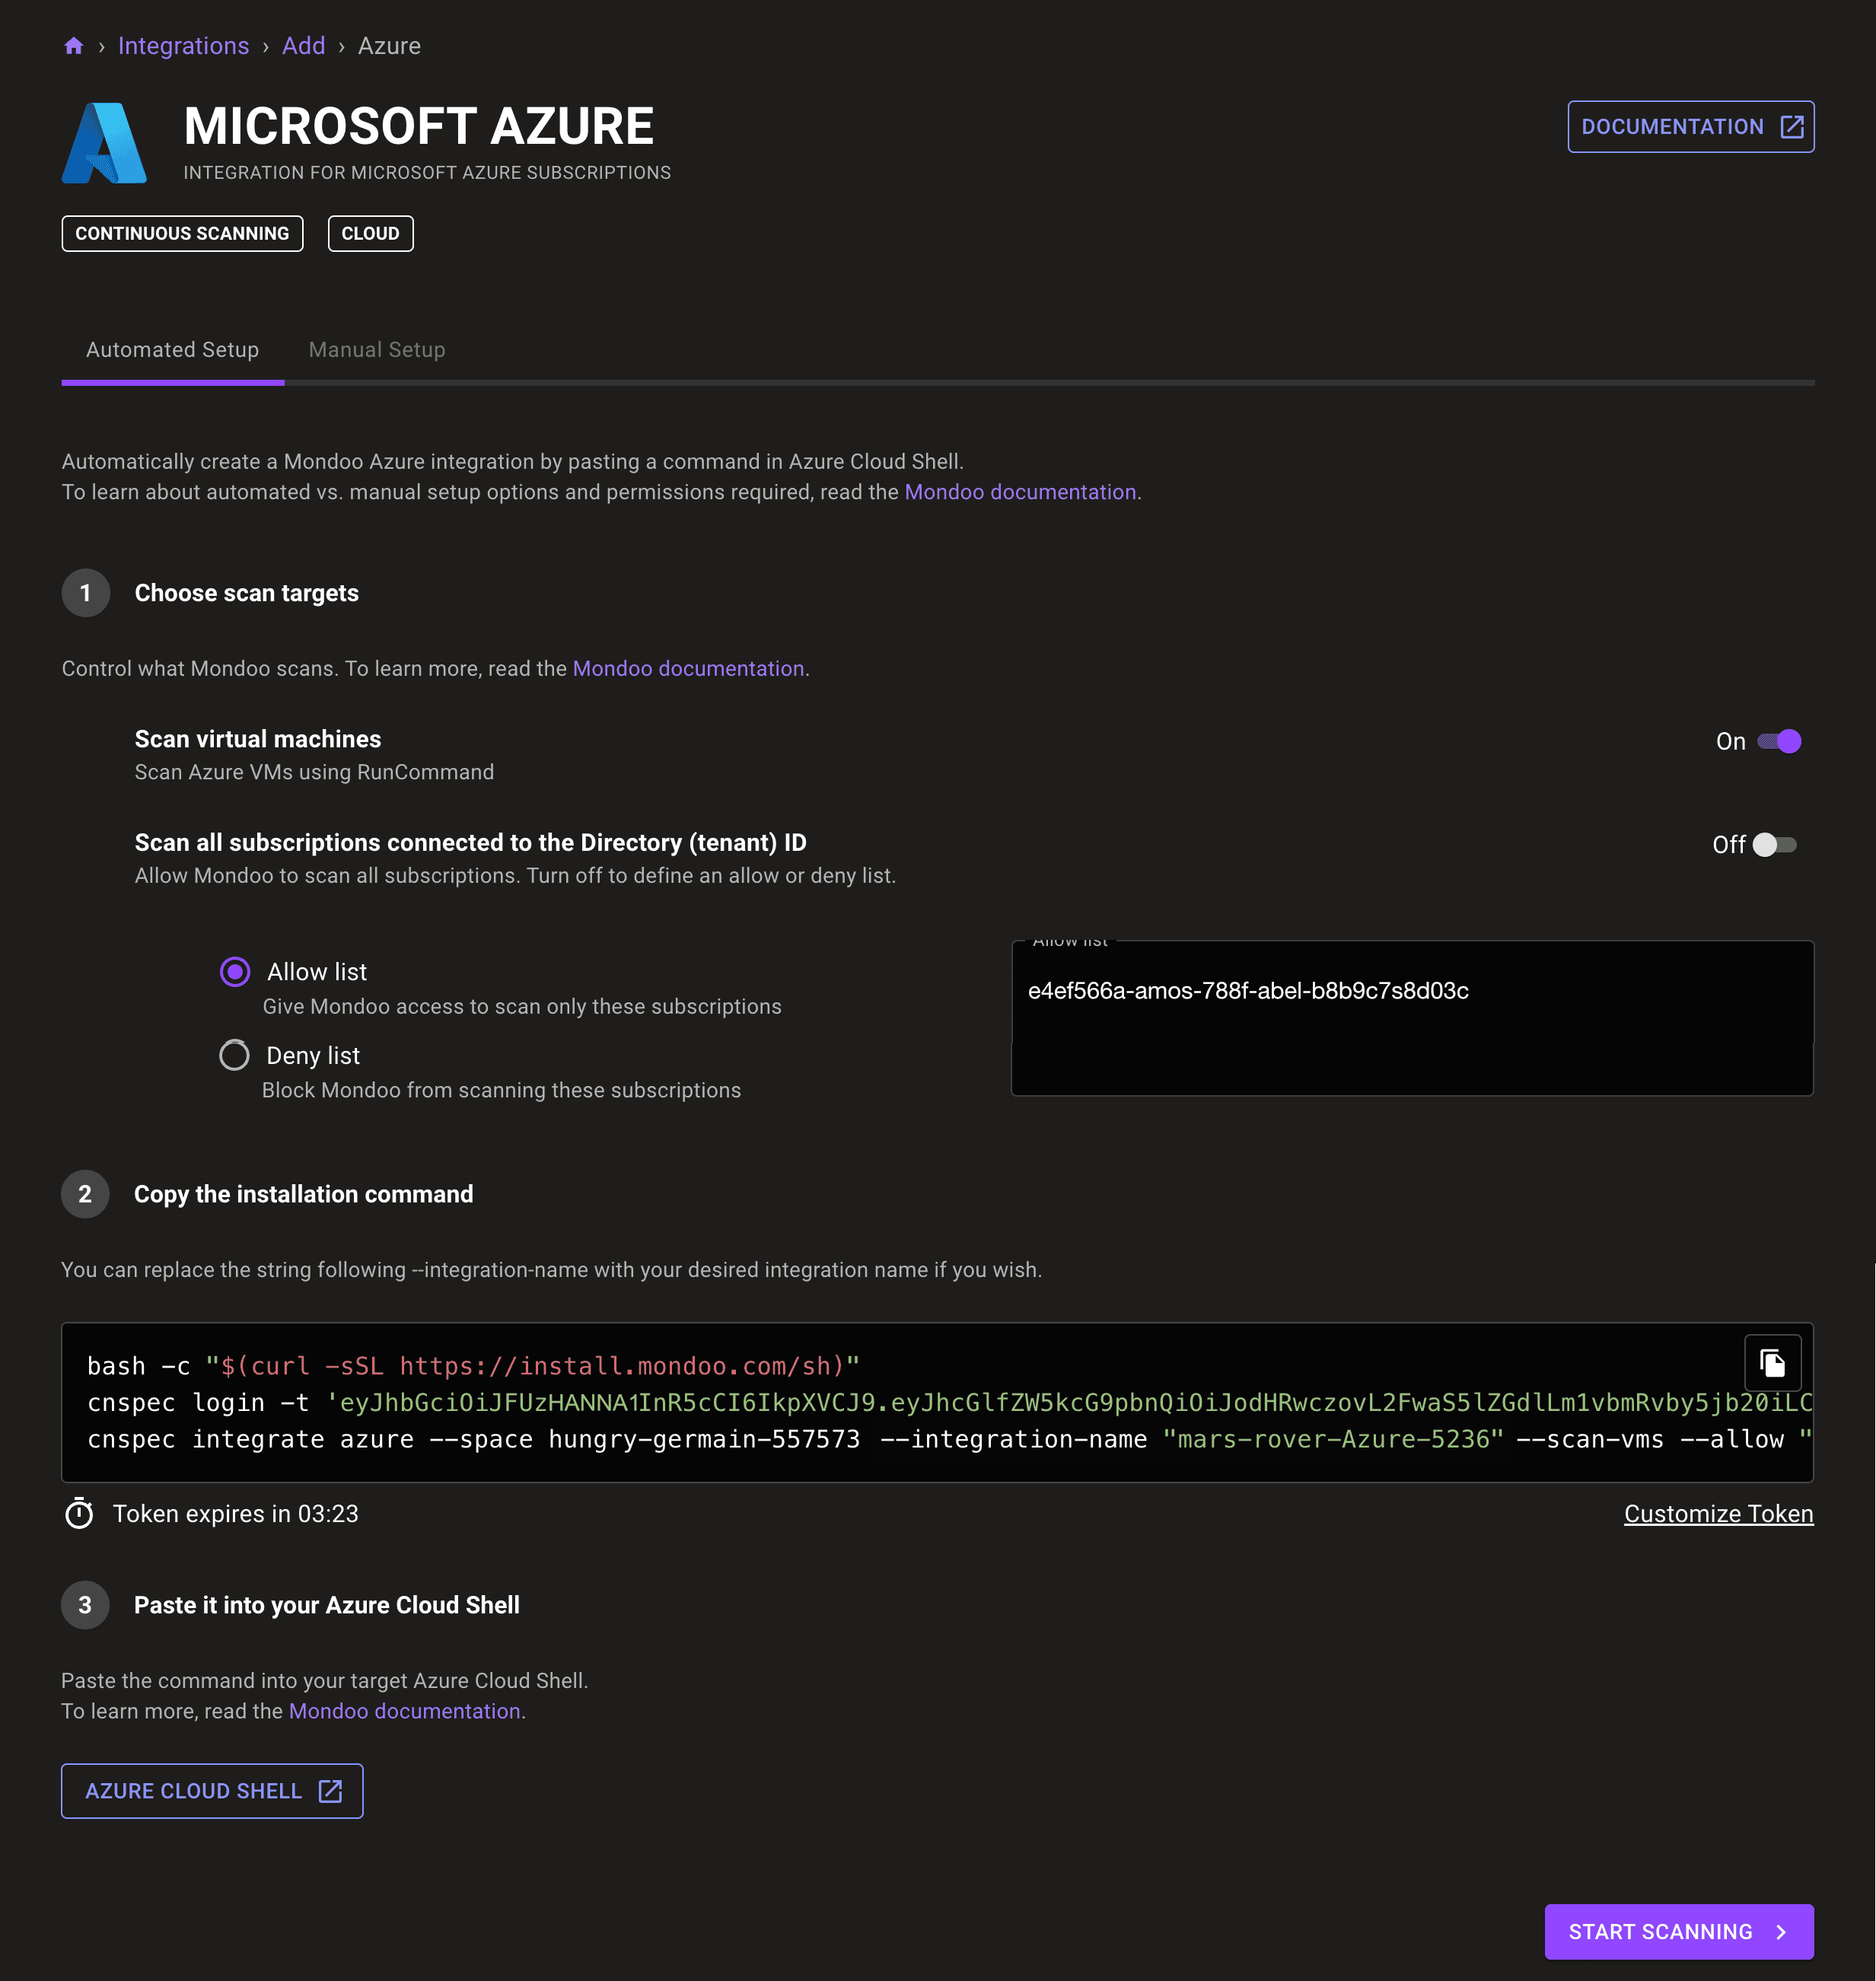
The automated setup runs one generated command in Azure Cloud Shell to provision everything Mondoo needs to continuously scan one or more Azure subscriptions. The whole process takes a few minutes.
Take the manual setup instead if you need to scan all subscriptions in a management group, your key vaults use the legacy access policy permission model, or your Azure environment is unusually large.
Before you start
You need:
- In Mondoo: Editor or Owner access in the space where you want to add the integration.
- In Azure: an account with an active subscription, plus a Microsoft Entra role that can manage applications. Either Application Administrator or Cloud Application Administrator works.
- Also scanning VMs? You additionally need Global Administrator or Privileged Role Administrator.
- Azure Cloud Shell access to run the setup command.
Check your Azure roles in the portal: Microsoft Entra ID > Users > (your account) > Assigned roles.
Set up the integration
-
In the Mondoo App, navigate to the space where you want to add the integration. In the side navigation bar, select Integrations, then select + INSTALL in the top right. Find Azure and select it.
-
(Optional) To automatically discover and scan all Linux and Windows virtual machines (VMs) in your subscriptions using Azure Run Command, enable Scan virtual machines. This gives Mondoo permission to read, write, and delete Azure VM run commands through a new role definition named
mondoo_security. -
Choose which subscriptions to scan:
- Leave Scan all subscriptions connected to the Directory (tenant) ID enabled to scan every subscription in the tenant.
- To scan only certain subscriptions, disable the toggle, select Allow list, and enter one subscription ID per line.
- To scan everything except certain subscriptions, disable the toggle, select Deny list, and enter one subscription ID per line.
To find your subscription IDs, go to Subscriptions in the Azure portal.
-
Under Copy the installation command, select the copy icon to copy the command Mondoo generated from your choices. Mondoo names the integration for you; you can rename it anytime, either in the command (in quotes after
--integration-name) or later in the Mondoo App. -
Select AZURE CLOUD SHELL to open Azure Cloud Shell, then paste the command and press Enter. Setup takes about two minutes. When prompted:
- Select the primary subscription. This is where Mondoo creates the resources it needs to run scans, not the subscription it scans. Use the arrow keys to choose one, then press Enter.
- Select Show details to review the resources Mondoo will create, then press Enter to confirm.
Wait for the success message. If it doesn't appear within five minutes, see Troubleshoot.

-
Return to the Mondoo App and select START SCANNING.
-
On the Recommended Policies page, enable the policies you want to use to assess your Azure environment, then select FINALIZE SETUP. To learn more, read Manage Policies.
Mondoo begins scanning your Azure resources. When it completes, you can see results on the INVENTORY page. To learn more, read Monitor Your Infrastructure Security.
Troubleshoot
- If the automation pauses for more than two minutes after you choose the primary subscription, press Control+C to end it, then paste and run the command again.
- If the automation fails, confirm you're logged in to Azure with an account that has the roles listed in Before you start.
- If your new integration doesn't appear in the Mondoo App after you finalize setup, refresh the page.
- For deeper checks, including certificate, app registration, and permission issues, see Test or Troubleshoot an Azure Integration.