Export Data to a Google Cloud Storage Bucket
Set up continuous export of assets, vulnerabilities, and scan results from Mondoo to a Google Cloud Storage bucket using Workload Identity Federation or a service account key.
Export your Mondoo security data to a Google Cloud Storage bucket for long-term retention, custom reporting, or integration with a GCP data pipeline. For how exports work in general, read Continuous Data Exports.
Requirements
-
A GCP project
-
Editor or Owner access to the Mondoo space from which you want to export data
-
Permission in GCP to create service accounts, Workload Identity Pools, and IAM policy bindings
Create a Cloud Storage bucket
Your Cloud Storage integration needs a bucket to which to export data. To learn about buckets, read About Cloud Storage buckets in the Google documentation.
Create a new GCP Cloud Storage bucket for the Mondoo integration to use. For instructions, read Create buckets in the Google documentation.
Note the bucket name. You need it when you configure the integration.
Choose an authentication method
Mondoo can authenticate to GCP in two ways:
-
Workload Identity Federation (WIF) (recommended): Keyless. You create a Workload Identity Pool, an OIDC provider for Mondoo, and a service account in GCP, then paste the audience URL and service account email into Mondoo. Nothing to rotate.
-
Service account key: A static JSON key file. Simplest to set up, but you're responsible for securely storing and regularly rotating the key.
With WIF, Mondoo acts as an OIDC identity provider. When it's time to export, Mondoo issues a short-lived OIDC token and presents it to GCP. GCP validates the token against Mondoo's public signing keys (fetched from Mondoo's OIDC discovery endpoint), then issues temporary GCP credentials that Mondoo uses to write data to Cloud Storage. No static keys are stored or transmitted.
Step 1: Create a GCP service account
Create a GCP service account that Mondoo will impersonate to write data to your Cloud Storage bucket. Do not create a key for this service account; WIF replaces the need for static keys.
-
In the GCP Console, navigate to IAM & Admin > Service Accounts.
-
Select Create Service Account.
-
Give the service account a name (for example,
mondoo-gcs-export) and select Create and Continue. -
Grant the service account the Storage Object Creator role (
roles/storage.objectCreator) for the bucket.For instructions, read Manage access to projects, folders, and organizations in the Google documentation.
-
Select Done. Note the service account email address (for example,
mondoo-gcs-export@PROJECT_ID.iam.gserviceaccount.com).
Step 2: Create a Workload Identity Pool
A Workload Identity Pool is a GCP resource that manages external identities. You create one pool and add Mondoo as an OIDC provider within it.
If you already created a Workload Identity Pool and Mondoo OIDC provider for another export (such as BigQuery), you can reuse it. Skip to Step 4.
-
In the GCP Console, navigate to IAM & Admin > Workload Identity Federation.
-
Select Create Pool.
-
Enter a name for the pool (for example,
mondoo-export-pool) and an optional description. -
Make sure the pool is Enabled and select Continue.
Step 3: Add Mondoo as an OIDC provider to the pool
Within the Workload Identity Pool, add Mondoo as a trusted OpenID Connect (OIDC) identity provider.
-
In the pool you just created, select Add Provider.
-
For Select a provider, choose OpenID Connect (OIDC).
-
Enter a provider name (for example,
mondoo-provider). -
Set the Issuer (URL) to the Mondoo STS endpoint for your environment:
Environment Issuer URL Mondoo (US) https://sts.us.mondoo.comMondoo (EU) https://sts.eu.mondoo.comMondoo Edge https://sts.edge.mondoo.comDedicated deployment https://sts.mondoo.CUSTOMER.comGCP automatically fetches the OIDC discovery document from
<issuer>/.well-known/openid-configurationto obtain Mondoo's signing keys. To learn more about Mondoo's OIDC endpoints, see Mondoo as an OIDC identity provider. -
Under Audiences, select Allowed audiences and leave the default value. The audience is the full provider resource name, which you note in the next step.
-
Under Attribute Mapping, add this mapping:
Google attribute OIDC attribute google.subjectassertion.sub -
Select Save.
Step 4: Note the WIF audience URL
After creating the provider, note the full audience URL. It follows this format:
https://iam.googleapis.com/projects/PROJECT_NUMBER/locations/global/workloadIdentityPools/POOL_ID/providers/PROVIDER_IDYou can find this on the provider details page in the GCP Console. You enter this value in Mondoo in the next step.
PROJECT_NUMBER is a numeric value, not the project ID string. Find it on your GCP project's dashboard or by running:
gcloud projects describe PROJECT_ID --format='value(projectNumber)'Step 5: Create the Cloud Storage export integration in Mondoo
-
In the Mondoo App, navigate to the space from which you want to export data.
-
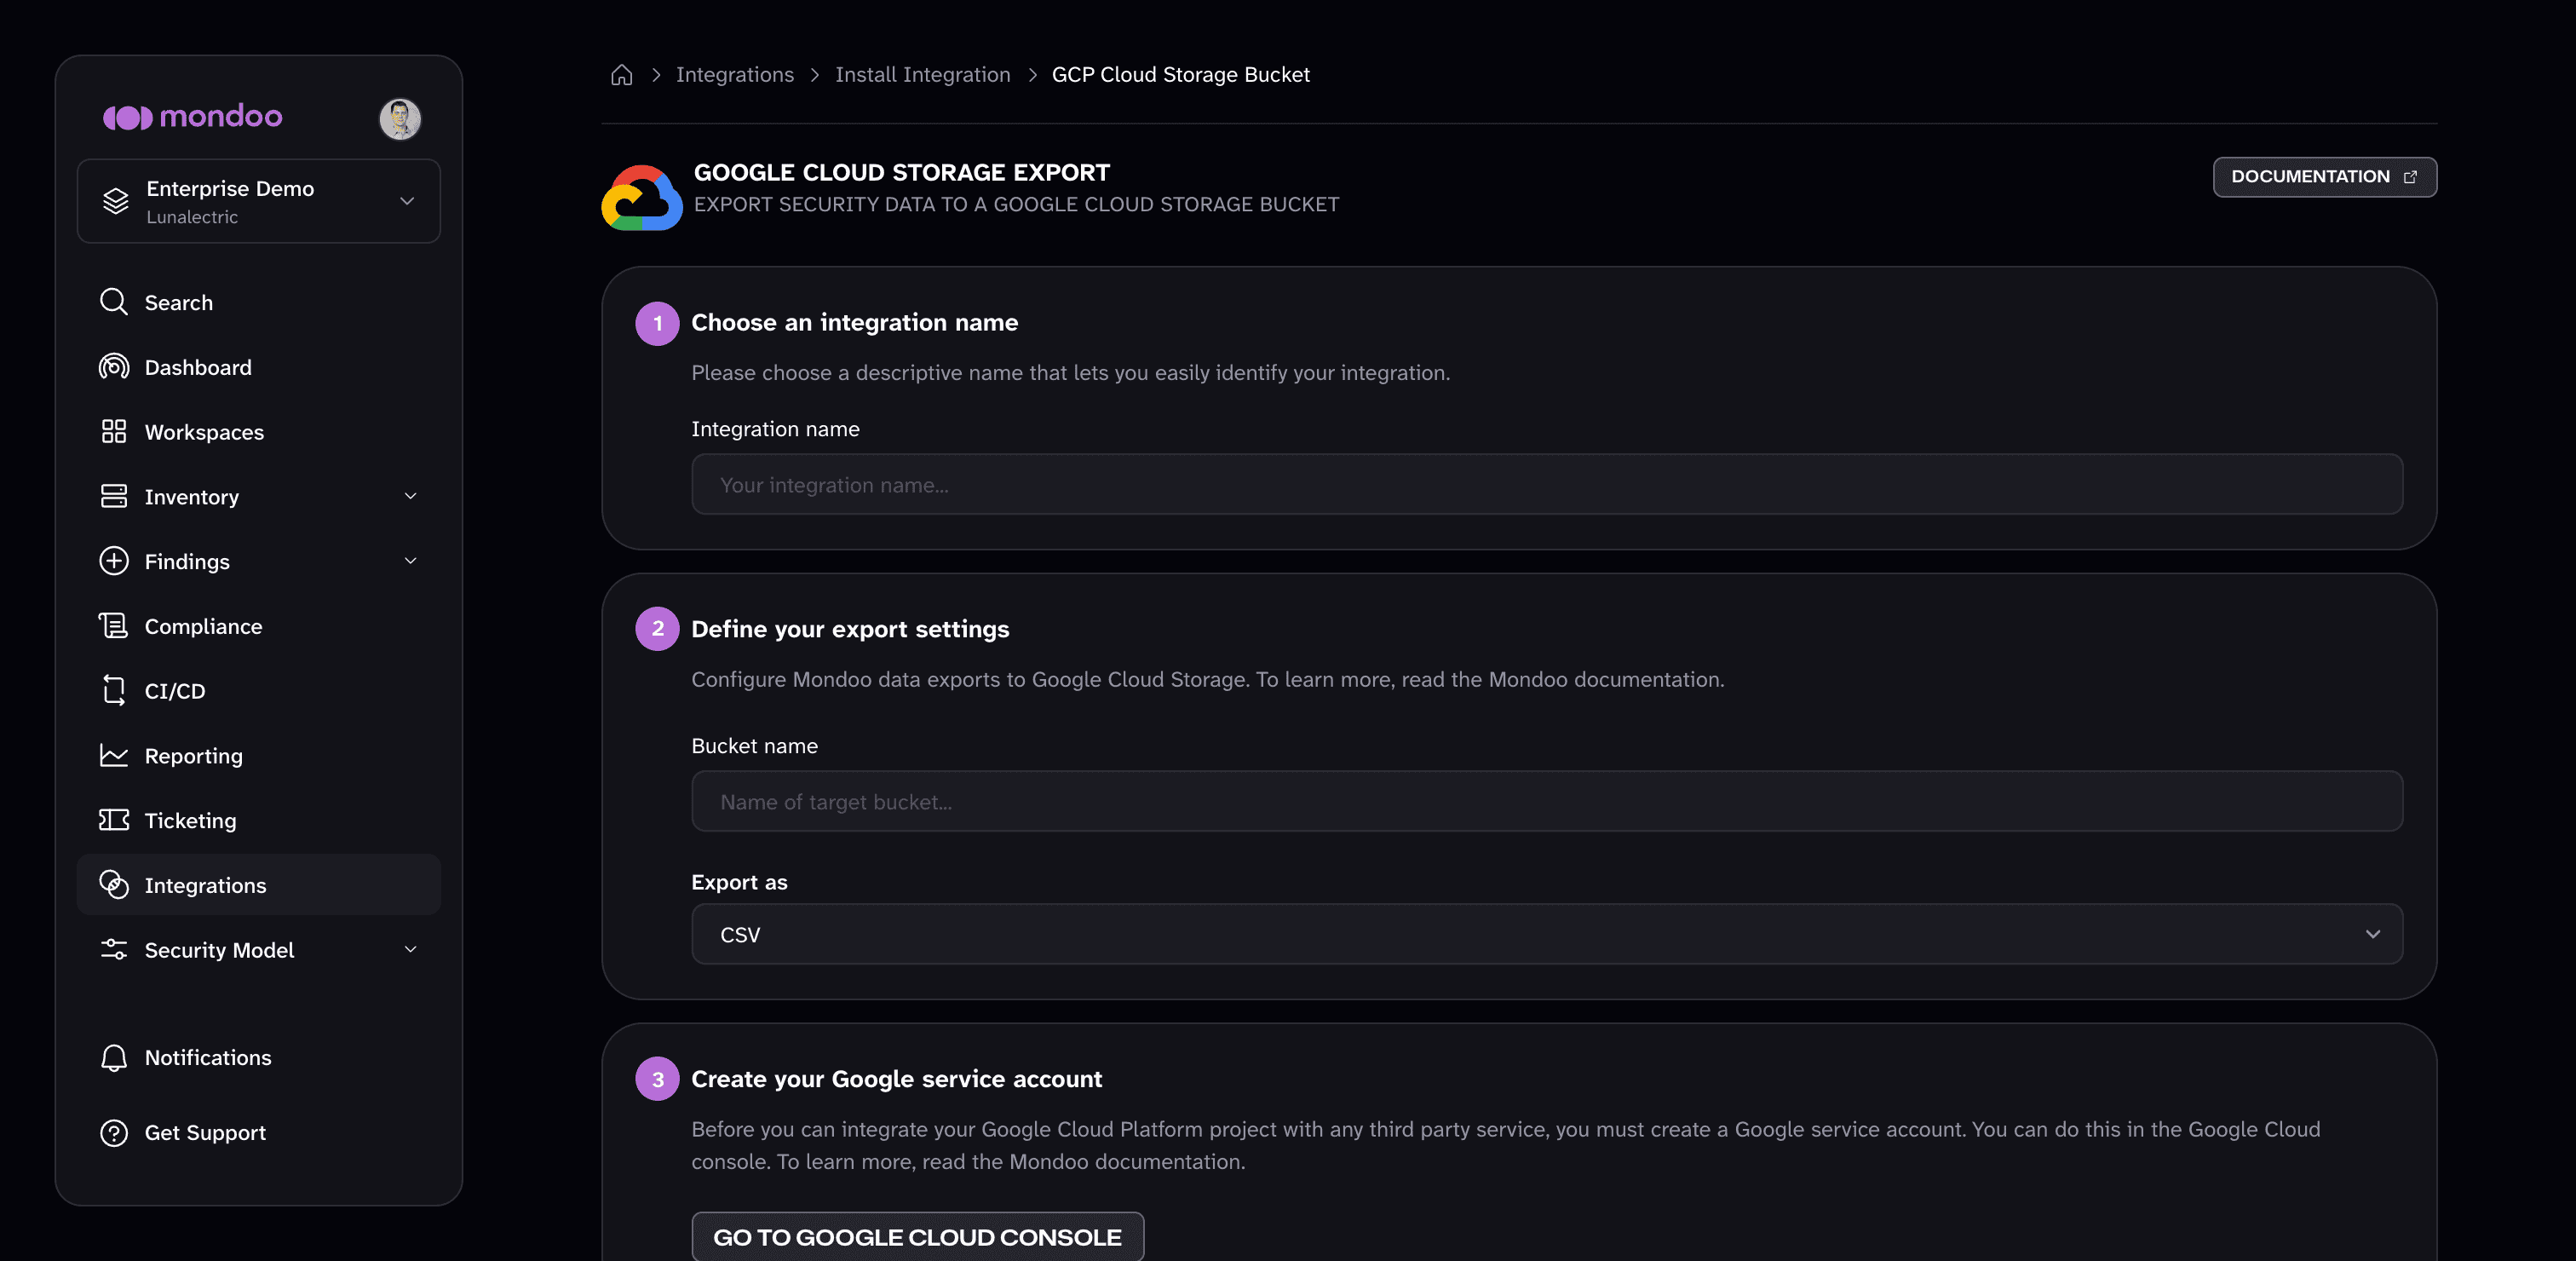
In the side navigation bar, select Integrations, then select INSTALL. Under Data Exports, select GCP Cloud Storage Bucket.
-
In the Integration name box, enter a name for the integration.
-
In the Bucket name box, enter the name of the bucket you created earlier.
-
Under Export as, select JSONL or CSV.
-
Select the Workload Identity Federation (recommended) tab.
-
In the WIF Audience URL box, enter the audience URL from Step 4.
-
In the Service Account Email (for impersonation) box, enter the email of the service account you created in Step 1 (for example,
mondoo-gcs-export@PROJECT_ID.iam.gserviceaccount.com). -
Select Create Integration.
Creating the integration immediately attempts a first export, but the GCP binding that authorizes Mondoo doesn't exist yet, so that attempt fails. That's expected. Complete Steps 6 and 7, then run a fresh export in Step 8.
Step 6: Copy the WIF subject value
After you create the integration, Mondoo computes a WIF subject value that uniquely identifies this integration. You need this value to authorize Mondoo in GCP.
-
On the integration details page in the Mondoo App, find the WifSubject field.
-
Copy the subject value. It has the format
INTEGRATION_ID@integrations.SPACE_ID.spaces.iam.REGION.mondoo.app, whereREGIONis the short name of your Mondoo region (for example,us).
The WIF subject is a computed, read-only value. Mondoo generates it automatically when you create the integration; you cannot set or change it.
Step 7: Authorize the WIF subject to impersonate the service account
Back in GCP, grant the WIF subject the Workload Identity User role on the service account you created in Step 1. This allows Mondoo's OIDC-validated identity to impersonate the service account and write to Cloud Storage.
Run this gcloud command, substituting your own values:
gcloud iam service-accounts add-iam-policy-binding \
  mondoo-gcs-export@PROJECT_ID.iam.gserviceaccount.com \
  --project=PROJECT_ID \
  --role="roles/iam.workloadIdentityUser" \
--member="principal://iam.googleapis.com/projects/PROJECT_NUMBER/locations/global/workloadIdentityPools/POOL_ID/subject/SUBJECT_VALUE"| Placeholder | Replace with |
|---|---|
PROJECT_ID | Your GCP project ID (the string identifier, not the number) |
PROJECT_NUMBER | Your GCP project number (numeric) |
POOL_ID | The Workload Identity Pool ID from Step 2 |
SUBJECT_VALUE | The WIF subject value you copied in Step 6 |
Step 8: Verify the integration
The export runs on its configured schedule (approximately every 24 hours). To verify the setup works immediately:
-
Return to the integration details page in the Mondoo App.
-
Select RUN to trigger an immediate export.
-
Wait for the export to complete. If the status changes to active, the setup is working correctly.
If the export fails, double-check:
- The WIF audience URL matches the full provider resource name in GCP exactly (including project number, pool ID, and provider ID).
- The service account email is correct.
- The
gcloud iam service-accounts add-iam-policy-bindingcommand completed successfully with the correct subject value. - The service account has the required Storage Object Creator role.
Manage this integration
After it's created, find your integration under Integrations in your space's side navigation. Select it to open the detail page, where you can:
- Trigger a manual export. Exports run automatically about every 24 hours. To export immediately, select RUN.
- Check the status. ACTIVE means the integration is healthy and exporting on schedule. PENDING means Mondoo hasn't attempted the first export yet. ERROR means the last export failed. The Export Details section shows when the last export succeeded and when Mondoo last attempted one.
- Review the activity log. Most Recent Activity lists each export run's messages, such as when a job started, finished, or failed and why. Filter it to errors, warnings, or info messages.
- Change the settings. Select the pencil icon to edit the integration, for example to update credentials.
- Remove the integration. Select the trash can icon and confirm. Mondoo stops future exports but does not delete data that has already been exported.