Secure Google Workspace with Mondoo
The Mondoo Google Workspace integration lets you continuously scan your Google Workspace resources, such as users and applications. It finds misconfigurations and vulnerabilities that put your organization at risk. You deploy the integration once and always get the latest security assessments for new accounts and resources.
Before you begin
Be sure you have the required access:
- Super administrator access to Google Workspace Admin Console
- Administrator access to Google Cloud Console
Create a Google Cloud service account
These steps for configuring Admin SDK API access to your Google Workspace environment rely on Google Cloud (GCP) even if you aren't otherwise using GCP.
Step A: Create a Google Cloud Project
-
Go to Google Cloud and sign in as a super administrator. If it's your first time signing into the console, agree to the terms of service.
-
From the Google Cloud menu, select IAM & Admin > Manage Resources.
-
At the top, select Create Project and enter a project name (such as Mondoo Security Scan).
If you want, you can add the project to a folder: For Location, select Browse, navigate to the folder, and choose Select.
-
Select Create.
Step B: Enable the required APIs to scan Google Workspace
-
From the Google Cloud menu, select APIs & Services > Library.
-
For each of these APIs, select the API name and then select Enable:
- Admin SDK
- Google Calendar API
- Contacts API
- Gmail API
- Groups Migration API
- Cloud Identity API
- Google Drive API
If you don't see the API you need, type its name in the search box.
Step C: Set up the OAuth consent screen
-
From the Google Cloud menu, select APIs & Services > OAuth consent screen.
-
For User Type, select Internal.
-
Select Create.
-
For App name, enter "Mondoo Security Scanner" or another name that makes sense for your organization.
-
For Authorized Domains, select + ADD DOMAIN and enter your domain configured in Google Workspace.
-
Select a User support email for users to contact with questions.
-
For Developer contact information, enter email addresses so Google can contact you about changes to your project.
-
Select Save and Continue > Save and then select Continue > Back to Dashboard.
Step D: Create the service account
-
From the Google Cloud menu, select APIs & Services > Credentials.
-
Select Create Credentials > Service account.
-
For Service account name, enter "mondoo-security-scanner" or another name that makes sense for your organization.
If you want, you can also add a Service account description.
-
Select Create and select Continue.
-
Select Done > Save.
-
At the top, select Key > Add Key > Create new key.
-
Make sure the key type is set to JSON, then select Create. You see a message that the service account's private key JSON file was downloaded to your computer. Note the file name and where your browser saves it. You need it for later steps.
-
Select Close.

-
Record the OAuth 2 / Client ID from the list of service accounts. You need that for the next step.
Configure domain-wide delegation in Google Workspace Admin Console
In this next section you configure domain-wide delegation in Google Workspace Admin console to give your new service account the access it needs the Google Workspace APIs.
-
Log into the Google Workspace Admin Console.
-
In the left-side navigation, select Security > Access and data control > API controls.
-
Select Domain-wide Delegation and then select Add new.
-
For the Client ID, enter the client ID your recorded in Step D above.
-
For OAuth Scopes, paste this comma-delimited list to add all 16 read-only OAuth scopes:
https://www.googleapis.com/auth/admin.chrome.printers.readonly,https://www.googleapis.com/auth/admin.directory.customer.readonly,https://www.googleapis.com/auth/admin.directory.device.chromeos.readonly,https://www.googleapis.com/auth/admin.directory.device.mobile.readonly,https://www.googleapis.com/auth/admin.directory.domain.readonly,https://www.googleapis.com/auth/admin.directory.group.member.readonly,https://www.googleapis.com/auth/admin.directory.group.readonly,https://www.googleapis.com/auth/admin.directory.orgunit.readonly,https://www.googleapis.com/auth/admin.directory.resource.calendar.readonly,https://www.googleapis.com/auth/admin.directory.rolemanagement.readonly,https://www.googleapis.com/auth/admin.directory.user.alias.readonly,https://www.googleapis.com/auth/admin.directory.user.readonly,https://www.googleapis.com/auth/admin.directory.userschema.readonly,https://www.googleapis.com/auth/admin.reports.audit.readonly,https://www.googleapis.com/auth/admin.reports.usage.readonly,https://www.googleapis.com/auth/admin.directory.user.security,https://www.googleapis.com/auth/cloud-identity.groups.readonly,https://www.googleapis.com/auth/calendar.readonly,https://www.googleapis.com/auth/calendar,https://www.googleapis.com/auth/calendar.events,https://www.googleapis.com/auth/calendar.events.readonly,https://www.googleapis.com/auth/calendar.settings.readonly -
Select Authorize.
Super admin role email
To use your Google Cloud service account with domain-wide delegation, you must specify a super admin role email to impersonate when authenticating to the API.
In the Google Workspace Admin Console, navigate to Account > Admin Roles and select Super Admins. Record the email address for the Super Admin you want to use when authenticating.
To learn more about super admin roles, read Prebuilt administrator roles in the Google Workspace documentation.
Record your Google Workspace customer ID
Navigate to Account > Account Settings and record the Customer ID. You need the customer ID to configure hosted scanning in Mondoo Platform, or to use locally with cnspec or cnquery.

Add a new Google Workspace integration
In this last step, you configure hosted scanning for Google Workspace.
Only team members with Editor or Owner access can perform this task.
-
Access the Integrations > Add > Google Workspace page in one of two ways:
-
New space setup: After creating a new Mondoo account or creating a new space, the initial setup guide welcomes you. Select BROWSE INTEGRATIONS and then select Google Workspace.
-
INTEGRATIONS page: In the side navigation bar, under INTEGRATIONS, select Add New Integration. Under SaaS, select Google Workspace.
-
-
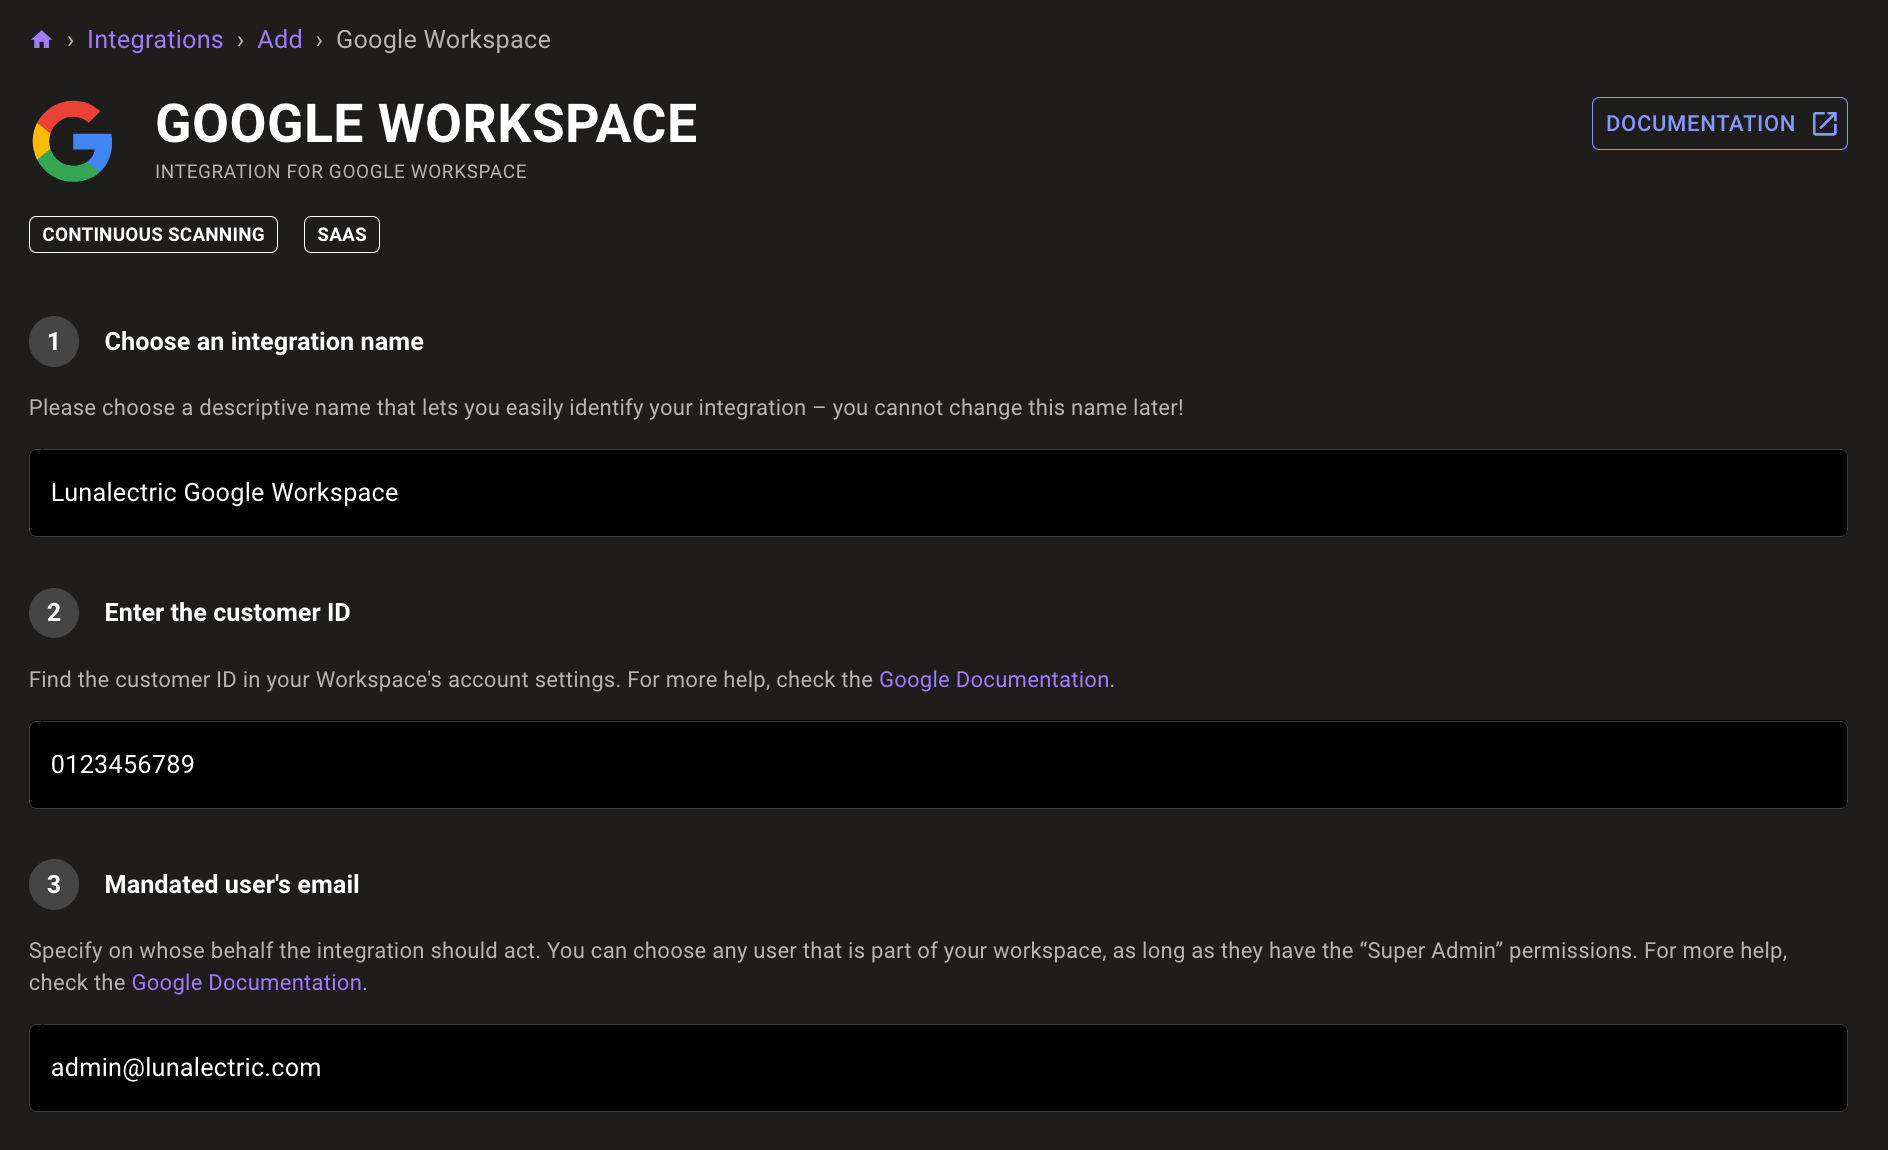
In the Choose an integration name box, enter a name for the integration. Make it a name that lets you easily recognize the Google Workspace account.
-
In the Mandated user's email box, enter the email address of a Google Workspace user with super admin access. Mondoo relies on this user's privileges to access the information it needs. You can choose an existing super admin or create one just for Mondoo.
-
Under Provide your Google service account config, upload the GCP service account's JSON key that you downloaded in the previous section:
Drag the file and drop it in the Drag and drop your .json file here box.
OR
In the Drag and drop your .json file here box, select the cloud icon and choose the file to upload.

-
To complete the integration, select the START SCANNING button.
-
On the Recommended Policies page, enable the policies on which you want to base assessments of your Google Workspace environment. To learn more, read Manage Policies.
Mondoo begins scanning the assets in your Google Workspace and, when completed, presents the results on the INVENTORY page.
Learn more
For more information, explore the complete Mondoo Google Workspace Resource Pack Reference.