Secure VMware with Mondoo
Continuously assess VMware vSphere and ESXi hosts for security vulnerabilities and misconfigurations.
Mondoo continuously assesses your VMware vSphere and ESXi hosts for security vulnerabilities and misconfigurations. Because VMware often forms the foundation of on-premises infrastructure, keeping it secure helps protect all the workloads running on top of it.
Create a read-only user for Mondoo in vCenter
For Mondoo to scan assets, it requires read-only user access to the vCenter. Create a new, read-only role, then create a new user and assign it the role you created.
-
On the vSphere Client main menu, select Administration and then select Roles.
-
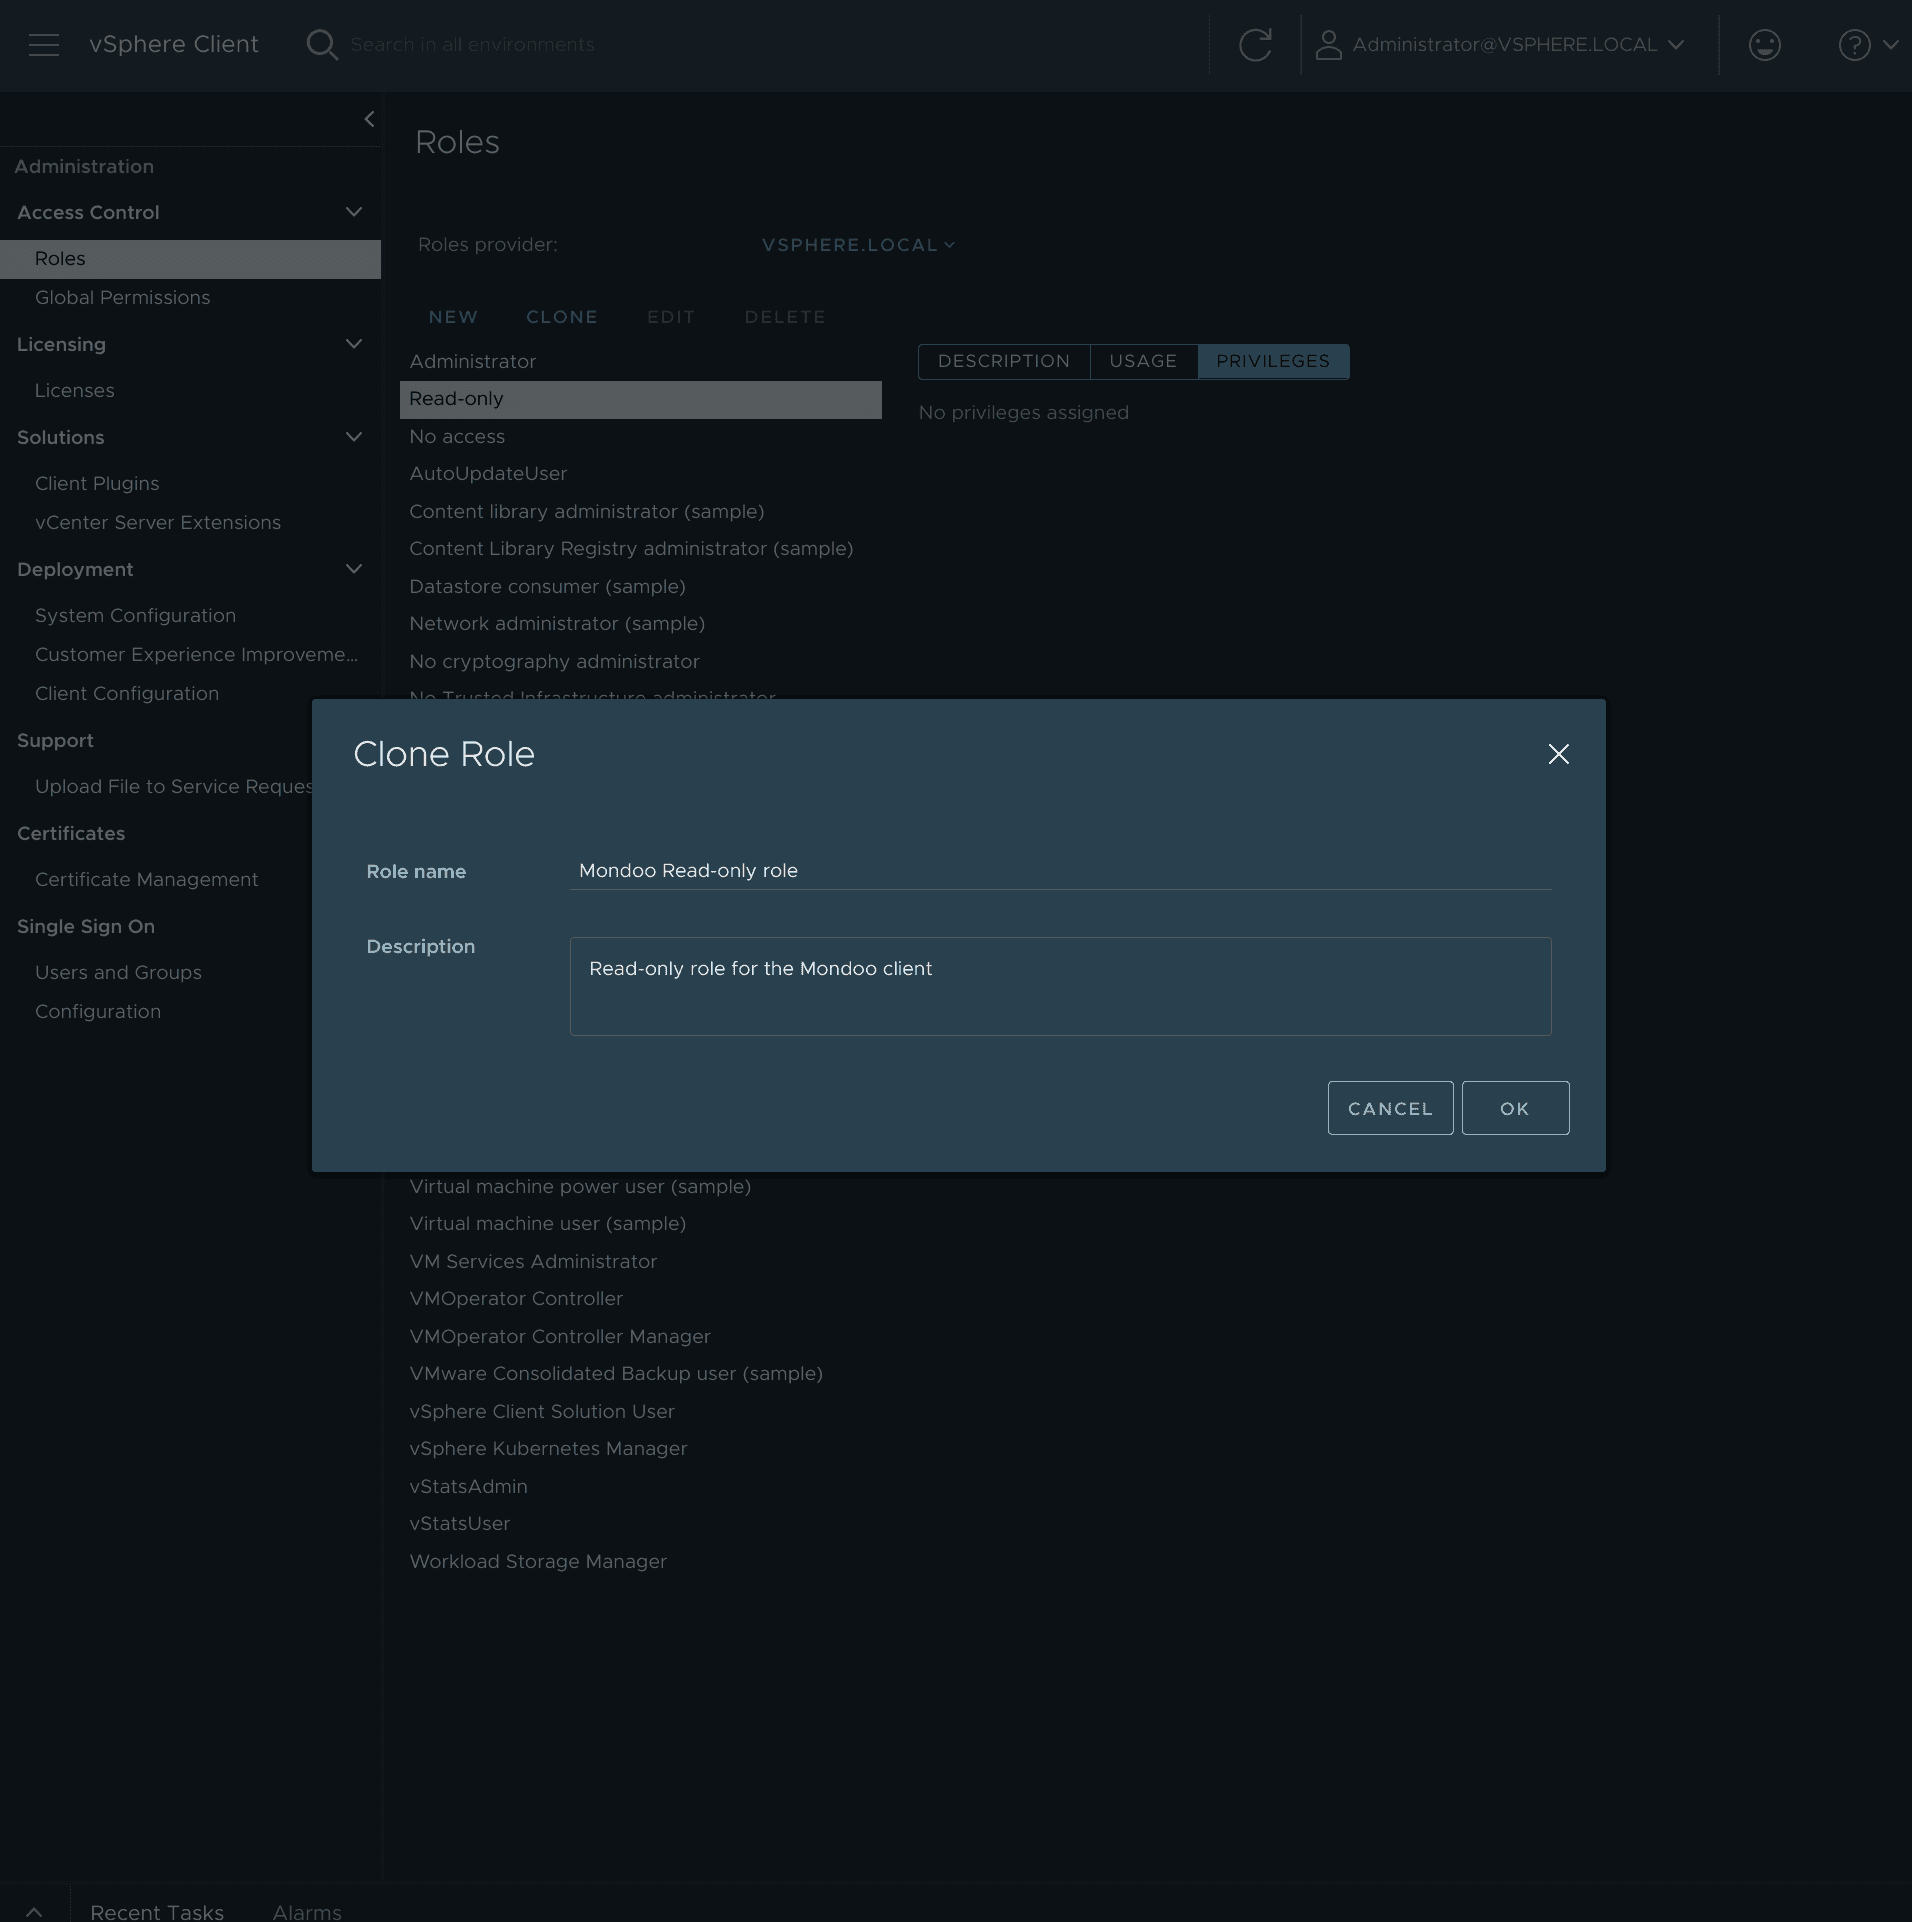
Select the Read-only role and then select CLONE.
-
Type the name Mondoo read-only role and select OK.
-
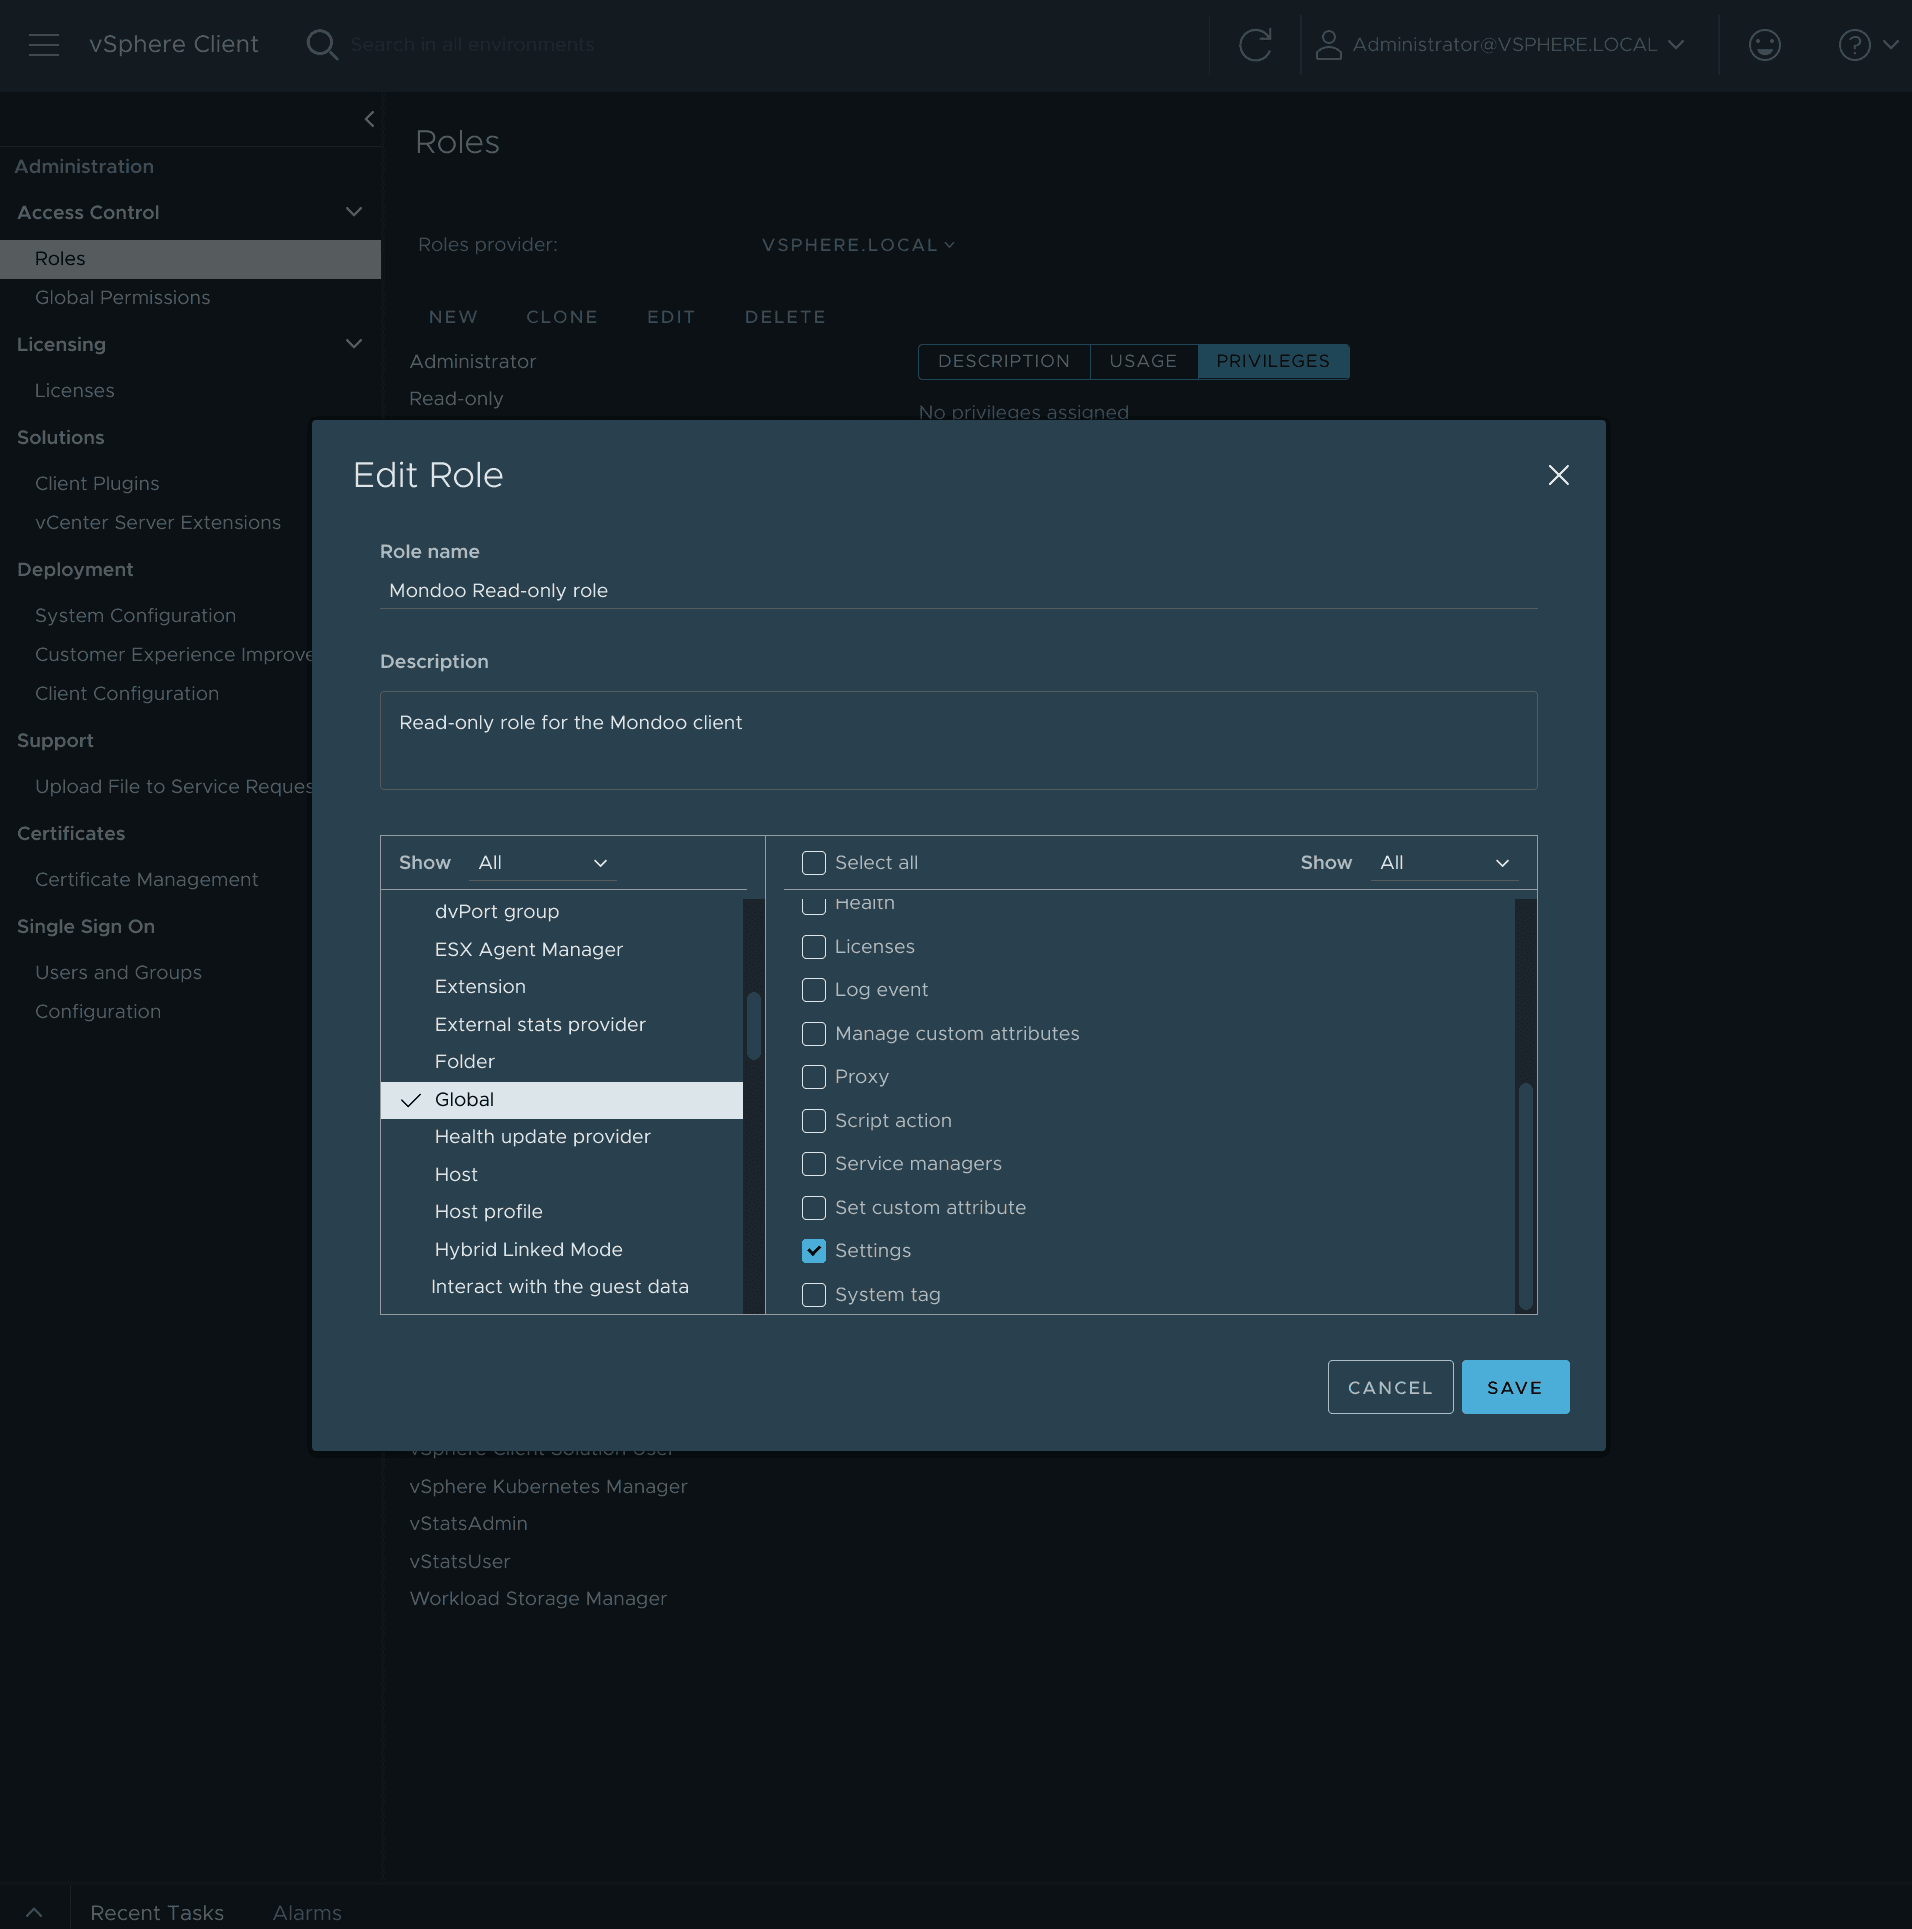
In the list of roles, select the Mondoo read-only role you just created and select EDIT.
-
In the left-side list, select Global, and in the right-side list, check Settings. Then select SAVE.
-
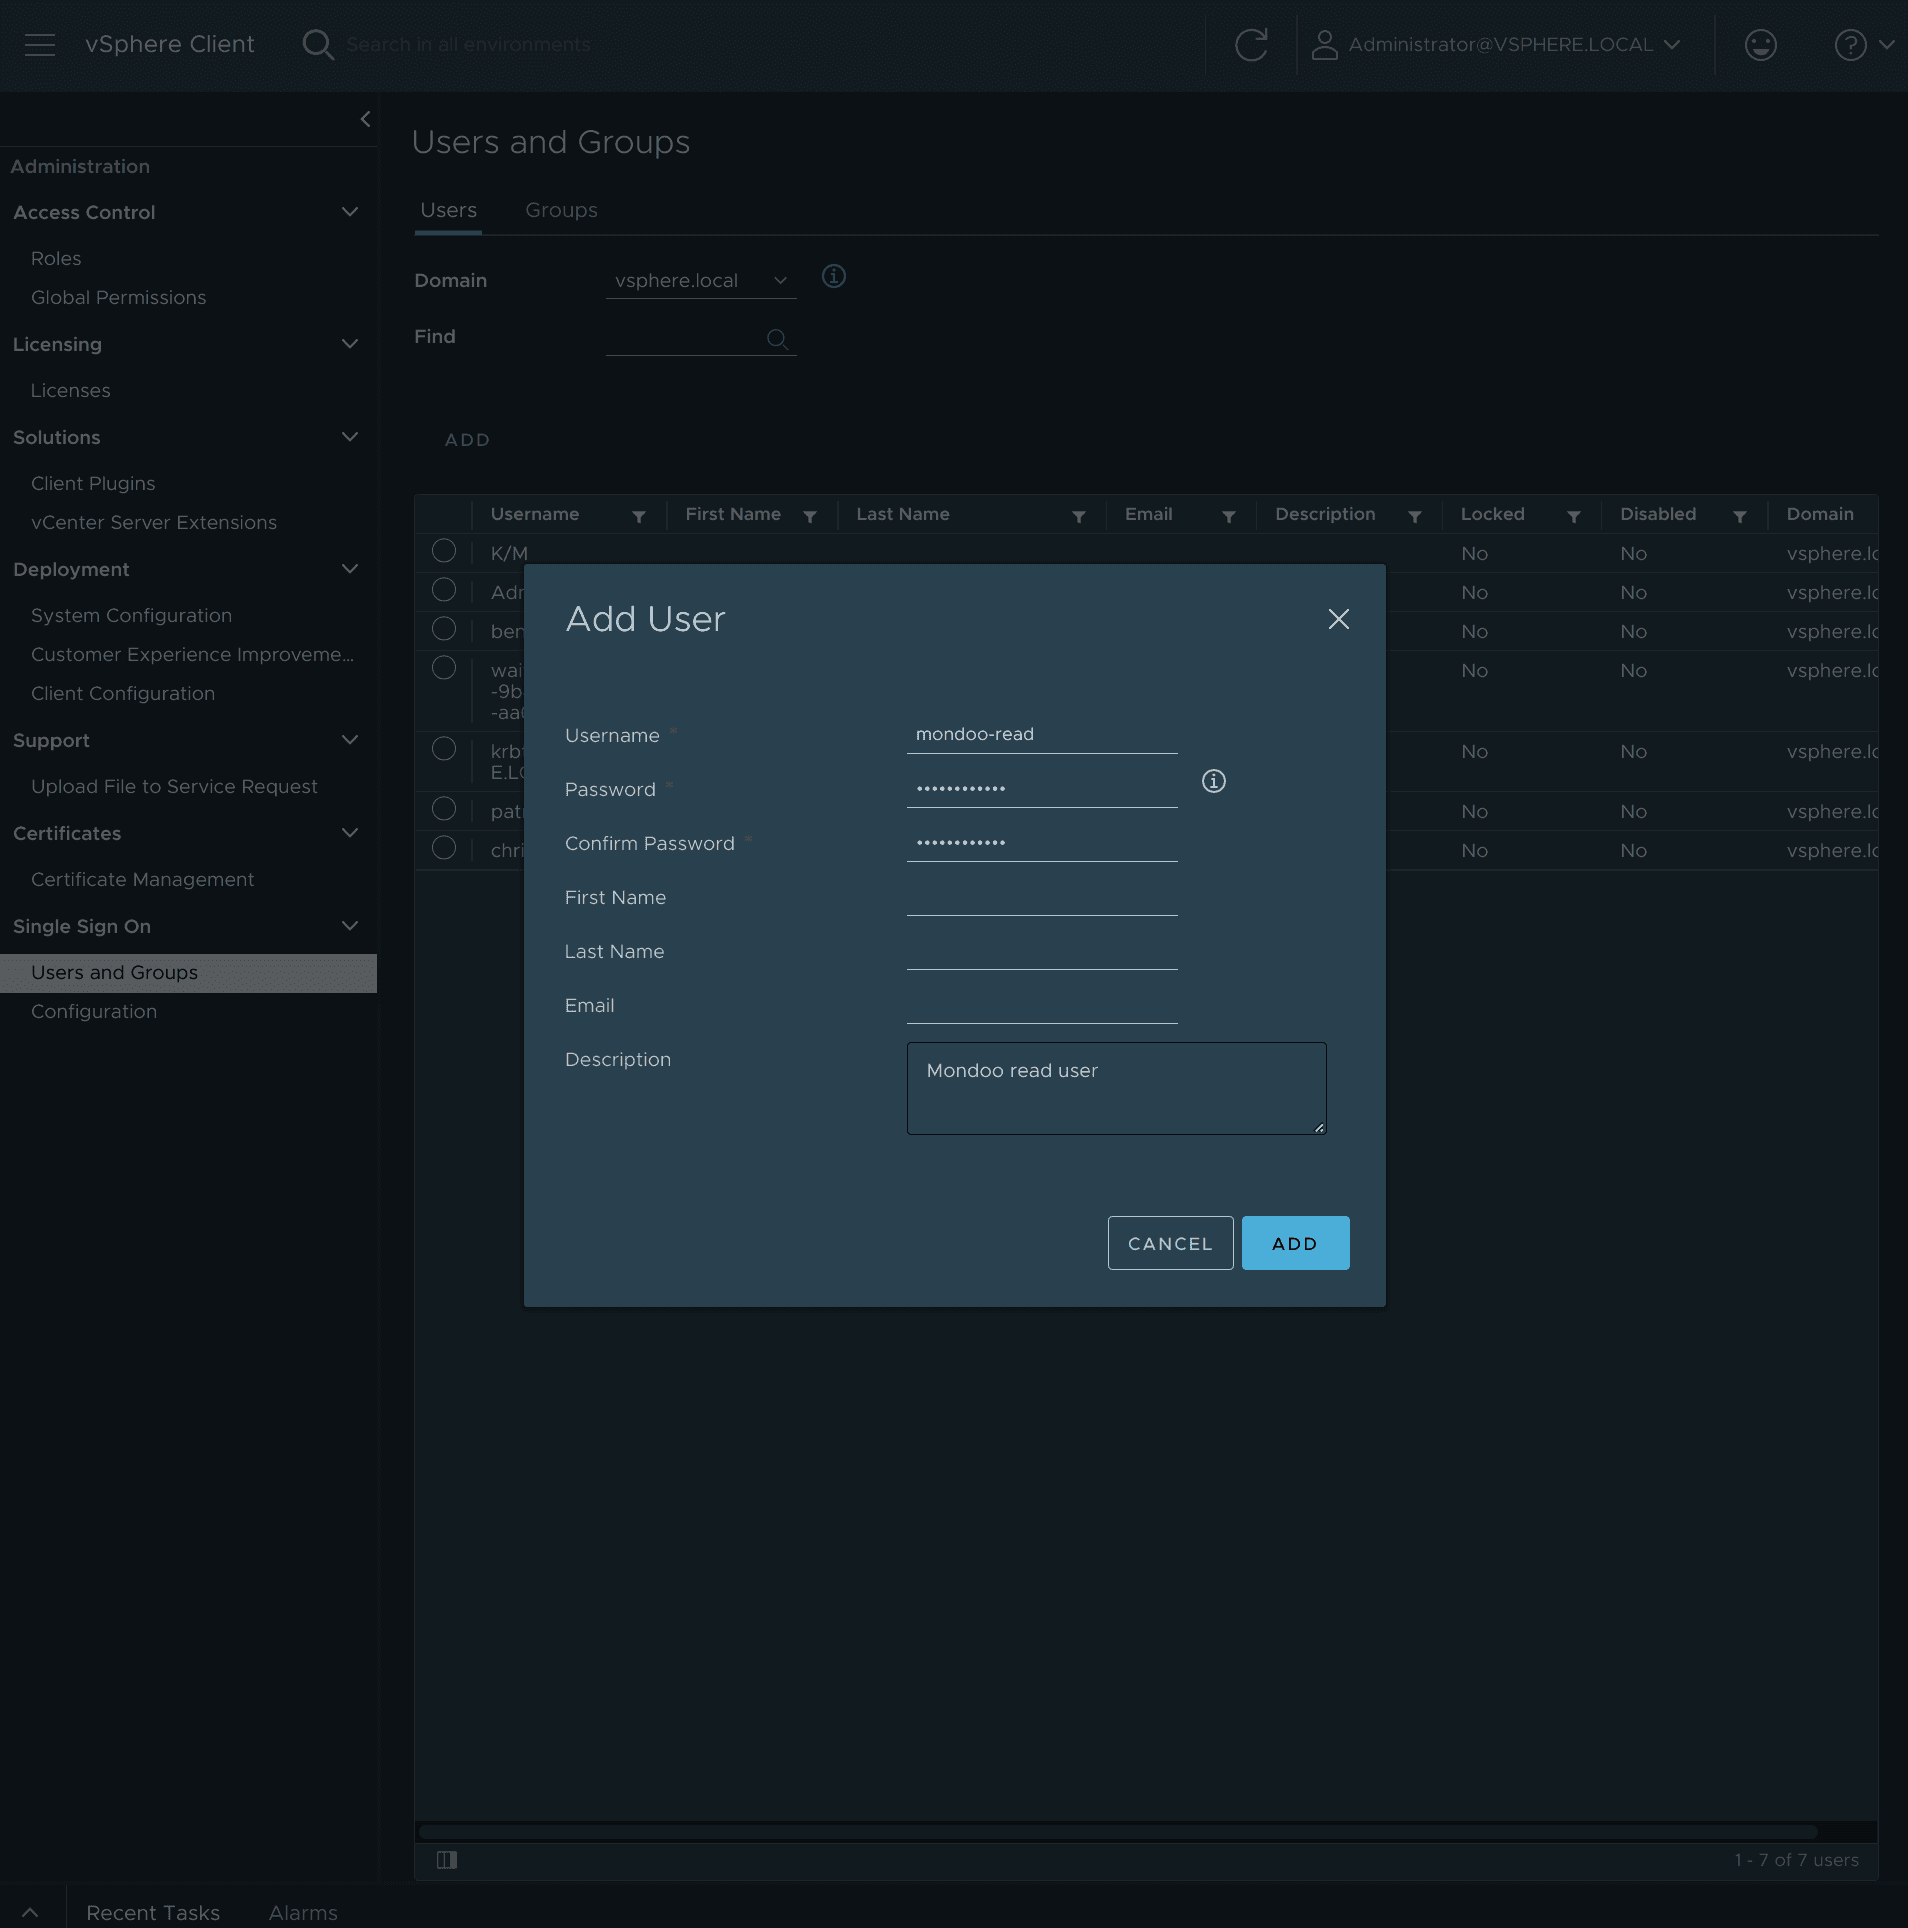
On the Administration menu, select Users and Groups.
-
Under Users, select the Domain vsphere.local, and select ADD.
-
Type the name mondoo-read and assign it a password, then select ADD.
-
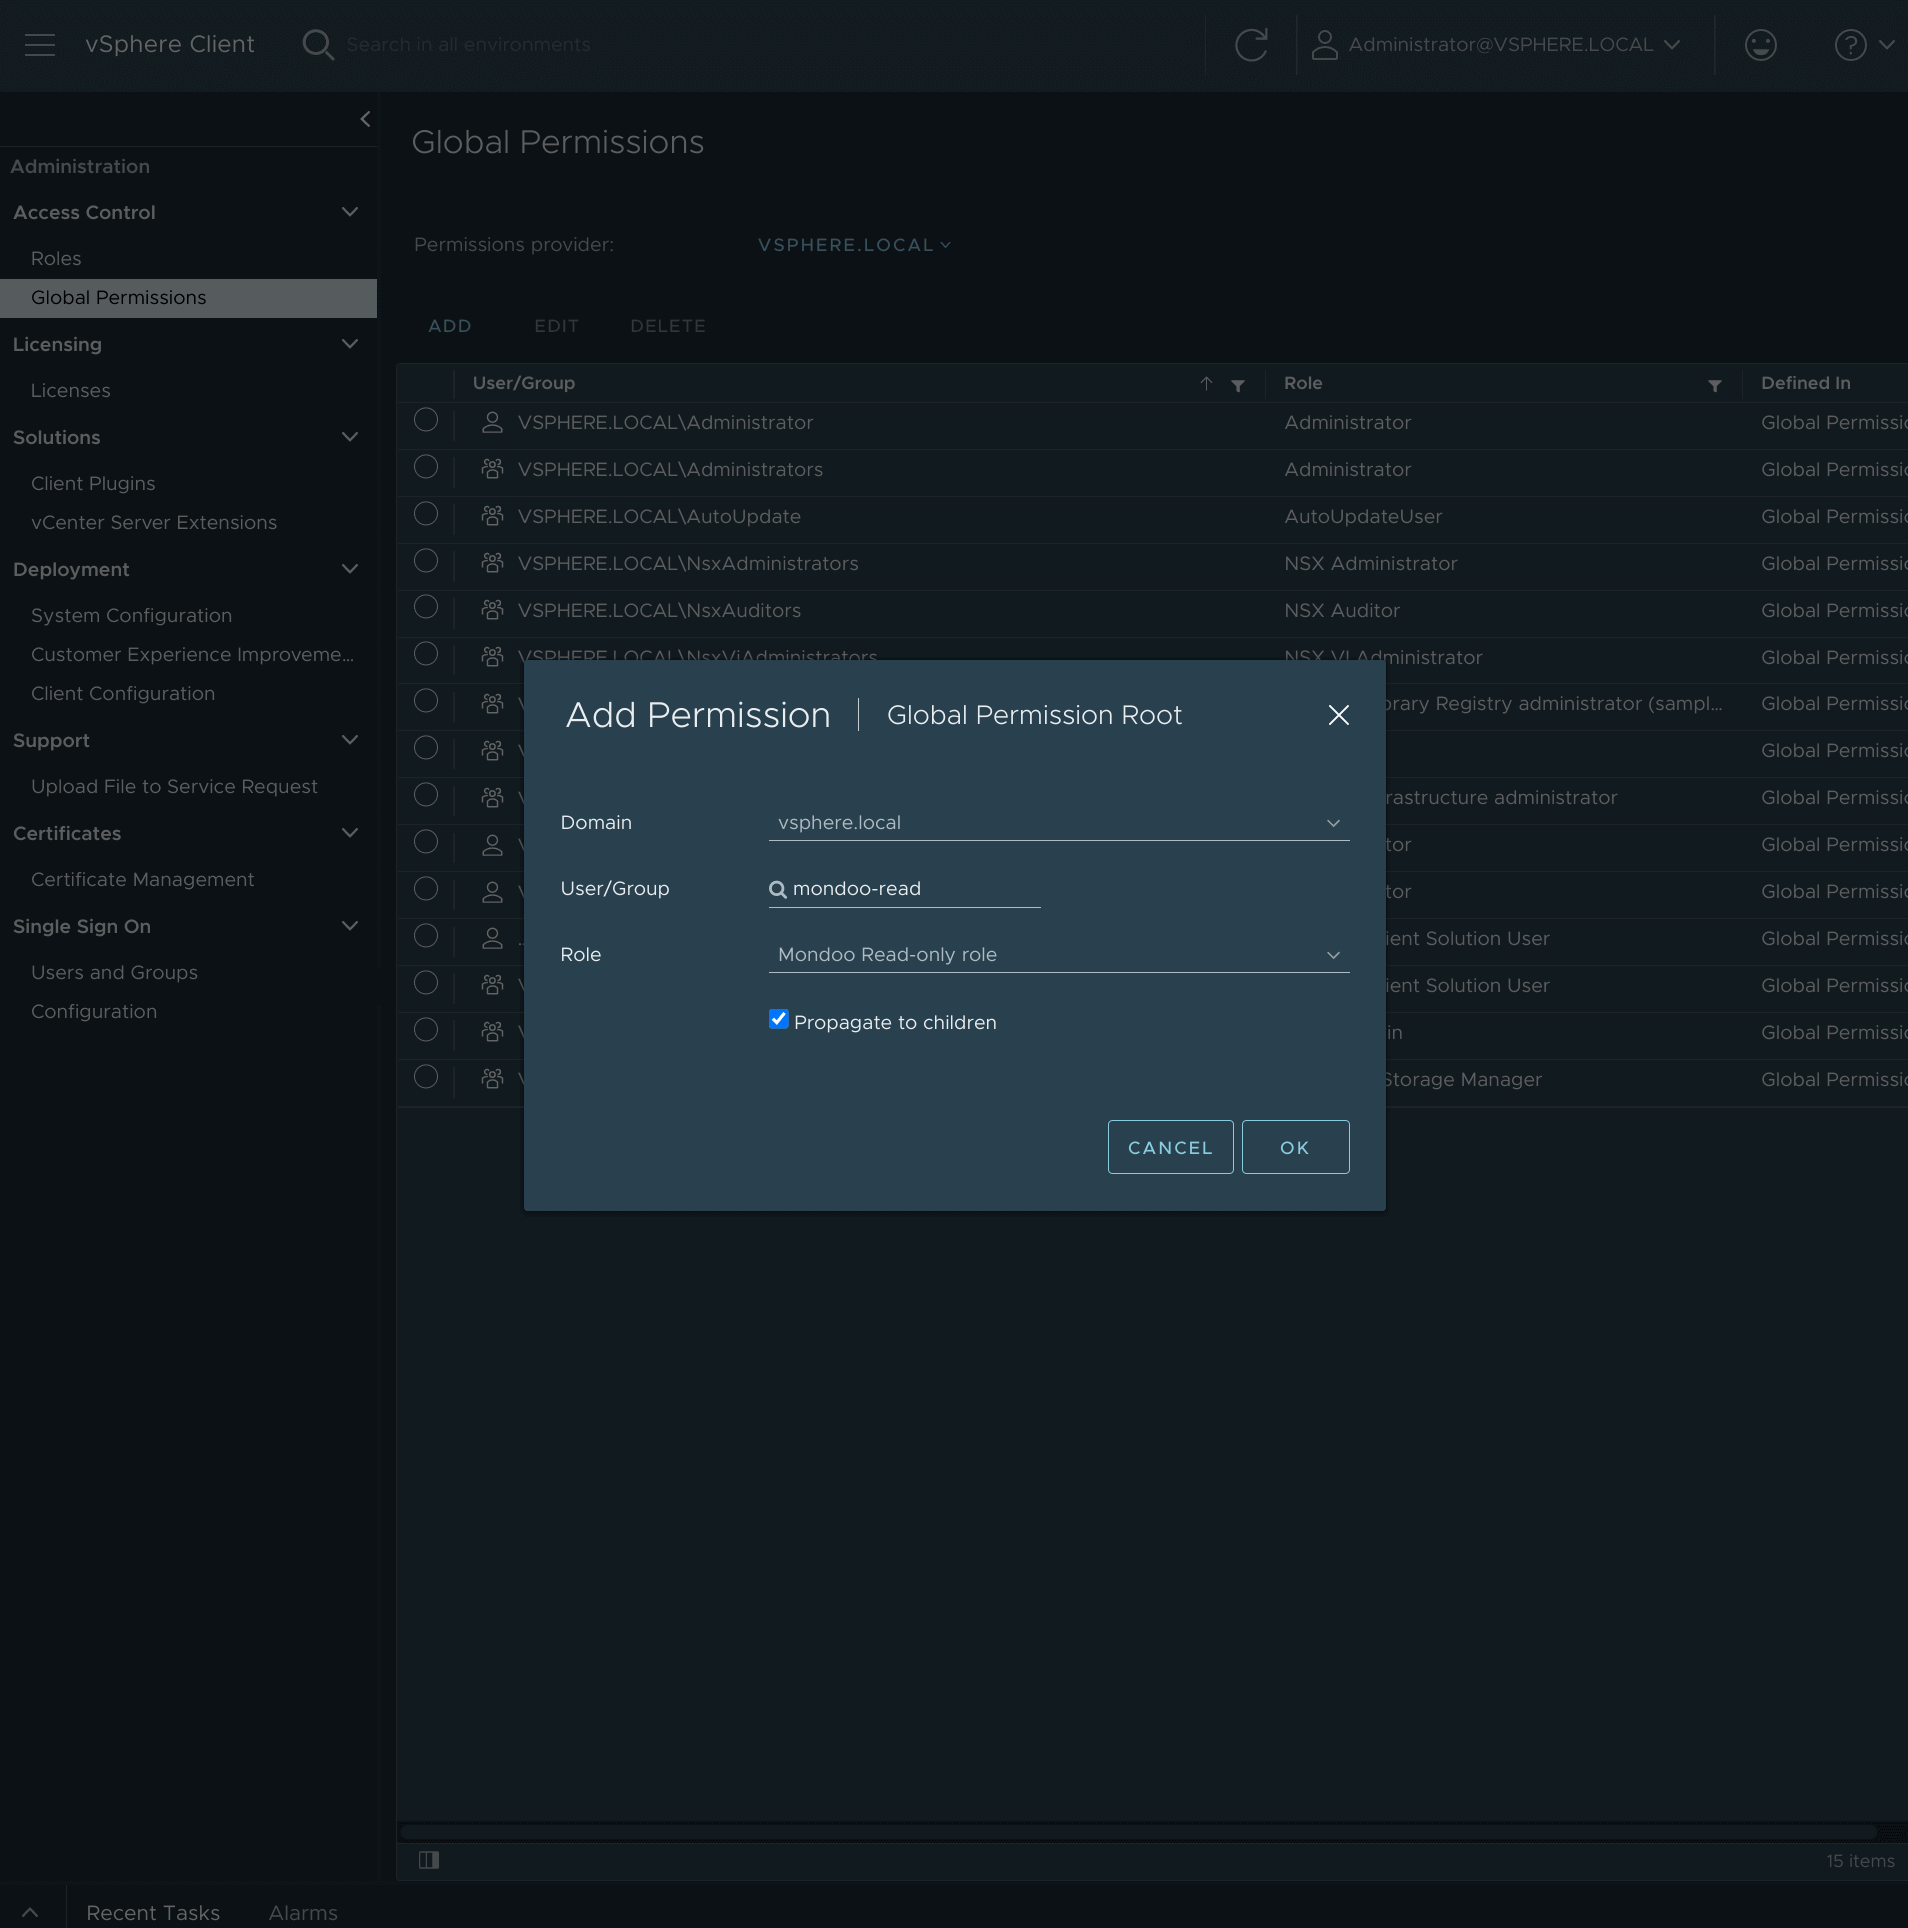
On the Administration menu, select Global Permissions and select ADD.
-
Assign the new role to the new user:
a. Select the user you created, mondoo-read.
b. Select the role you created, Mondoo Read-only role.
c. Check Propagate to children.
d. Select OK.
Mondoo VMware appliance
Mondoo's VMware appliance is a pre-configured Linux host that lets you quickly launch a virtual machine to scan your VMware environment using cnspec. It is built using these components:
- Debian 12
- dev-sec.io's Ansible os and ssh role
- VMware tools
- Cloud-Init and cloud-init-vmware-guestinfo
- cnspec
- cnquery
It is not required to use the Mondoo VMware appliance. Instead, you can provision your own hardened Linux instance and install and configure cnspec to scan your VMware infrastructure.
Setup
-
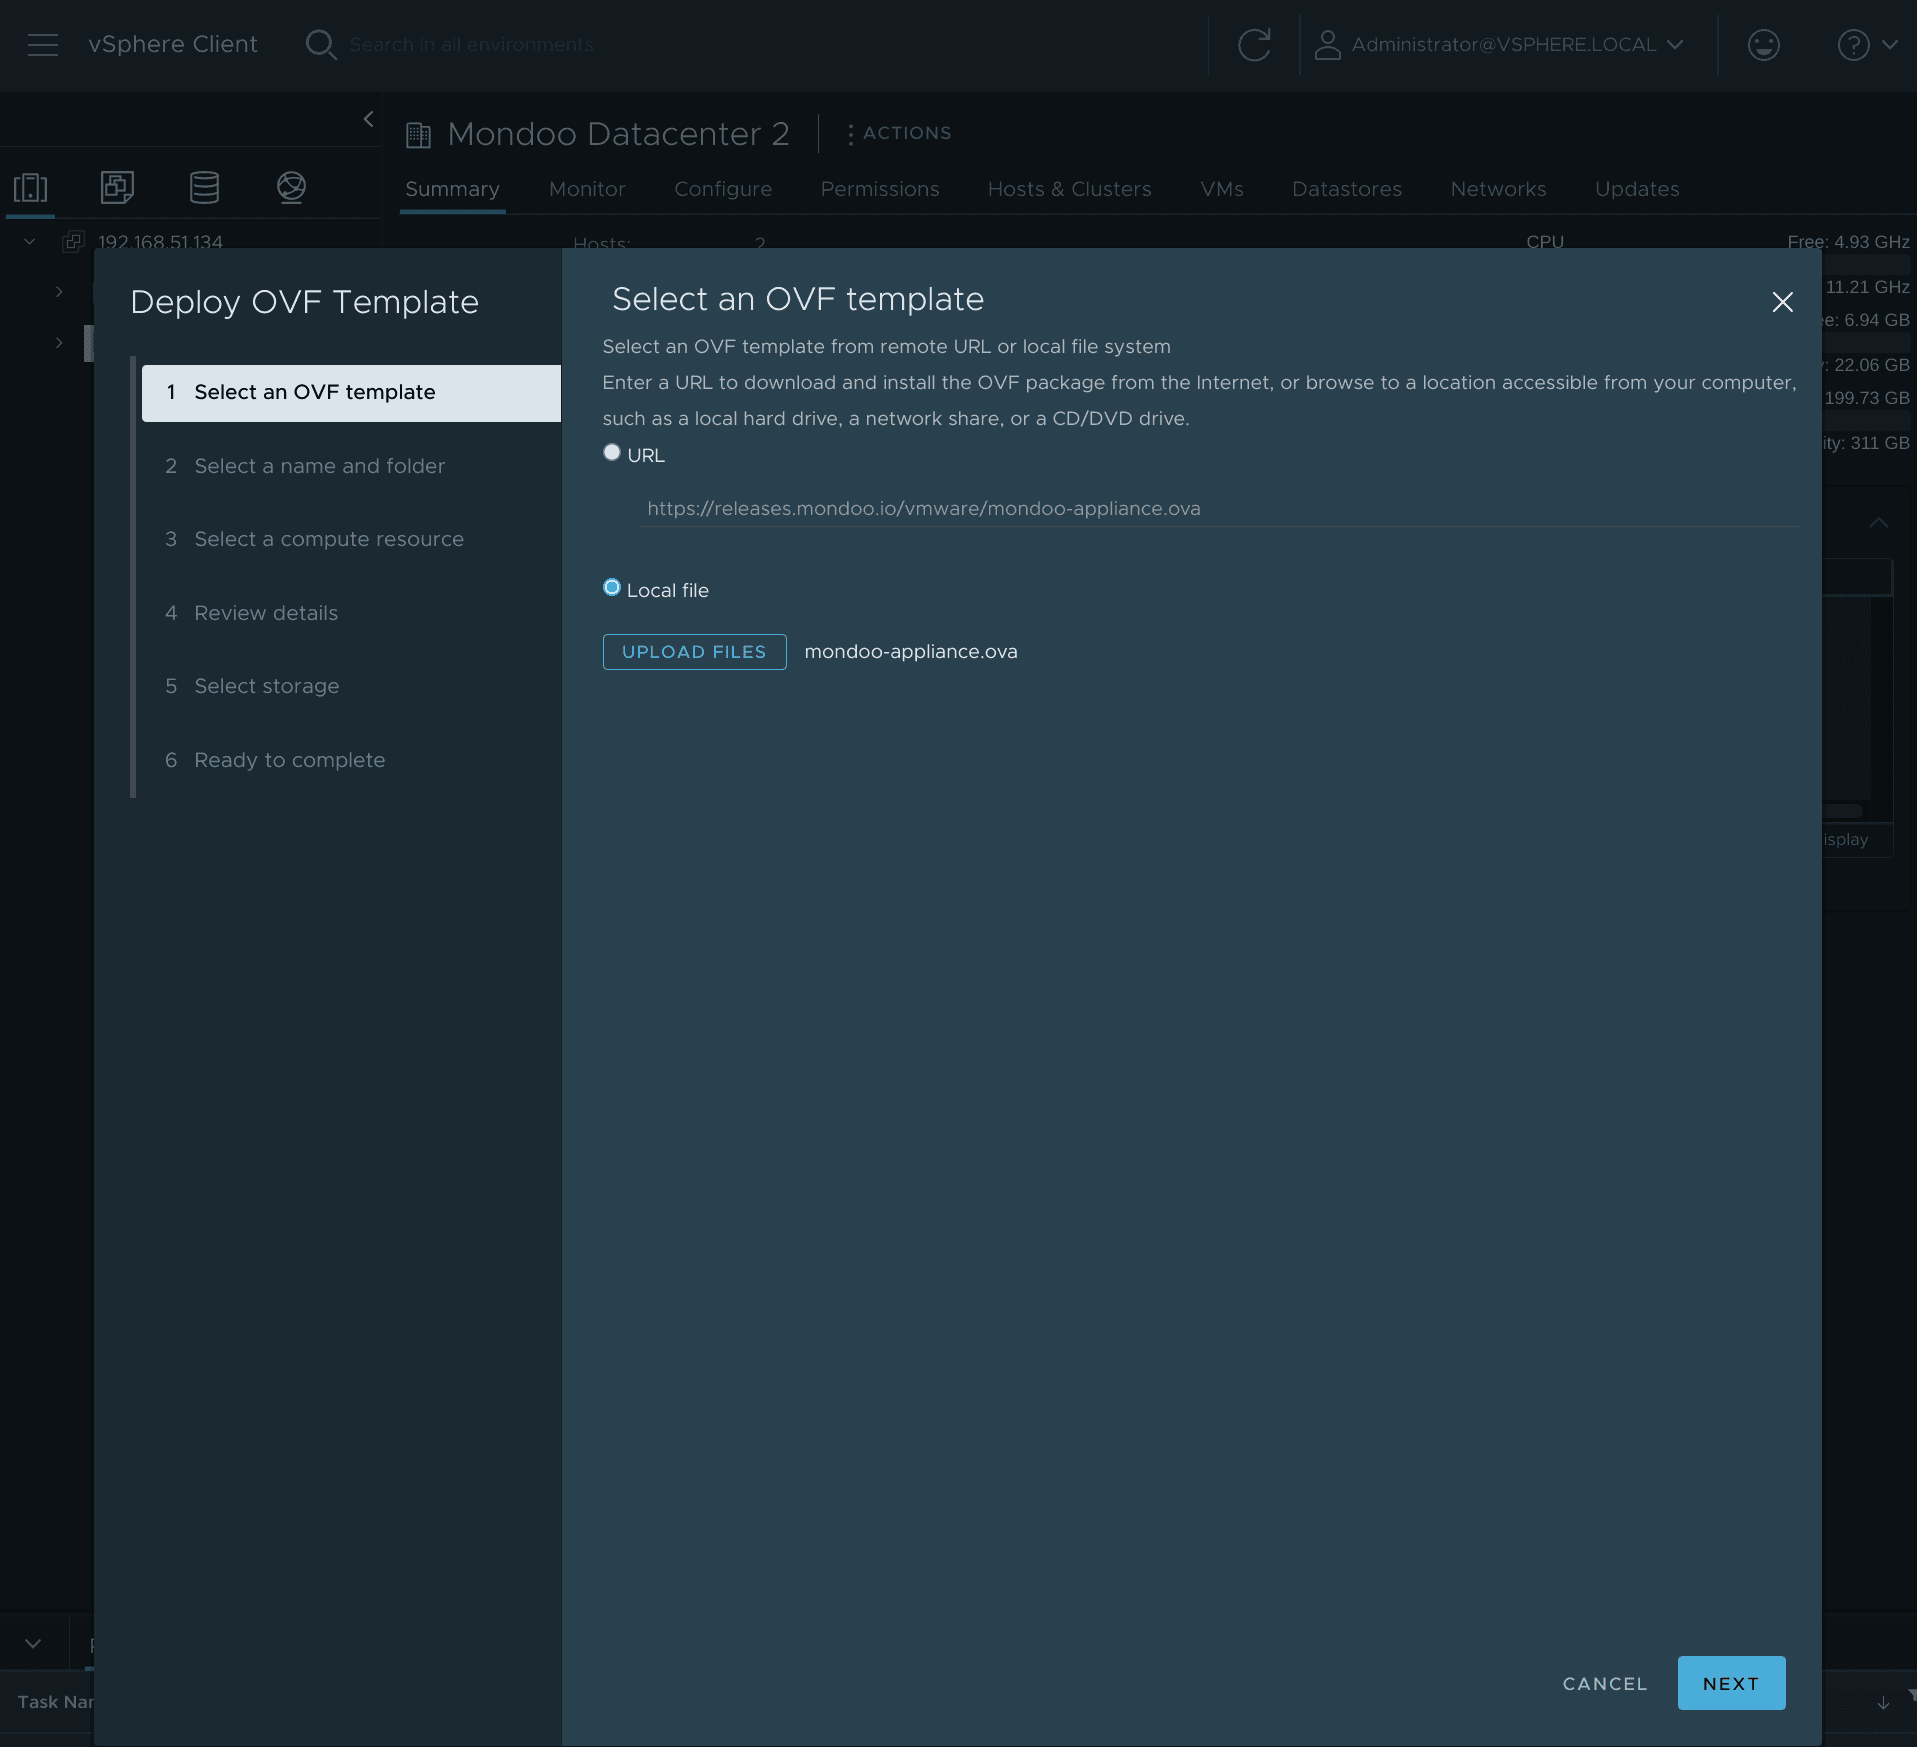
Download the Mondoo OVA image.
-
Import the Mondoo OVA image.
-
Launch the Mondoo OVA image.
Launch the appliance using the vCenter web UI
-
Right-click on your Datacenter and select Deploy OVF Template.
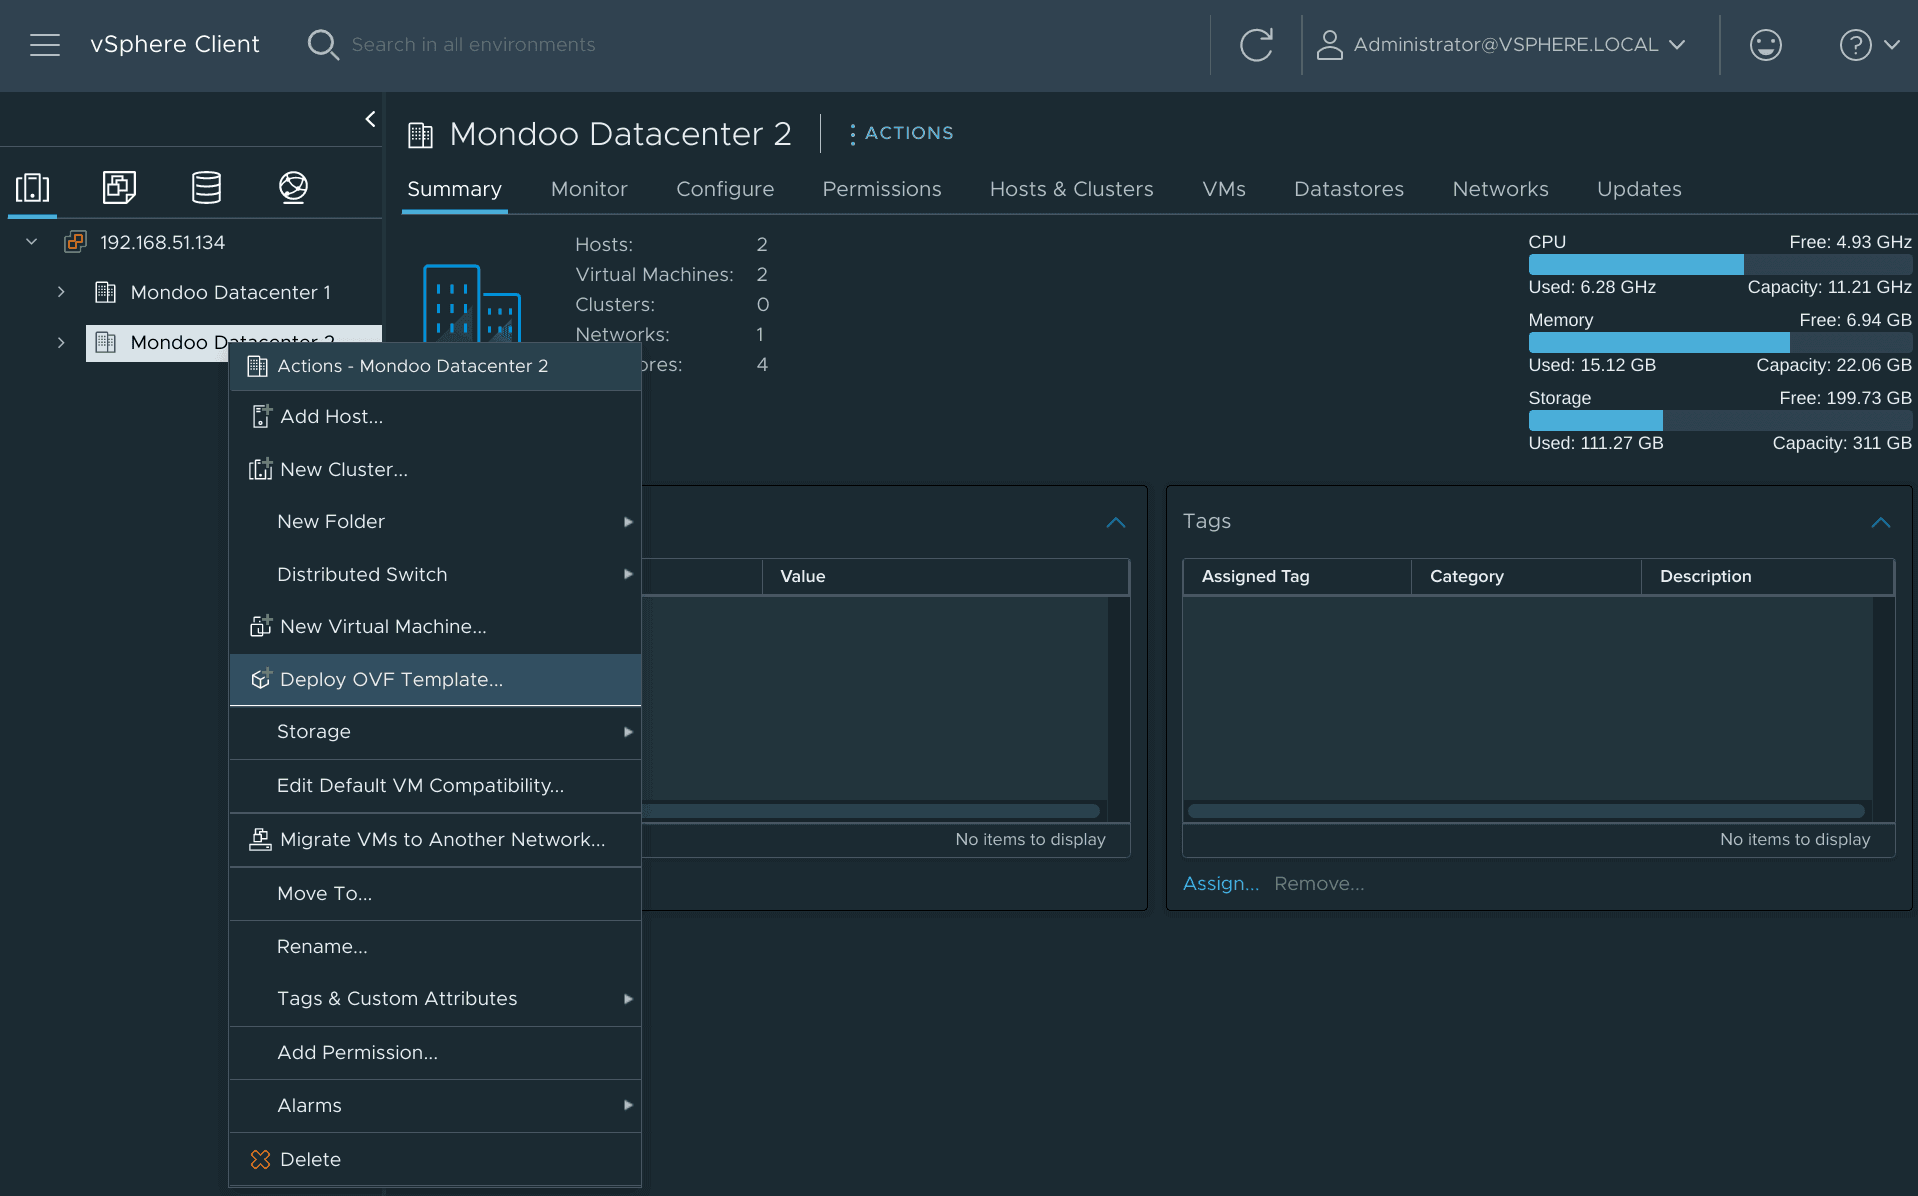
-
Select an OVF template using URL or Local file and select Next.
-
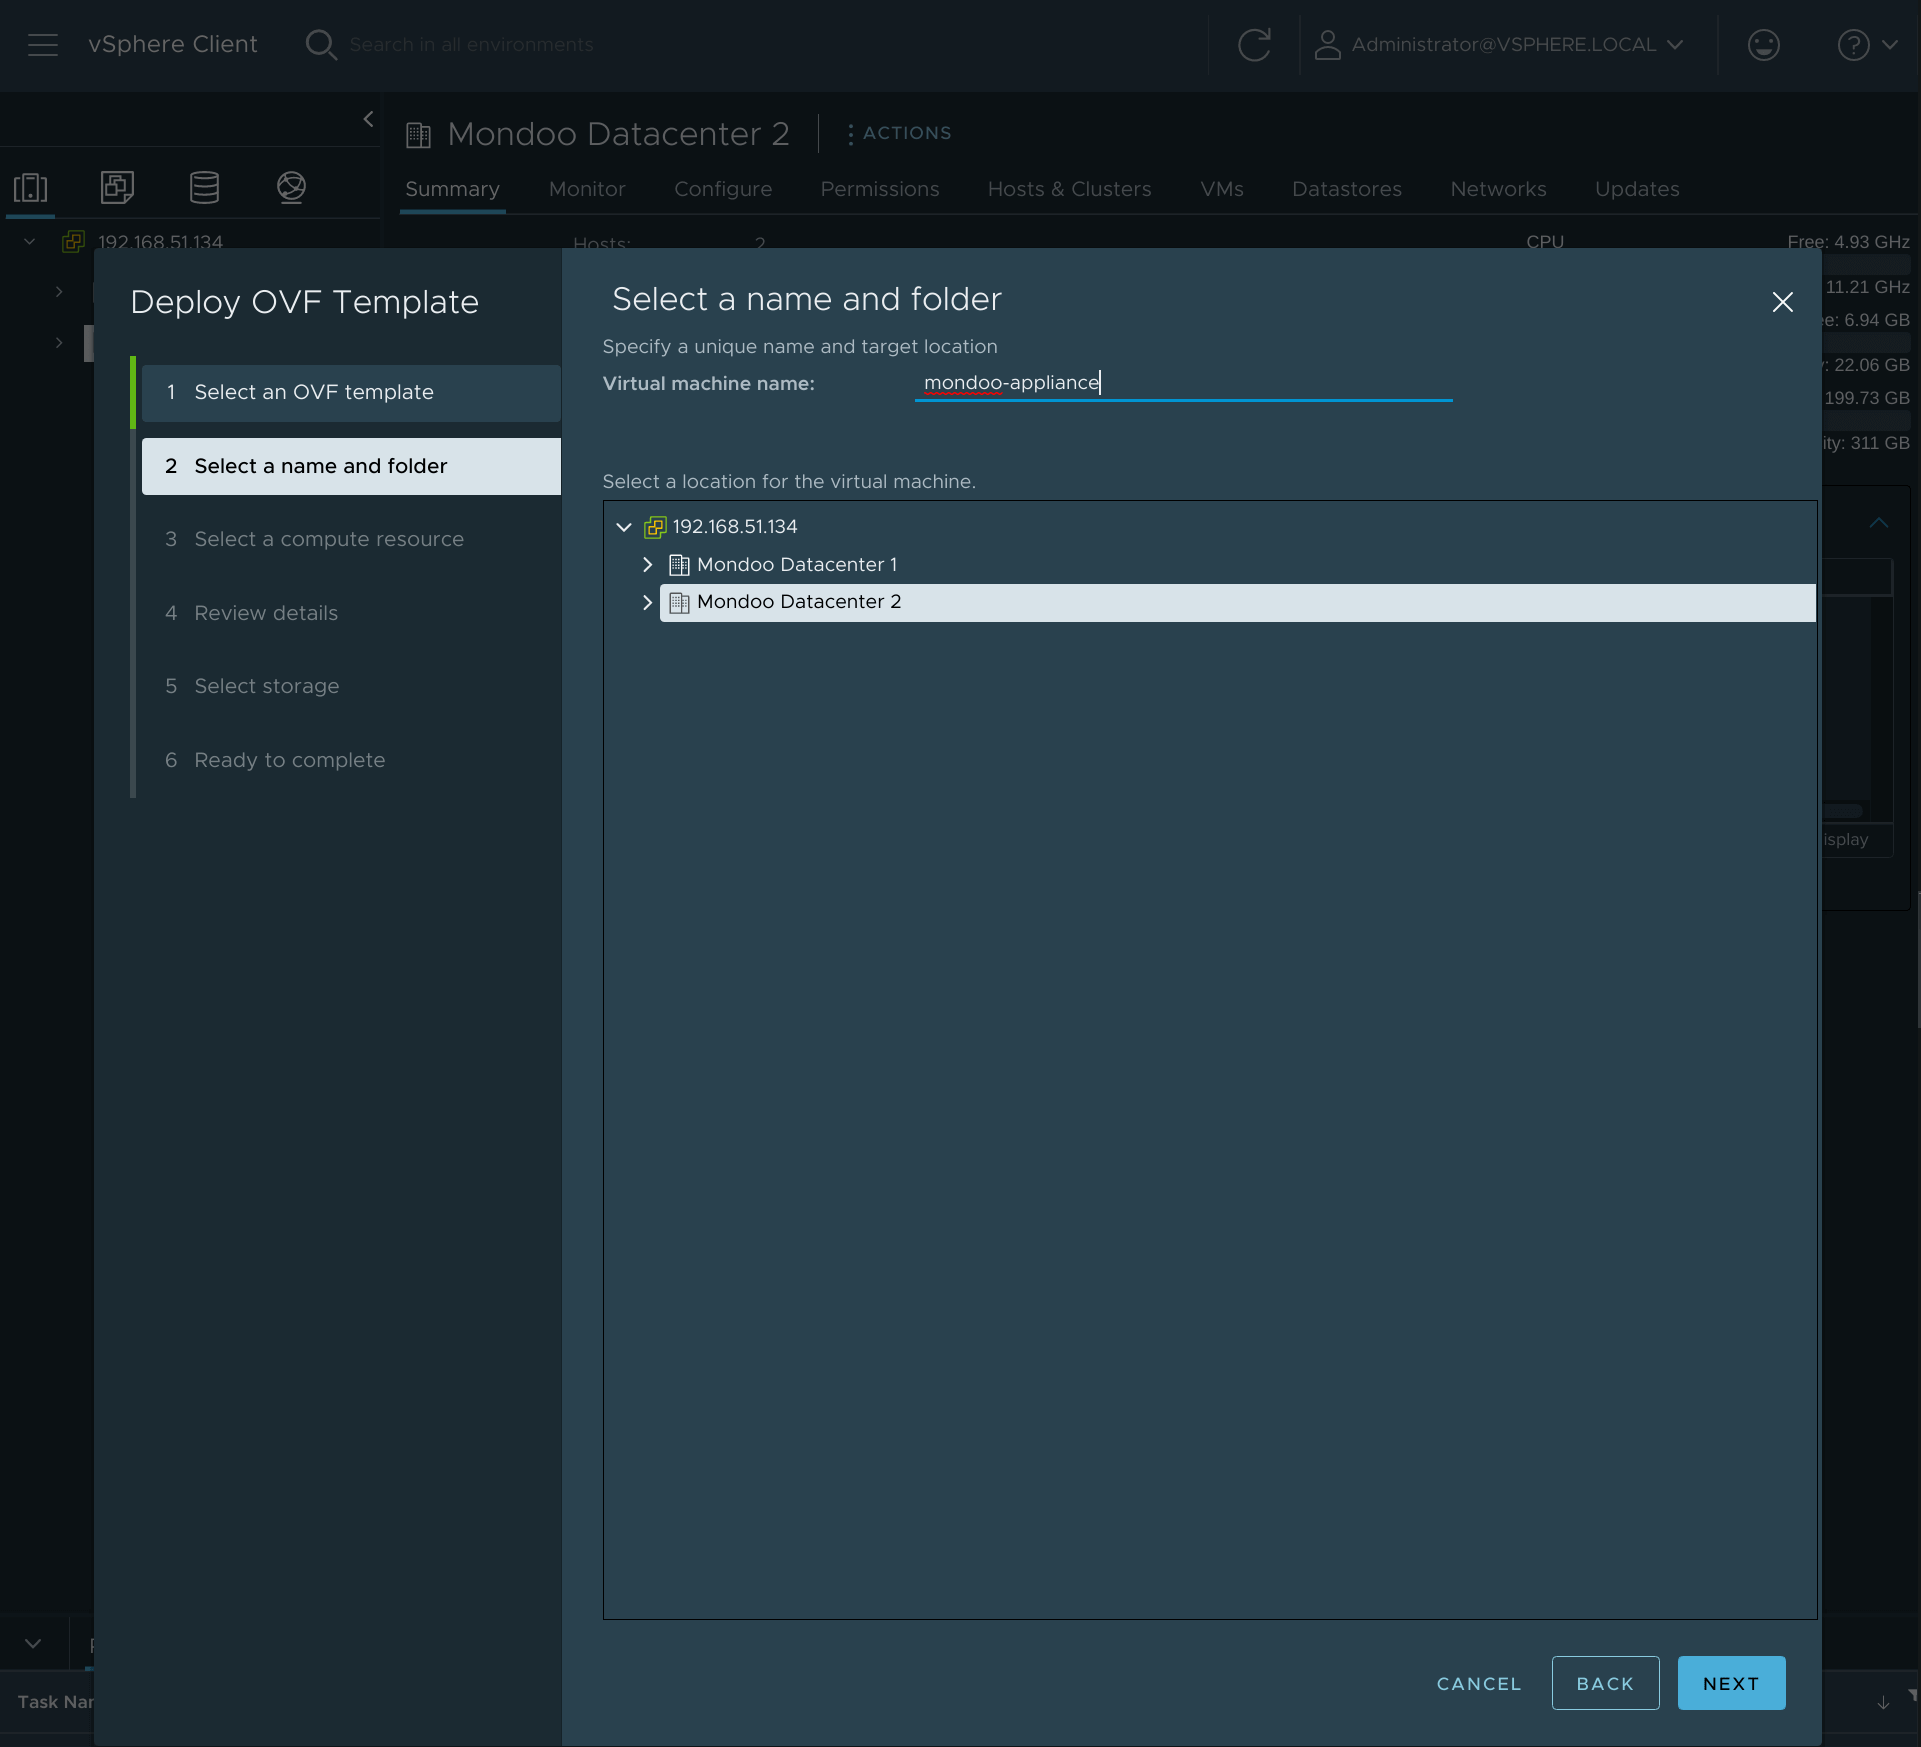
Select a name and folder where you want to deploy the Mondoo appliance and select Next.
-
Select any compute resource to run the Mondoo appliance and select Next.
-
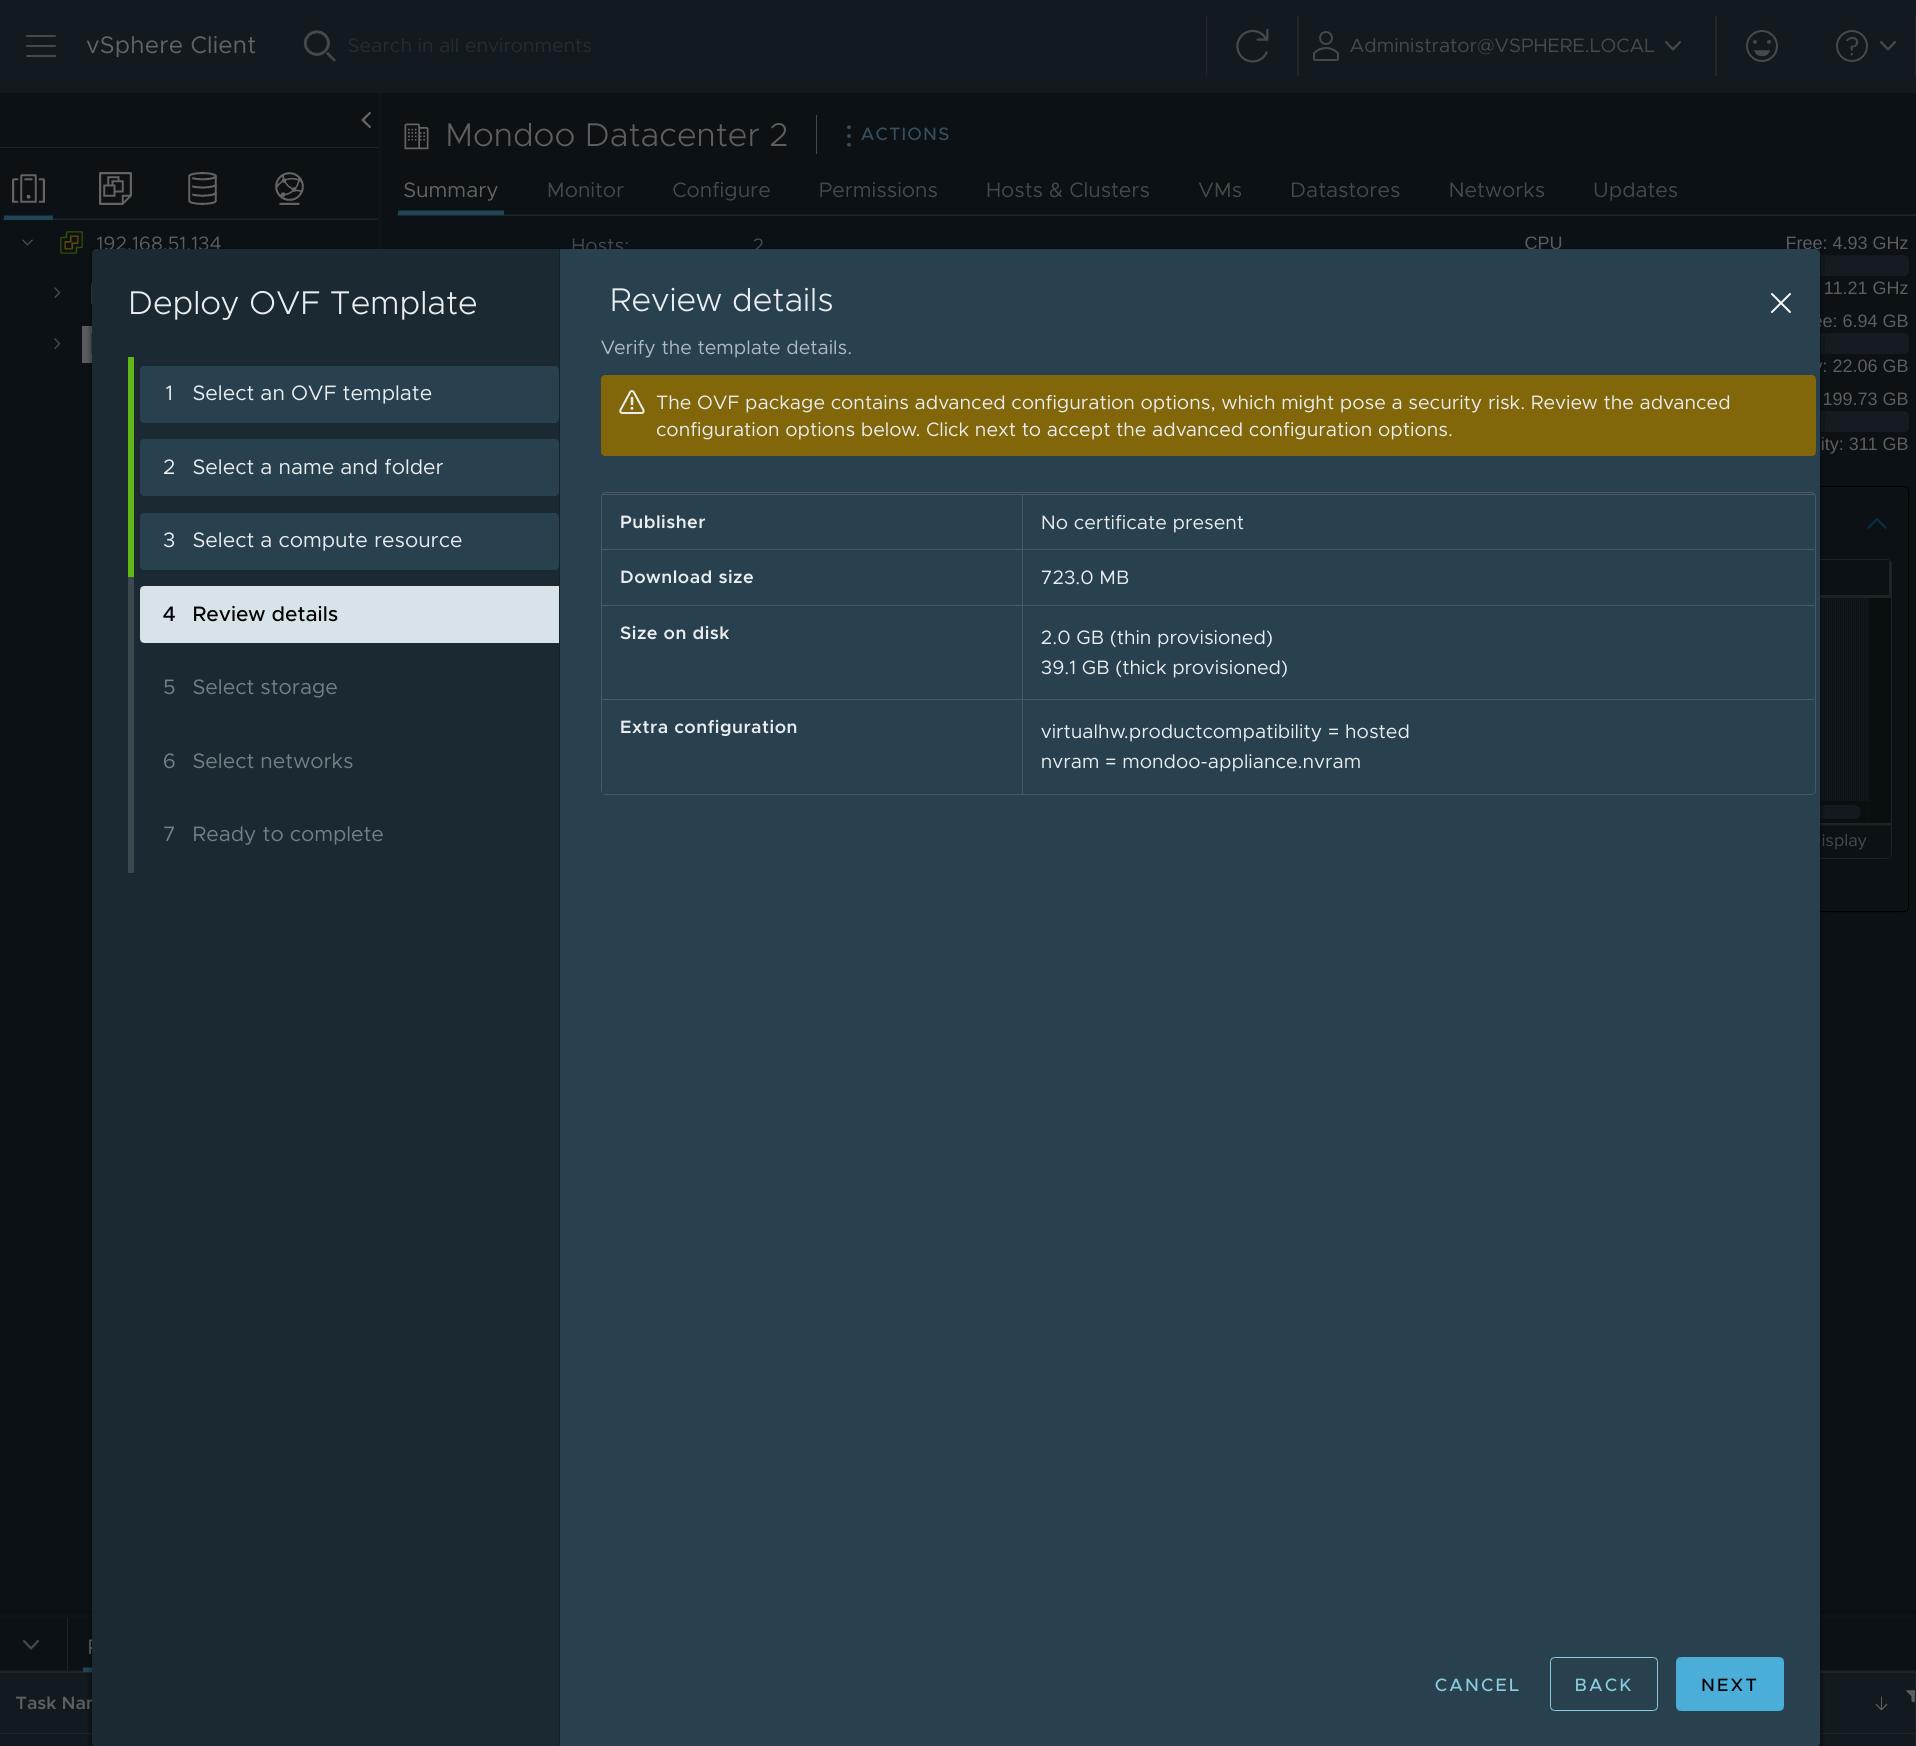
Review the details and select Next.
-
Select the appropriate storage (such as
datastore2) and select Next.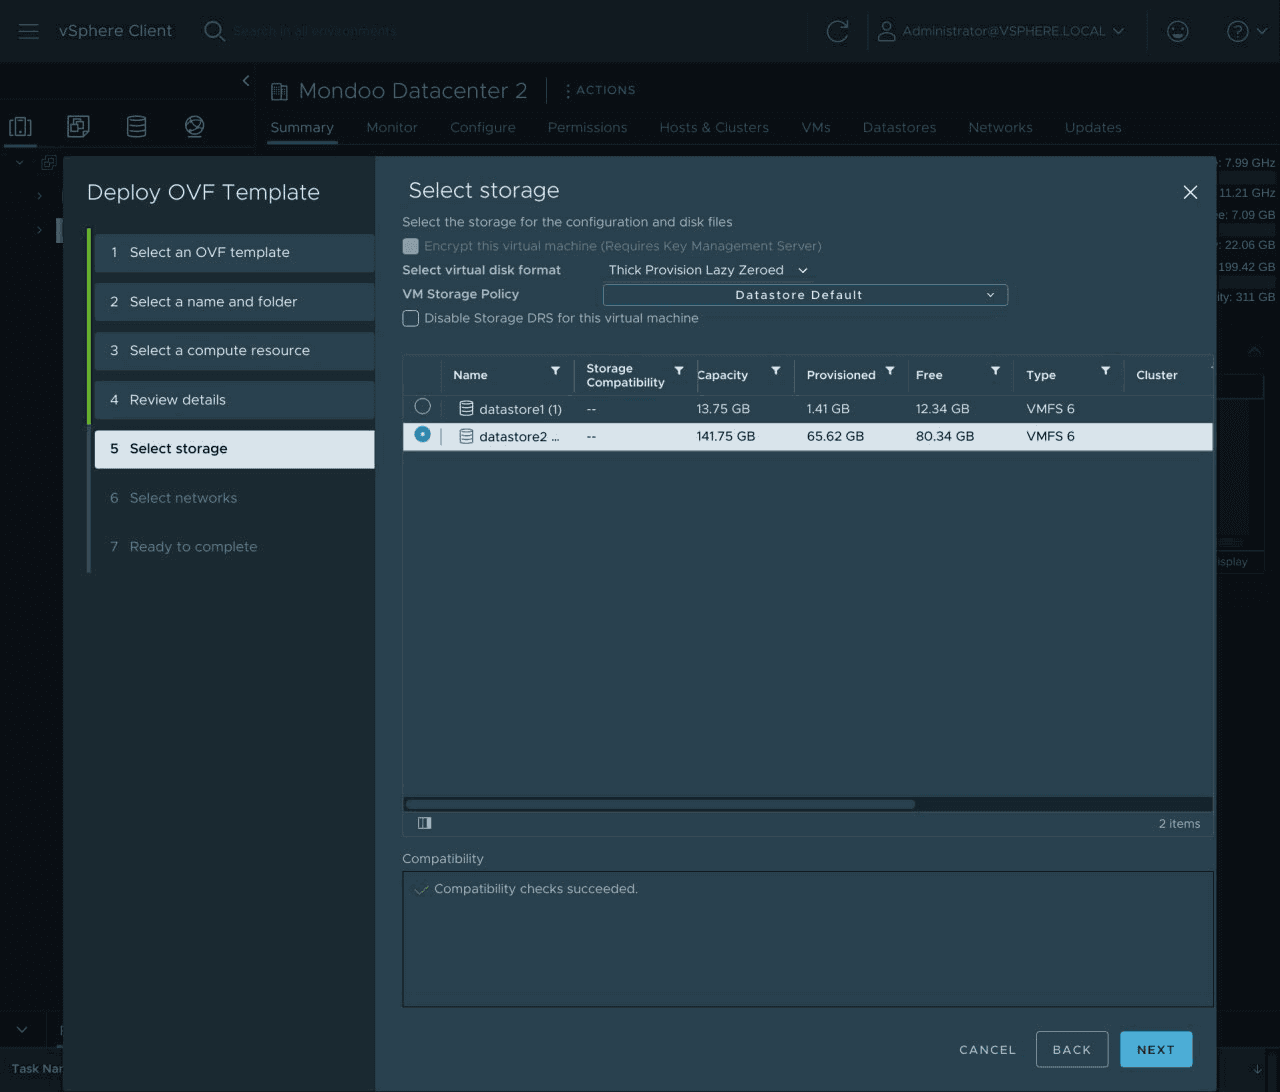
-
Select destination network (such as
VM Network) and select Next.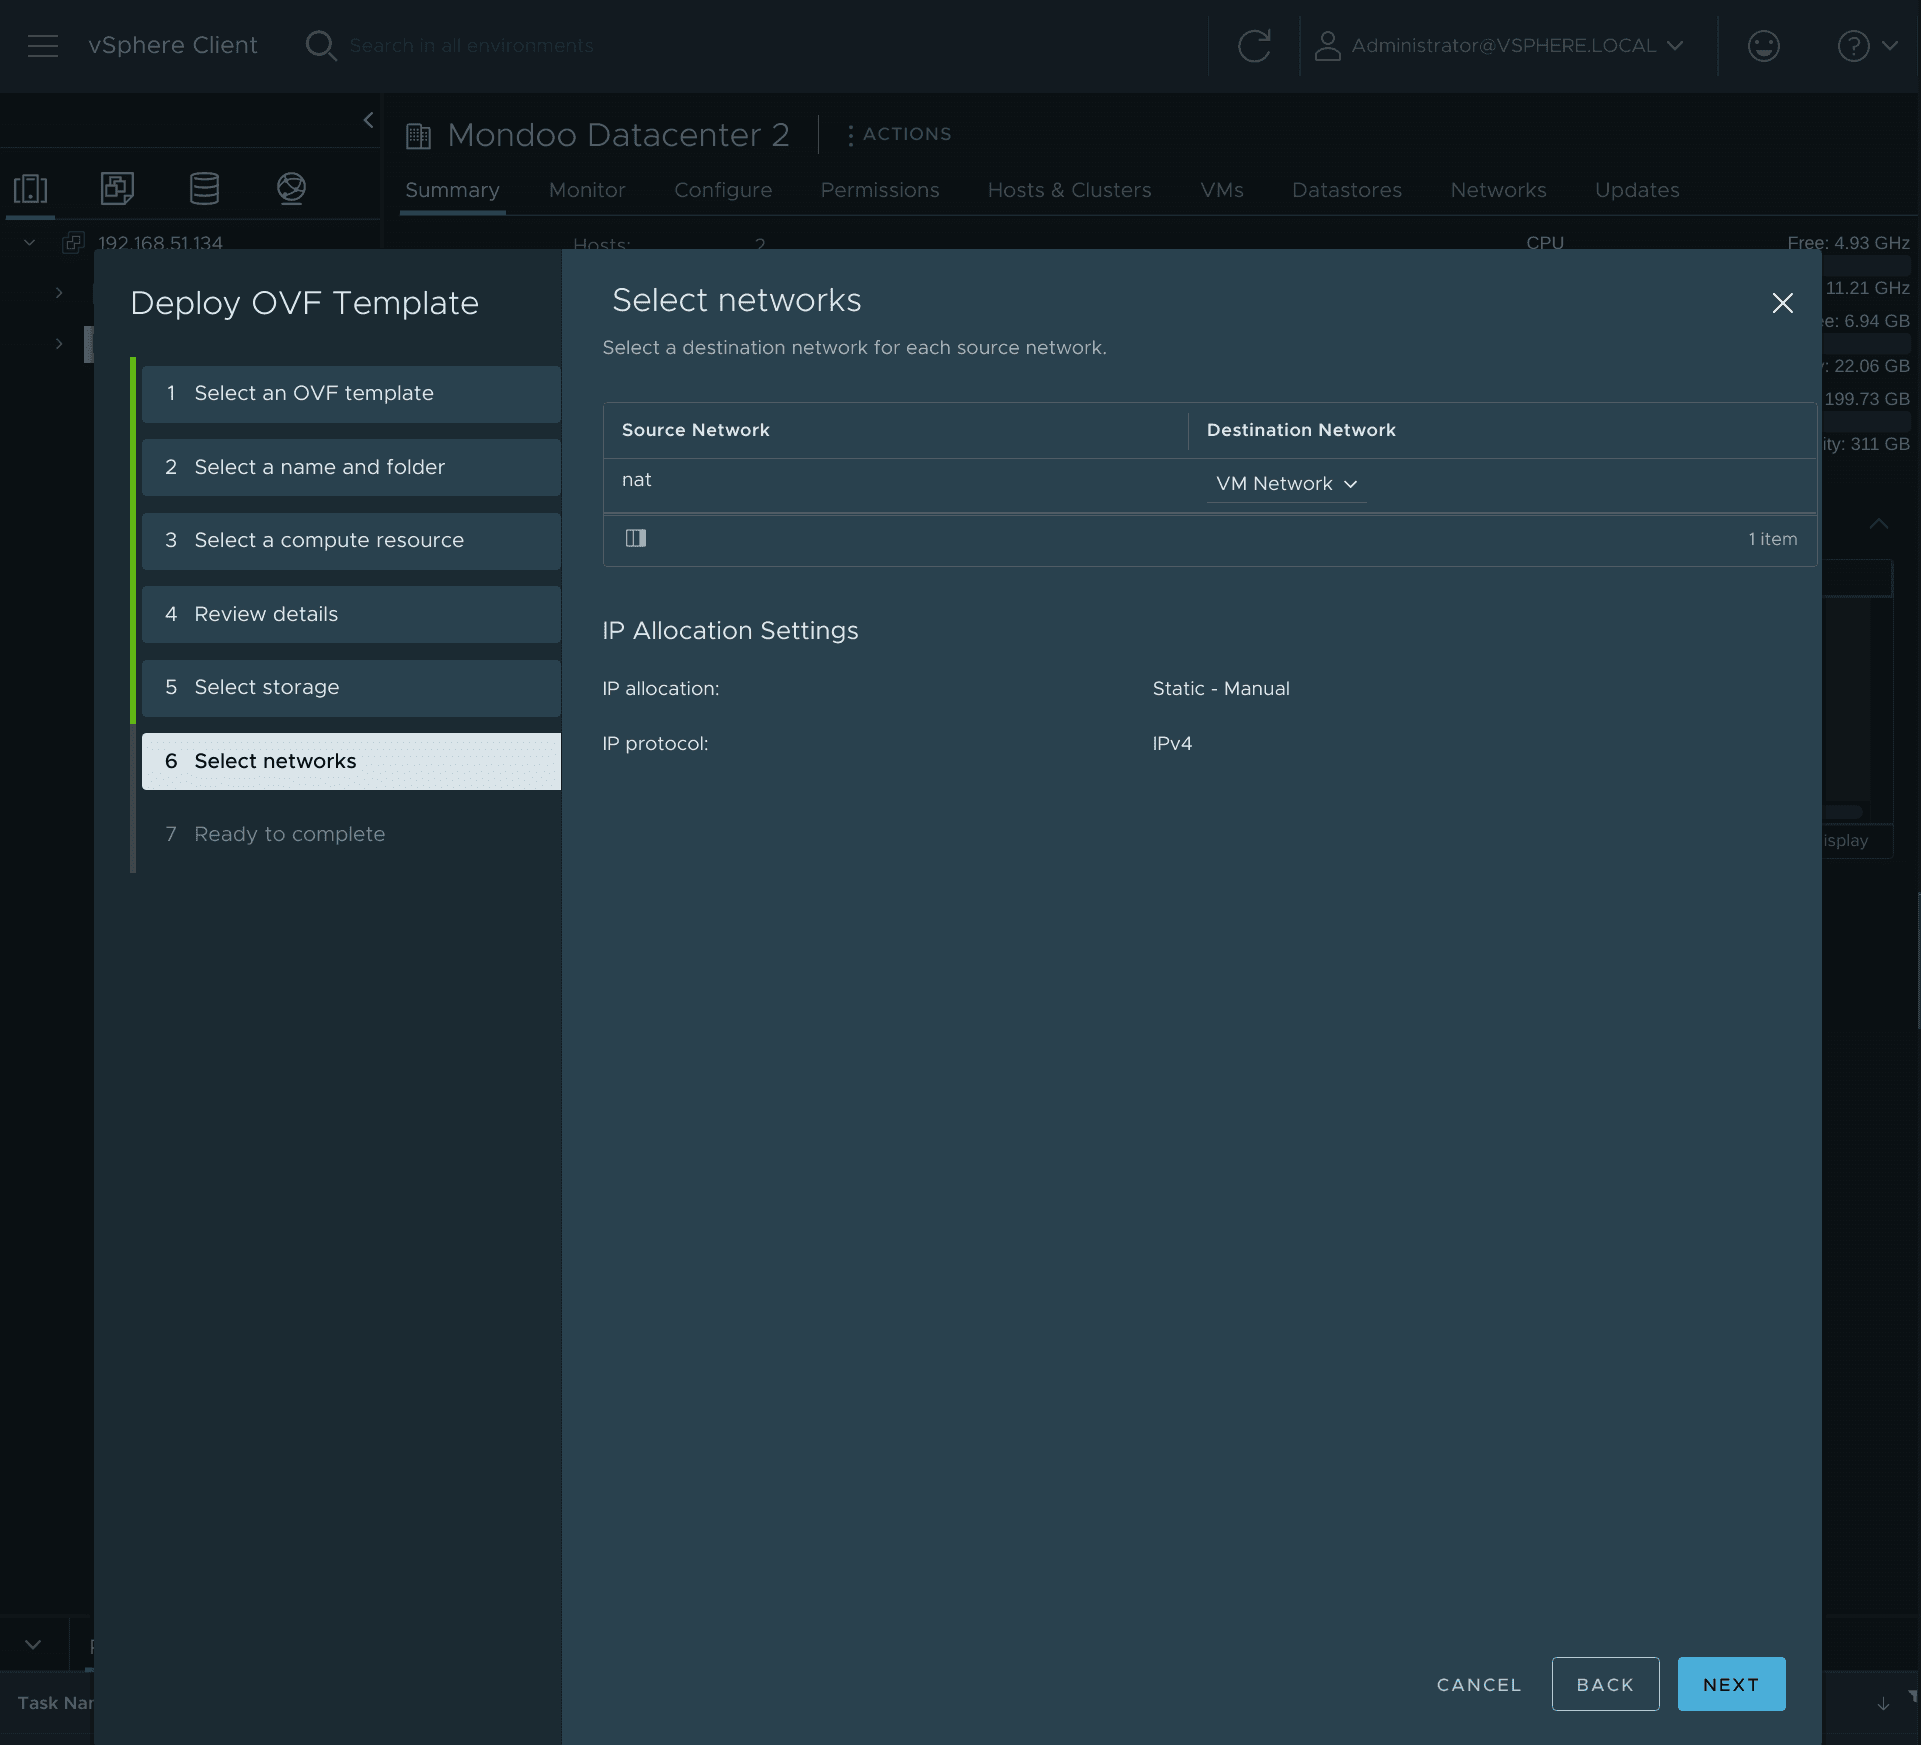
-
Review your complete configuration for the Mondoo appliance and select Next.
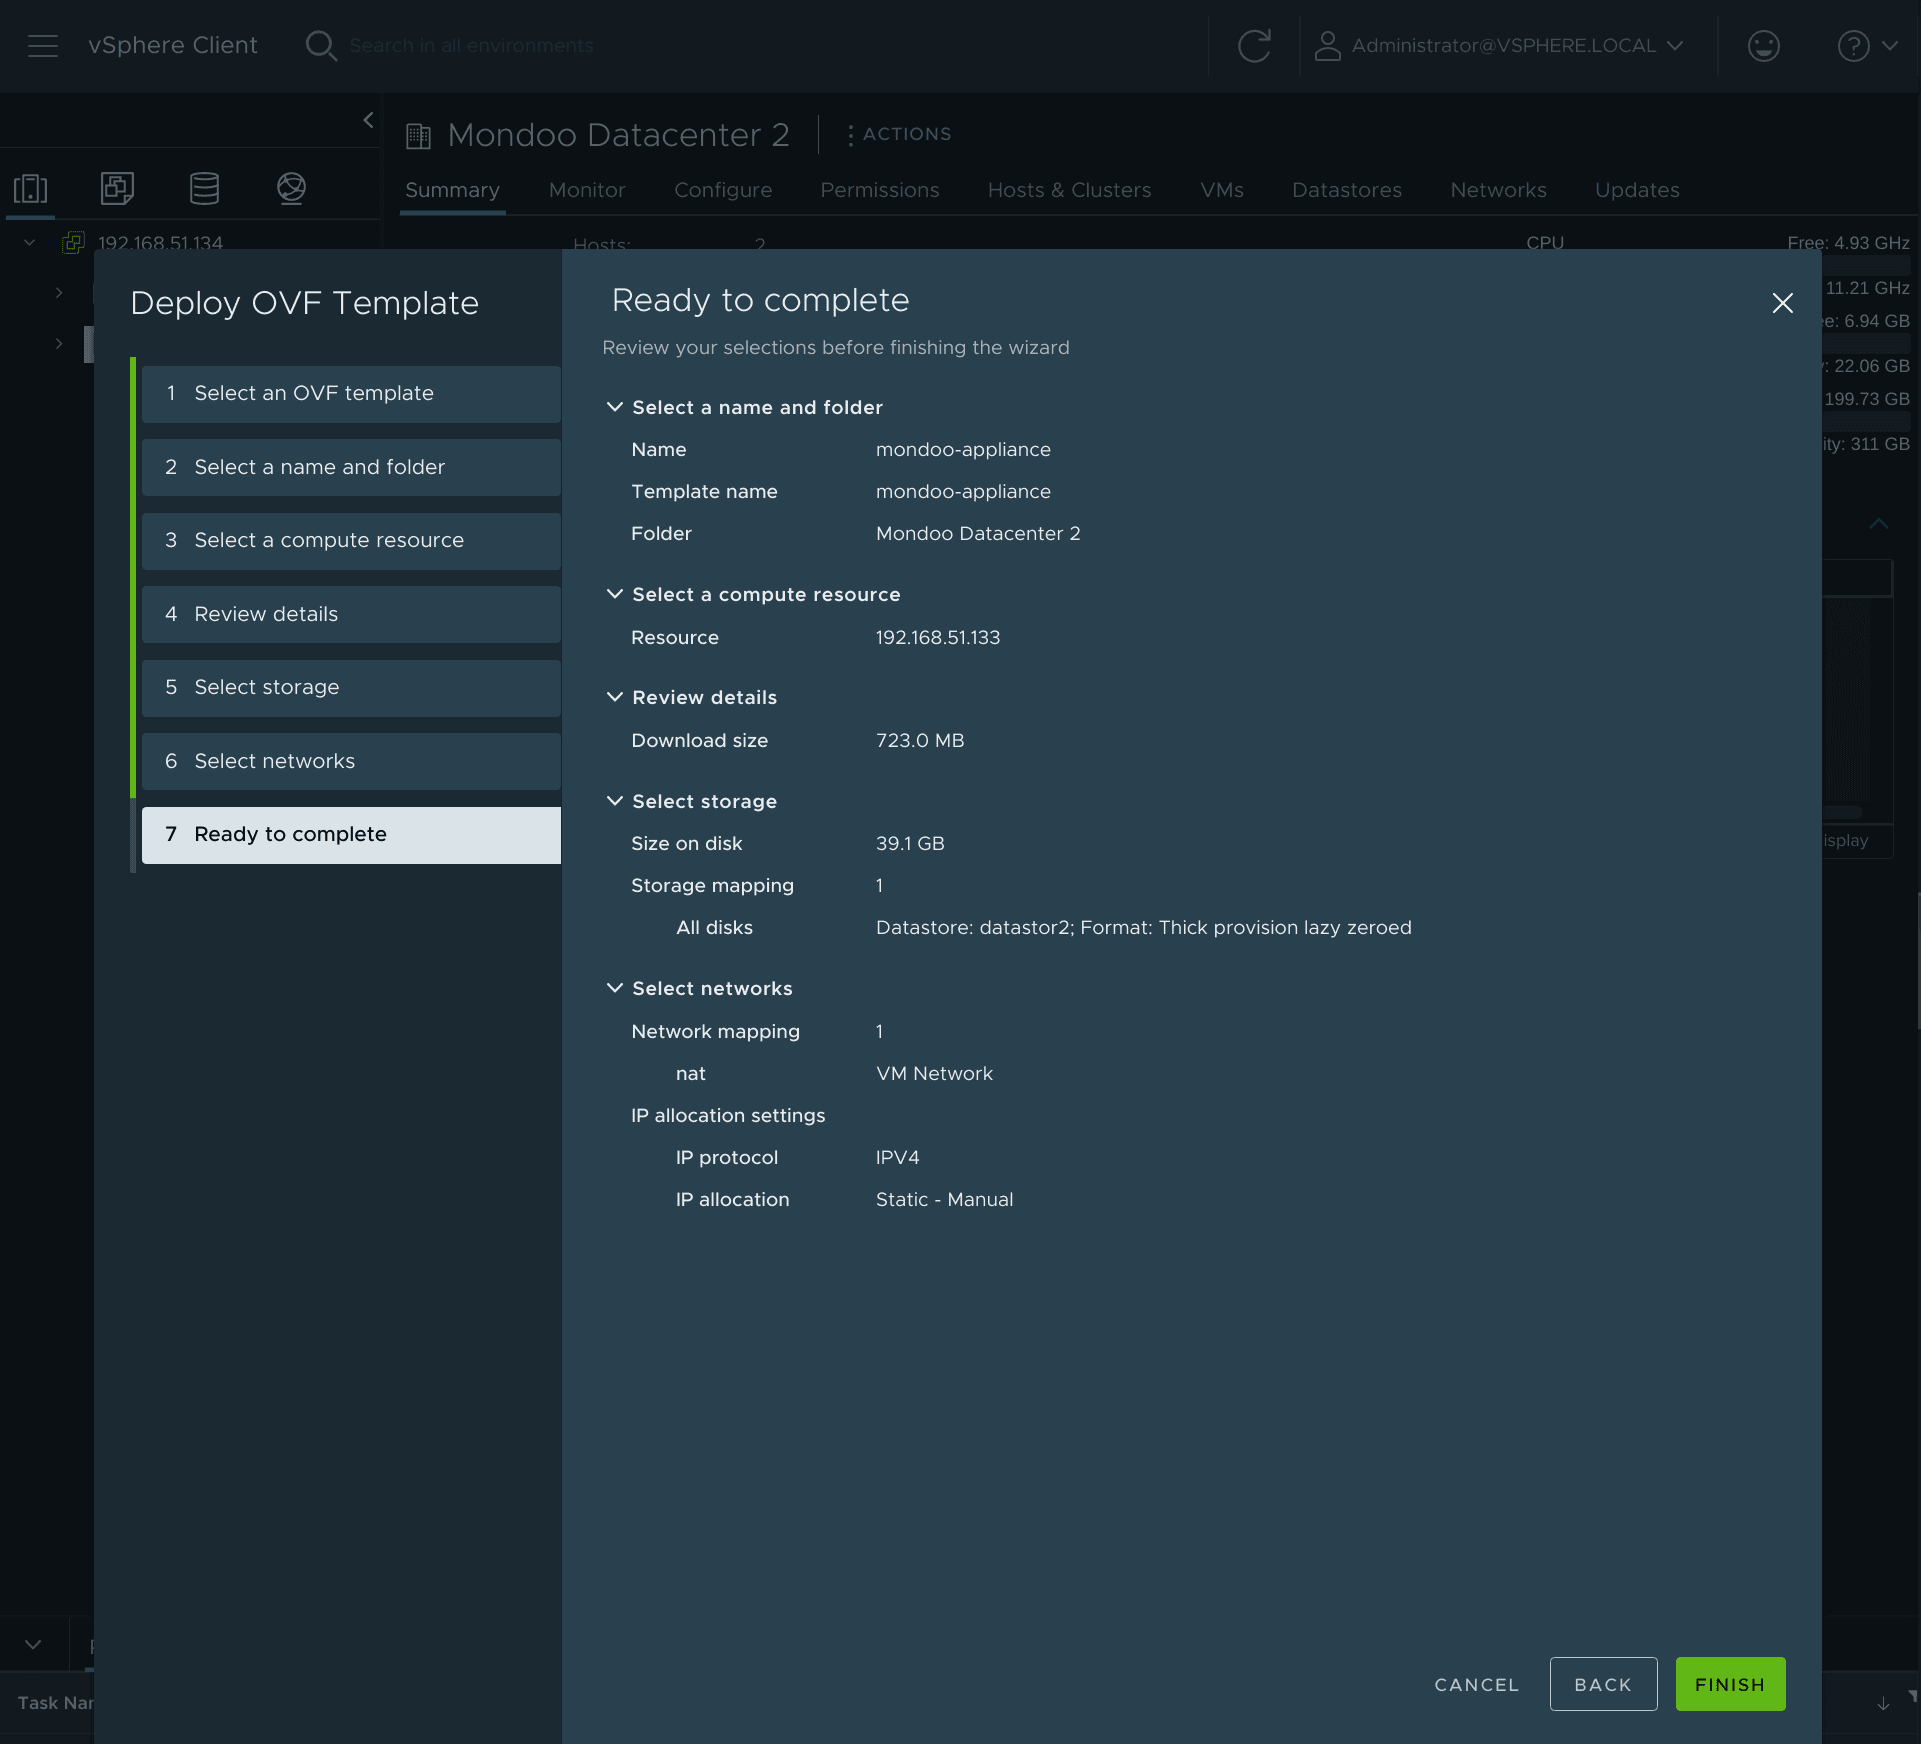
-
Launch the Mondoo appliance.
SSH for Mondoo appliance
The virtual machine comes with default credentials: username mondoo and password mondoo. You must change the password after your first login.
By default, the hardened machine disables password login. To configure the authorized_keys, add your ssh public keys to /home/mondoo/.ssh/authorized_keys.
Instead of setting /home/mondoo/.ssh/authorized_keys manually, you can configure Cloud-Init to
configure the ssh key during boot time.
If you are using GitHub, you can quickly fetch your public keys with this command: mkdir ~/.ssh && curl https://github.com/{youruser}.keys > .ssh/authorized_keys
When you log in using your ssh key, you see this welcome screen:
                        .-.
                        : :
,-.,-.,-. .--. ,-.,-. .-' : .--.  .--. ™
: ,. ,. :' .; :: ,. :' .; :' .; :' .; :
:_;:_;:_;`.__.':_;:_;`.__.'`.__.'`.__.'

Mondoo VMware Appliance

mondoo@debian:~$
Enable SSH password authentication
If you can't copy the SSH key using the curl command, you can allow SSH password authentication during deployment.
- After the SSH public keys are deployed, enable SSH password authentication by modifying these lines in
/etc/ssh/sshd_config:
AuthenticationMethods password
PasswordAuthentication yes-
Restart the sshd service using
systemctl restart sshd.service. -
Log in with your user name and password.
Configure a static IP address (optional)
If you choose, you can configure a static IP address (using a root user shell).
- In the editor of your choice, open the
/etc/network/interfacesfile and rewrite the block that defines your primary network interface. For example, this block adds the static IP192.168.1.100to the interfaceens32in a Class C private network with the network gateway and the name server both housed at192.168.1.1:
# The primary network interface
auto ens32
iface ens32 inet static
address 192.168.1.100
netmask 255.255.255.0
gateway 192.168.1.1
dns-nameservers 192.168.1.1 8.8.8.8- Make sure to comment out these lines in the file
/etc/network/interfaces.d/50-cloud-init:
#auto lo
#iface lo inet loopback

#auto ens32
#iface ens32 inet dhcp- Create the file
/etc/cloud/cloud.cfg.d/99-disable-network-config.cfgwith the following content:
network: {config: disabled}- Make sure to set the correct name server(s) in the file
/etc/resolv.conf:
nameserver 192.168.1.1
nameserver 192.168.1.2- Restart the
networkingservice:
systemctl restart networkingIf the static IP you chose is different than the current IP address of the VM, you will lose the current shell connection to the Mondoo Appliance and need to reconnect to the new, static IP address.
Configure cnspec
Mondoo's cross-platform scanning engine, cnspec, assesses your VMware. To return results to Mondoo for monitoring, reporting, and measuring improvements, you must register cnspec with Mondoo Platform.
- Enter this command:
sudo cnspec login -t <paste token here> --config /etc/opt/mondoo/mondoo.yml- Verify that cnspec is registered successfully with Mondoo Platform by running
cnspec status:
→ loaded configuration from /etc/opt/mondoo/mondoo.yml using source --config
→ Hostname:     debian
→ IP:           192.168.51.139
→ Platform:     debian
→ Release:      11.2
→ Time:         2022-05-26T15:43:59-07:00
→ Version:      6.0.0 (API Version: 6)
→ API ConnectionConfig: https://us.api.mondoo.com
→ API Status:   SERVING
→ API Time:     2022-05-26T22:44:00Z
→ API Version:  6
→ Space:        //captain.api.mondoo.app/spaces/relaxed-poincare-384428
→ Client:       //agents.api.mondoo.app/spaces/relaxed-poincare-384428/agents/22vUq9U0gN9Uoy2c3UqCaKARSEg
→ Service Account:      //agents.api.mondoo.app/spaces/relaxed-poincare-384428/serviceaccounts/22y0WDmHloyEvdJEteV5cEvsQTj
→ client is registered
→ client authenticated successfully-
Test that cnspec can reach the vSphere API. The command below runs the two default Mondoo policies:
- The
Platform End-of-Life Policy - The
Platform Vulnerability Policy
As their names suggest, they scan the vSphere and determine if it has reached its end-of-life and if there are any known vulnerabilities.
Use the
--incognitoswitch to disable sending the results to the Mondoo Console. - The
# vSphere 6.x / 7.x
cnspec scan vsphere mondoo-read@vsphere.local@host --ask-pass-
Activate the policies against which Mondoo assesses your VMware.
To learn more, read Manage Policies.
A good place to start scanning is the VMware vSphere ESXi Security Baseline by Mondoo policy.
- Now, with the policy of your choice activated, scan again:
cnspec scan vsphere mondoo-read@vsphere.local@host --ask-passBecause you did not pass the --incognito switch, the command output includes a link to the Mondoo Console, where you can review the scan results.
Set up cnspec inventory
cnspec can use an inventory file to scan multiple VMware assets at the same time. An inventory is a list of systems with their connection types and accounts.
cnspec inventory with embedded secrets
This inventory.yml illustrates the configuration for the vCenter connection:
apiVersion: v1
kind: Inventory
metadata:
  name: cnspec-inventory
  labels:
    environment: production
spec:
  assets:
    - name:
      connections:
        - type: vsphere
          host: < ip of the ESXi or vCenter >
          insecure: true
          credentials:
            - type: password
              user: < username >
              password: < password >
          discover:
            targets:
- host-machines-
Using a user account with
rootprivileges, store the content in/etc/opt/mondoo/inventory.ymlto ensure that cnspec picks up the inventory automatically. -
Test that the
inventory.ymlis working:
mondoo@debian:~$ sudo cnspec scan --inventory-file /etc/opt/mondoo/inventory.yml
→ load inventory inventory=/etc/opt/mondoo/inventory.yml
→ cnspec 7.15.1 (Space: "//captain.api.mondoo.app/spaces/relaxed-poincare-384428", Service Account: "22y0WDmHloyEvdJEteV5cEvsQTj", Managed Client: "22vUq9U0gN9Uoy2c3UqCaKARSEg")
→ loaded configuration from /etc/opt/mondoo/mondoo.yml using source --config

→ discover related assets for 1 asset(s)
→ resolved assets resolved-assets=4
→ execute policies
→ synchronize asset found=4
→ establish connection to asset 192.168.51.134 (VMware vCenter Server) (api)
→ established connection
→ run policies for asset asset=//assets.api.mondoo.app/spaces/relaxed-poincare-384428/assets/22y2gEXiZrRagoV5cPbVFjj0MSI
...- Restart the service, so that the new inventory is loaded:
sudo systemctl restart cnspec- Check if the
inventory.ymlis loaded:
sudo journalctl -u cnspec.service-- Journal begins at Wed 2021-12-29 16:03:27 UTC, ends at Wed 2021-12-29 16:39:28 UTC. --
Dec 29 16:38:04 debian systemd[1]: Started cnspec Service.
Dec 29 16:38:05 debian cnspec[1294]: → load inventory inventory=/etc/opt/mondoo/inventory.yml
Dec 29 16:38:05 debian cnspec[1294]: → cnspec 7.15.1 (Space: "//captain.api.mondoo.app/spaces/relaxed-poincare-384428", Service Account>
Dec 29 16:38:05 debian cnspec[1294]: → loaded configuration from /etc/opt/mondoo/mondoo.yml using source --config
Dec 29 16:38:06 debian cnspec[1294]: → start cnspec background service- Enable the service so that after the VM restarts, the service starts automatically:
sudo systemctl enable cnspeccnspec inventory YAML with encrypted file vault
- Configure cnspec's vault to use the encrypted file vault. Execute the following commands as
mondoouser (not asrootuser). Run this command to create the vault configuration:
cnspec vault configure mondoo-client-vault --type encrypted-file --option=password='changeme' --option path='/etc/opt/mondoo/vault.enc'
→ add the following vault configuration to your inventory file
spec:
  vault:
    name: mondoo-client-vault
    options:
      password: changeme
      path: /etc/opt/mondoo/vault.enc
type: encrypted-file- Adjust the
/etc/opt/mondoo/inventory.ymlwith the proposed configuration to use the encrypted file vault functionality:
apiVersion: v1
kind: Inventory
metadata:
  name: cnspec-inventory
  labels:
    environment: production
spec:
  assets:
    - name:
      connections:
        - type: vsphere
          host: 192.168.51.134
          insecure: true
          credentials:
            - secret_id: vcenter
          discover:
            targets:
              - host-machines
  vault:
    name: mondoo-client-vault
    options:
      password: changeme
      path: /etc/opt/mondoo/vault.enc
type: encrypted-file- To store the vSphere login credentials into the encrypted file vault, execute the following command:
cnspec vault add-secret vcenter '{ "type": "password", "user": "chris@vsphere.local", "password": "password" }' --inventory-file /etc/opt/mondoo/inventory.yml- Scan the vSphere using the encrypted file vault:
# Note that you need to run this as root user, as the vault is stored in /etc/opt/mondoo/vault.enc
sudo cnspec scan --inventory-file /etc/opt/mondoo/inventory.yml- Once you have verified that the encrypted file vault is working, restart the cnspec service:
systemctl restart cnspecScan vSphere and ESXi using cnspec
Scan vSphere API, ESXi, and VMs:
cnspec scan vsphere mondoo-read@vsphere.local@192.168.51.134 --ask-pass --discover autoThe --discover auto option automatically discovers all ESXi hosts and the vCenter.
Scan vSphere API, ESXi, and VMs and automatically discover all ESXi hosts and VMs:
cnspec scan vsphere mondoo-read@vsphere.local@192.168.51.134 --ask-pass --discover all