Set Exceptions on Checks
Exceptions let you customize how Mondoo evaluates your compliance with a framework and communicate the reasons for that customization.
Exceptions tell Mondoo to exclude certain checks when calculating your progress toward full compliance. There are two types of exceptions for checks:
-
Risk Acceptance: Temporarily exclude check results from your overall compliance progress percentage. Risk acceptance is useful when you intend to comply with a control eventually but don't want it distracting your team right now. You can write a note justifying the delay to your team and your auditor.
-
Disable Permanently exclude a check from your compliance score and explain this exclusion to team. A control remains disabled unless you re-enable it.
When you set an exception on a check, you set that exception for the entire space. A check exception applies to the policy containing the check and impacts all compliance frameworks that use the check.
To learn about frameworks, policies, controls, and checks, read Enable Compliance Frameworks.
You can also set exceptions for an entire control in a Framework. To learn more, read Set Exceptions on Controls.
Set exceptions for a check
Only team members with Editor or Owner access can perform this task.
-
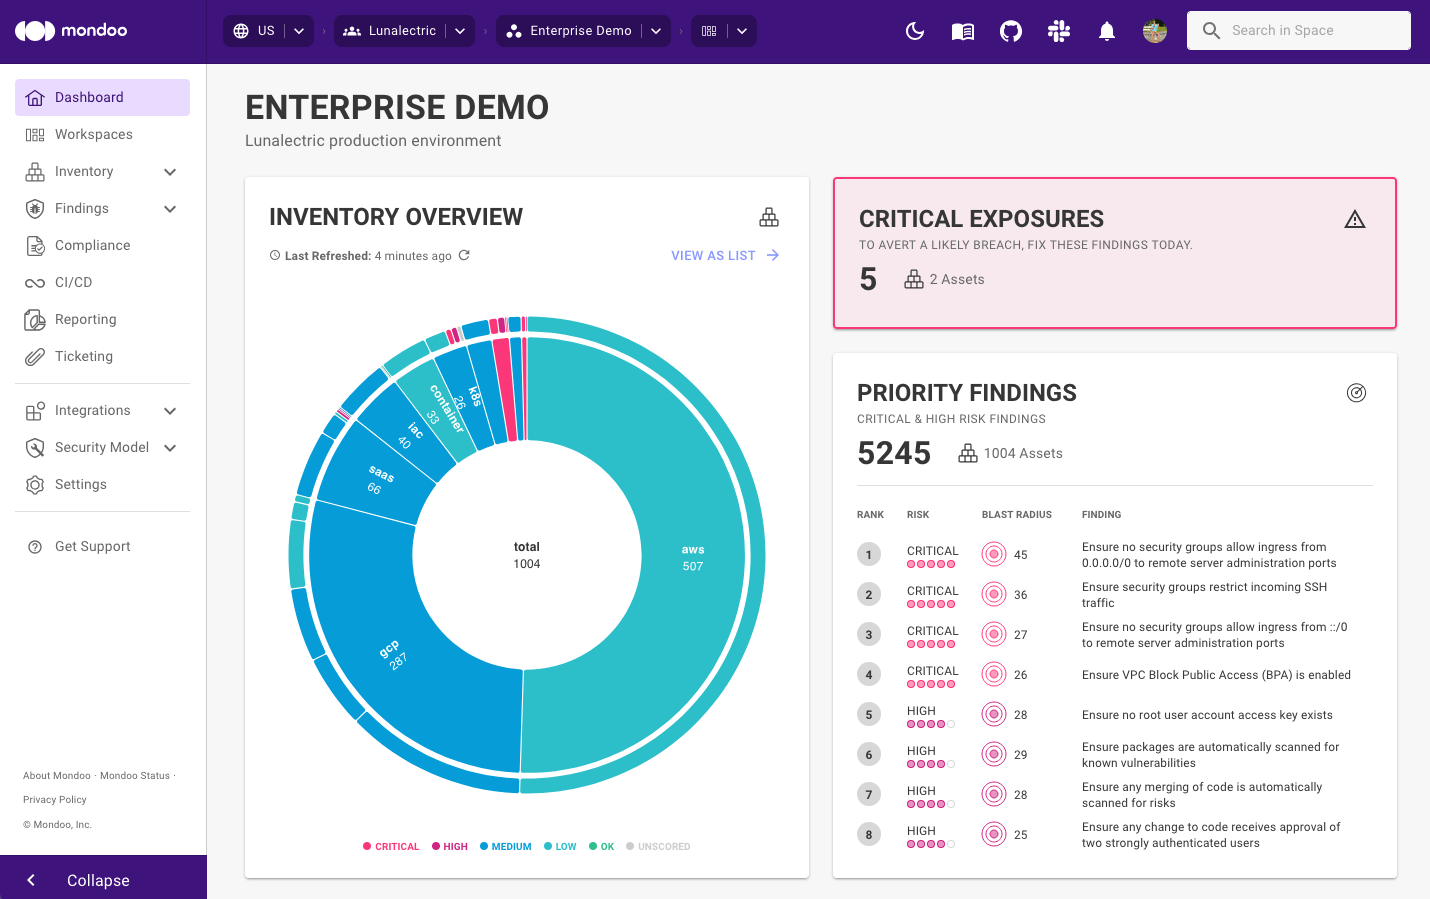
In the Mondoo Console, navigate to the space you want to customize.
-
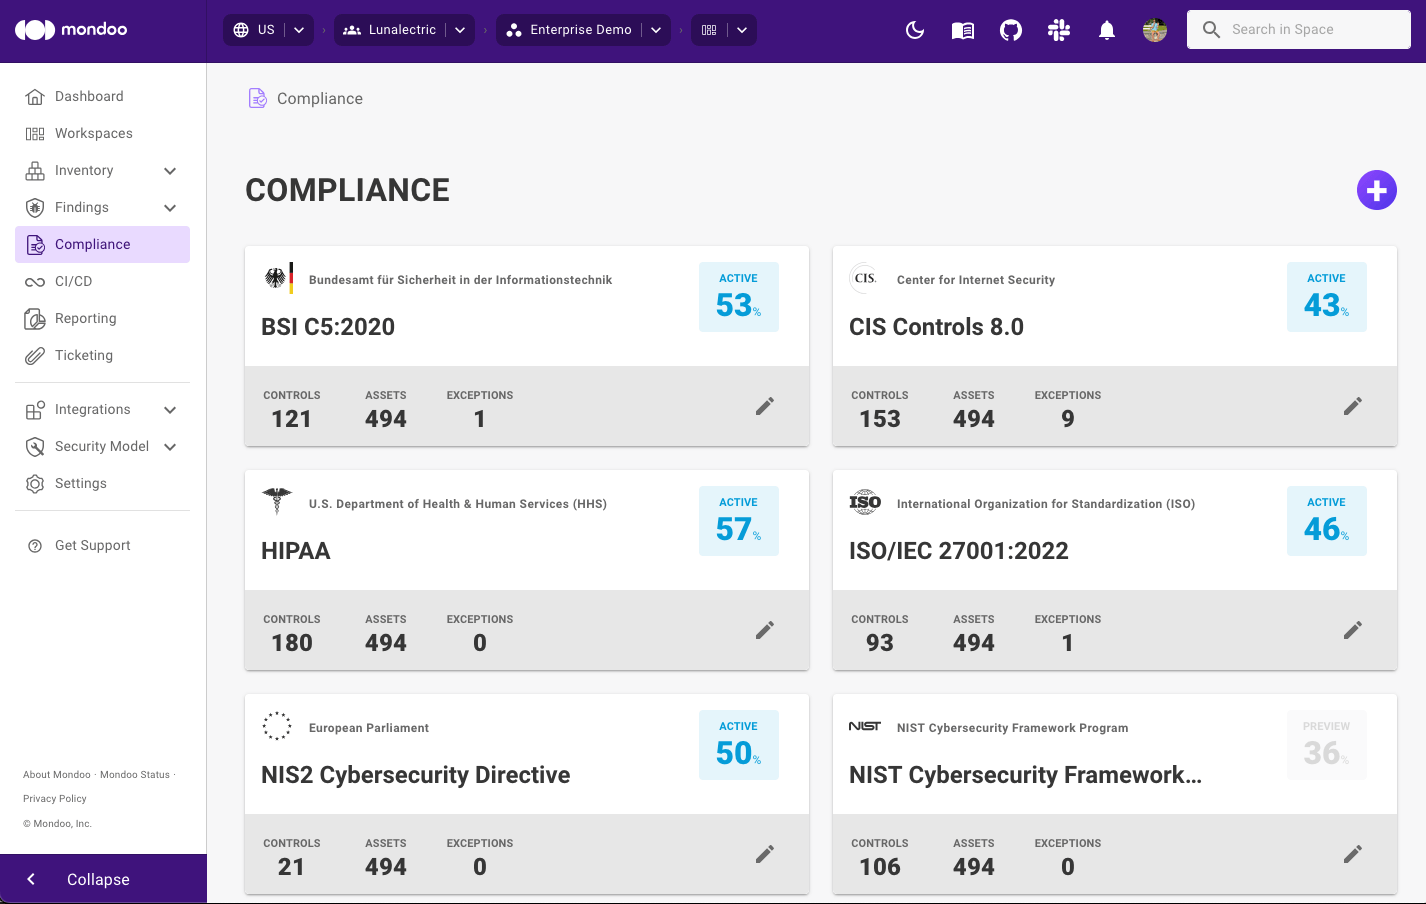
In the side navigation bar, select Compliance
-
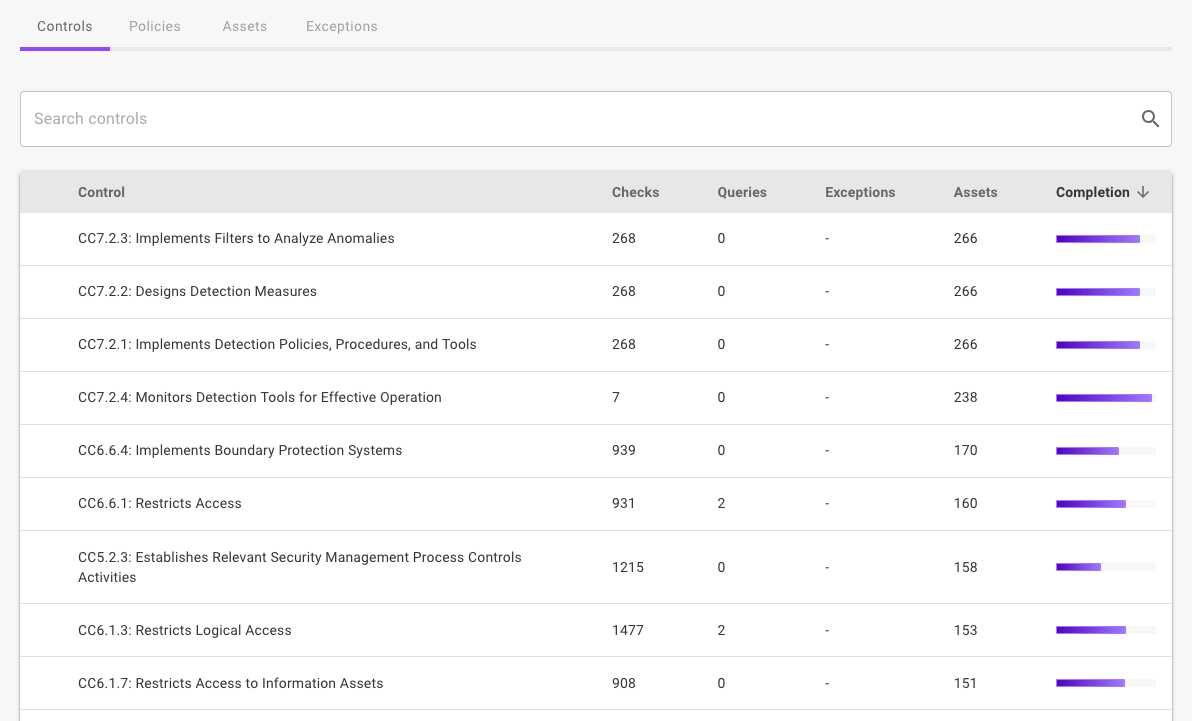
Select the framework you want to customize and scroll down to the list of controls.
-
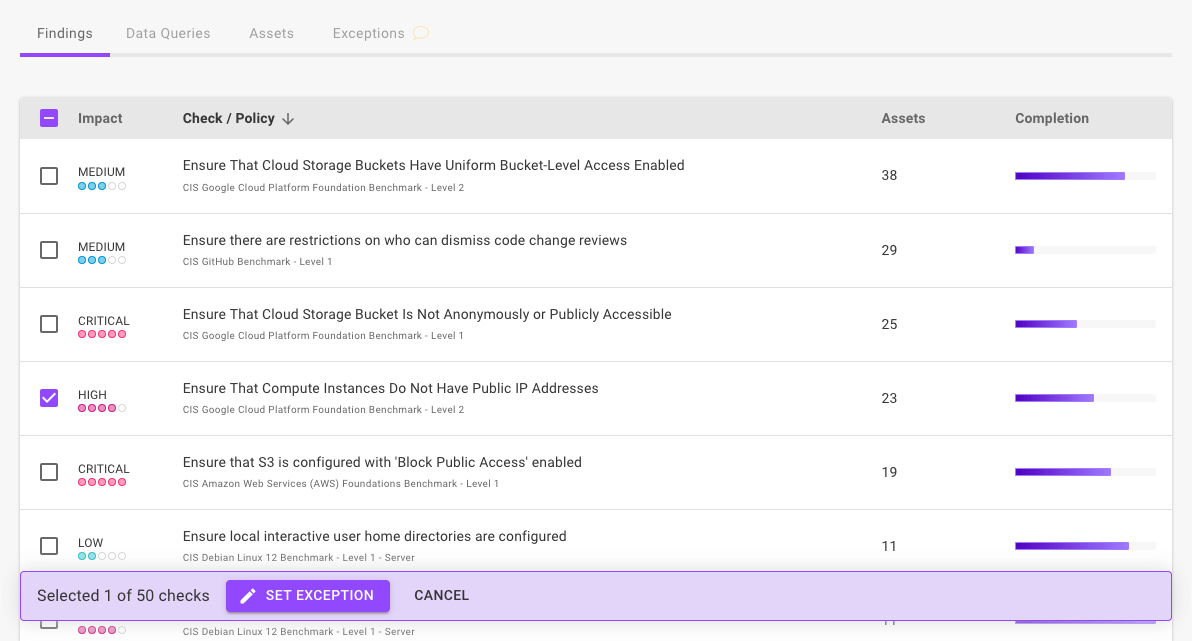
Select the control containing the check you want to set an exception for and select the check box beside that check.
-
Select the SET EXCEPTION button.
-
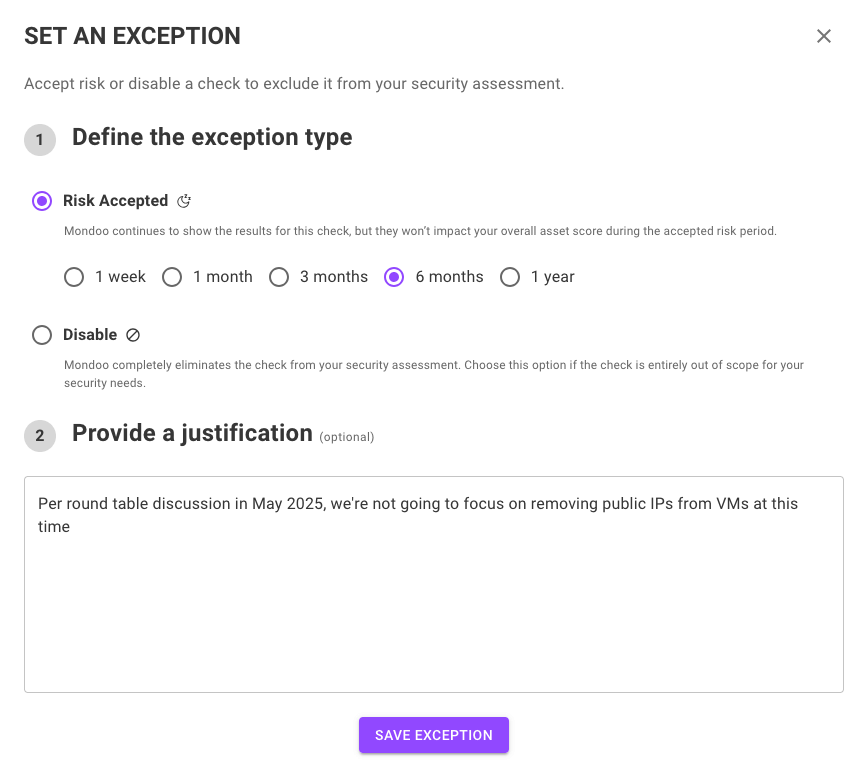
Select the exception type.
Select to either disable the check or accept the risk. When you accept the risk, you can choose to skip the check for a specific time period.
-
Write a justification for the exception.
-
Select the SAVE EXCEPTION button.
Approve or reject an exception
Only team members with Editor or Owner access can perform this task.
Exceptions take effect the moment they're added. However, as an extra tracking step, a team member can approve or reject an exception:
-
Approving an exception allows it to remain.
-
Rejecting an exception removes it and re-enables the check.
To approve or reject an exception:
-
In the Mondoo Console, navigate to the space you want to work in.

-
In the side navigation bar, select Compliance.

-
Select the framework you want to work in and scroll down to the list of controls.

-
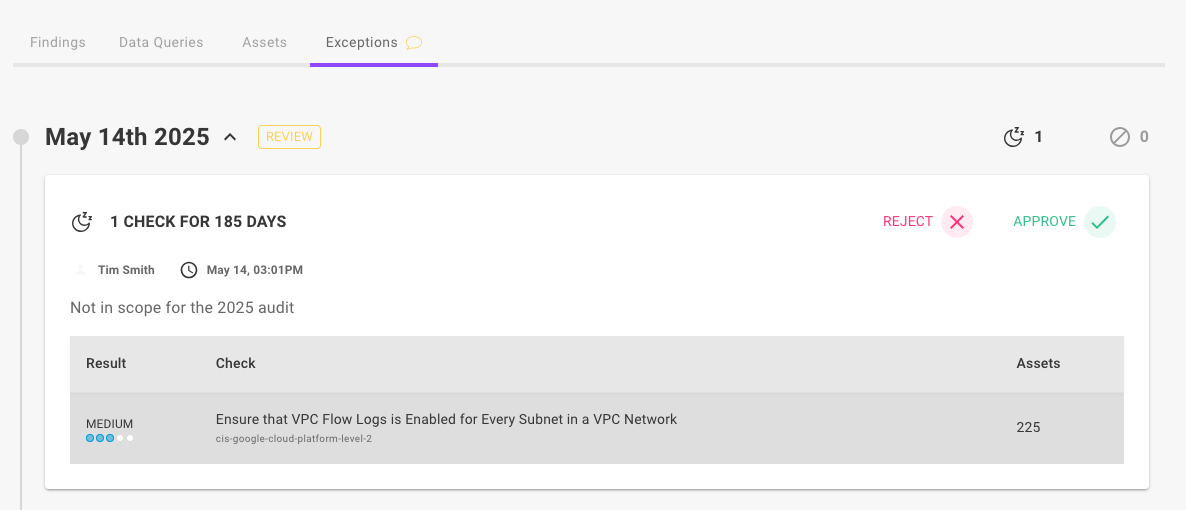
Select the control containing the check exception you want to approve and then select the Exceptions tab.
-
Select the Reject button to remove the exception, or select the Approve button to keep the exception with your approval.
Re-enable a check
Only team members with Editor or Owner access can perform this task.
-
In the Mondoo Console, navigate to the space you want to work in.

-
In the side navigation bar, select Compliance.

-
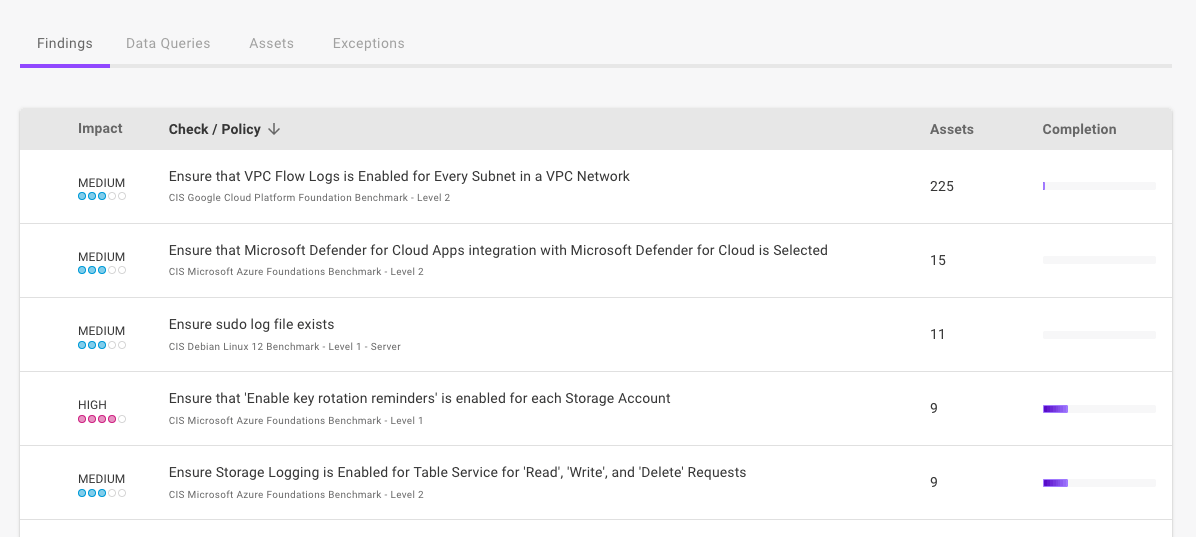
Select the framework you want to work in and select the control containing the check you want to re-enable.
-
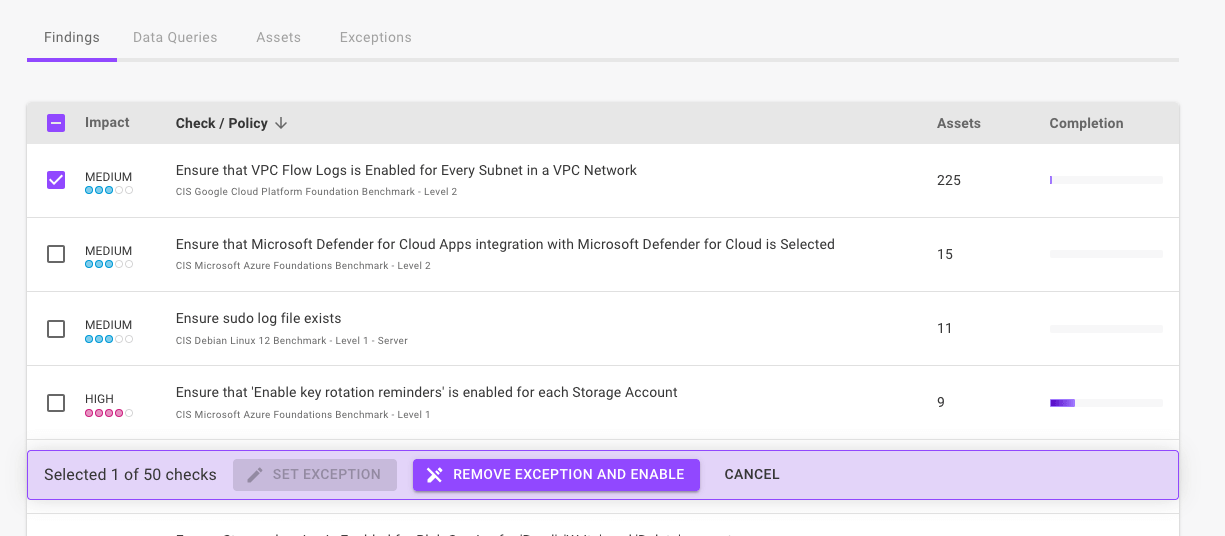
Select the snoozed or disabled check you want to re-enable.
-
Select the REMOVE EXCEPTION AND ENABLE button and then confirm the action by selecting the YES, ENABLE THE CHECK button.