Continuously Scan AWS - Mondoo-Hosted Integration
Configure the Mondoo-hosted AWS integration to continuously scan your AWS accounts and EC2 instances using Workload Identity Federation or an AWS access key.
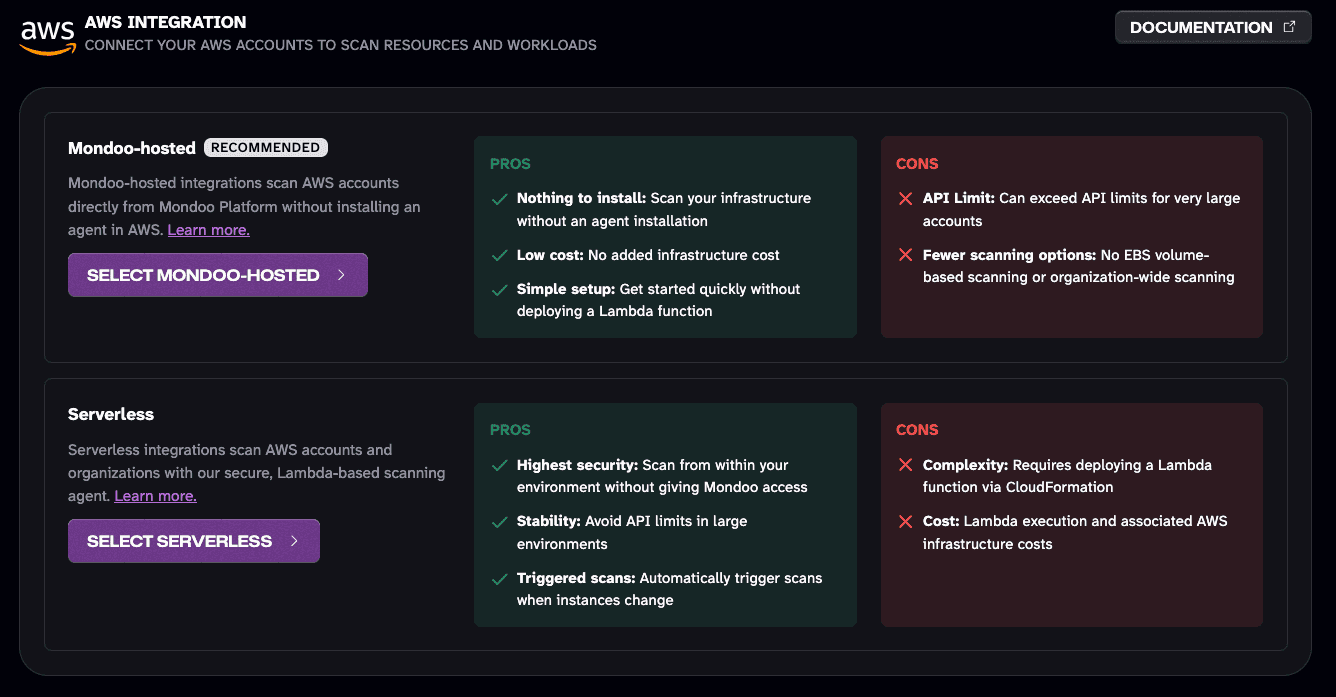
The Mondoo-hosted AWS integration provides continuous security and compliance scanning for a single AWS account, with no agent in your AWS environment and no additional AWS cost.
Need to scan an entire AWS Organization, or want all scan execution to stay inside your AWS account? See the serverless integration instead. To compare both options, read Continuously Scan with an AWS Integration.
Prerequisites
- Editor or Owner access in the Mondoo space where you want to add the integration
- An AWS account with permission to create IAM roles (and, for WIF, IAM identity providers)
Choose an authentication method
- Workload Identity Federation (WIF) (recommended): Keyless. You give Mondoo your AWS account ID, then use a one-click CloudFormation link to create an OIDC provider and a read-only IAM role Mondoo assumes with short-lived OIDC tokens. Nothing to rotate.
- Access key: A static IAM user access key and secret. Simpler to set up, but you're responsible for storing and rotating the key.
With WIF, Mondoo acts as an OIDC identity provider: at scan time it presents a short-lived OIDC token to AWS STS via AssumeRoleWithWebIdentity, and AWS issues temporary credentials for a read-only role that Mondoo assumes. You don't register the provider or edit trust policies by hand. Mondoo gives you a one-click AWS CloudFormation link that creates the OIDC provider and the role for you, pinned to this integration. No static keys are stored or rotated.
All you need is the AWS account ID you want to scan.
Step 1: Start the integration in Mondoo
-
In the Mondoo App, navigate to the space where you want to add the integration. In the side navigation bar, select Integrations. In the top right, select + INSTALL. On the integrations page, find AWS by browsing or searching by name, then select it.
-
Select SELECT MONDOO-HOSTED INTEGRATION.
-
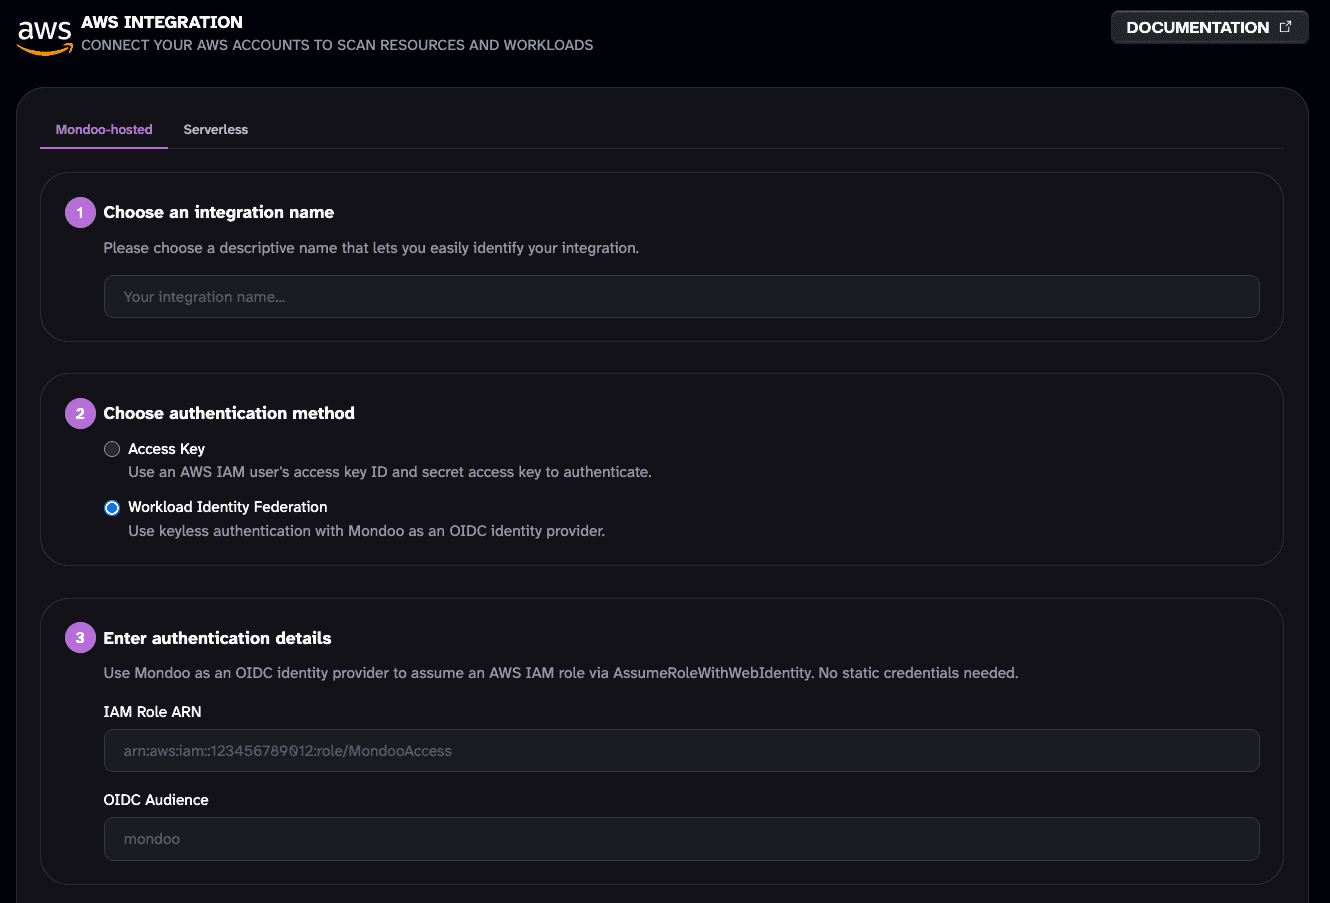
In the Choose an integration name box, type a recognizable name for this AWS account.
-
Under Choose authentication, select Workload Identity Federation.
-
In the AWS Account ID box, enter the 12-digit ID of the AWS account you want to scan.
-
Leave the suggested Role name (
mondoo-hosted-scan) as is, or change it if you prefer. Mondoo creates the role with this name. -
(Optional) Under Asset annotations, add key-value annotations that Mondoo applies to every asset this integration scans. Annotations make it easier to filter assets later or build workspaces that include only the assets from this integration.
-
Select Next, create role.
Step 2: Create the OIDC provider and role in your AWS account
Mondoo now shows a step with everything pre-filled for AWS CloudFormation.
-
Select Launch CloudFormation. This opens the AWS CloudFormation console in a new tab with the stack parameters already populated: the Mondoo OIDC issuer, the audience, this integration's subject, and the role name.
-
Review the stack, acknowledge that it creates IAM resources, and select Create stack. Wait for the stack status to reach CREATE_COMPLETE.
Make sure you're signed in to the same AWS account whose ID you entered in Step 1. The stack creates a (global) IAM OIDC provider and role, so any region works.
If the Mondoo OIDC provider already exists in this account (for example, from another integration), set the CreateOidcProvider parameter to No before creating the stack.
Step 3: Start scanning
Back in the Mondoo tab, select Start Scanning. Mondoo assumes the new role via WIF and begins its first scan.
Step 4: Enable policies and verify the integration
-
On the Recommended Policies page, enable the policies on which you want to base assessments of your AWS environment. To learn more, read Manage Policies.
-
Return to the integration details page and wait for the first scan to complete. If the status changes to active, the setup is working correctly.
If the scan fails, double-check:
- The CloudFormation stack reached CREATE_COMPLETE in the same AWS account whose ID you entered in Mondoo.
- You selected Start Scanning after the stack finished creating the role.
- If the account already had the Mondoo OIDC provider, the stack was created with CreateOidcProvider set to No.
- The role has the
ReadOnlyAccesspolicy attached (the CloudFormation template adds it automatically).
Step 1: Create an AWS user and access key for Mondoo
To give Mondoo the access it needs to continuously scan your AWS account, create an AWS user and access key. You give the key and its secret to Mondoo, which securely stores them. To learn about AWS access keys, read Managing access keys for IAM users in the AWS documentation.
-
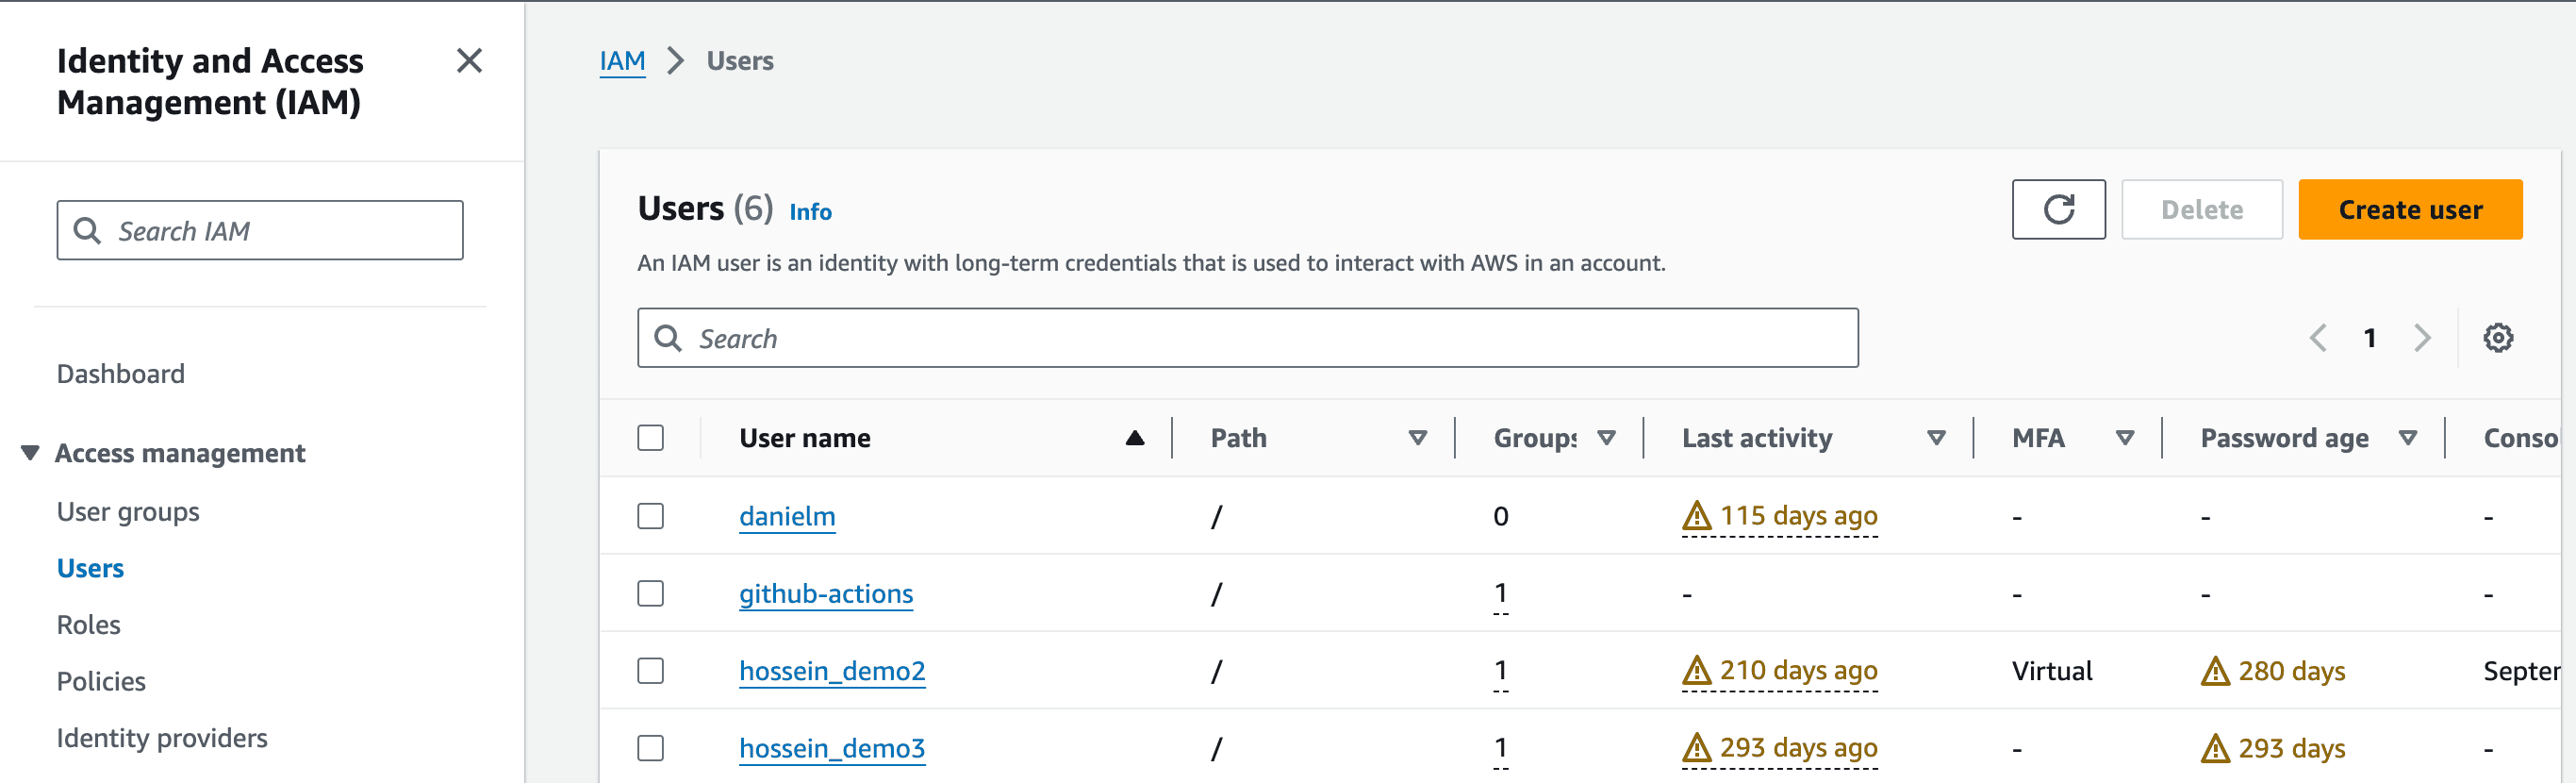
In the AWS access portal for the account you want to integrate with Mondoo, go to Identity and Access Management (IAM).
-
In the left menu, select Users.
-
Select the Create user button.
-
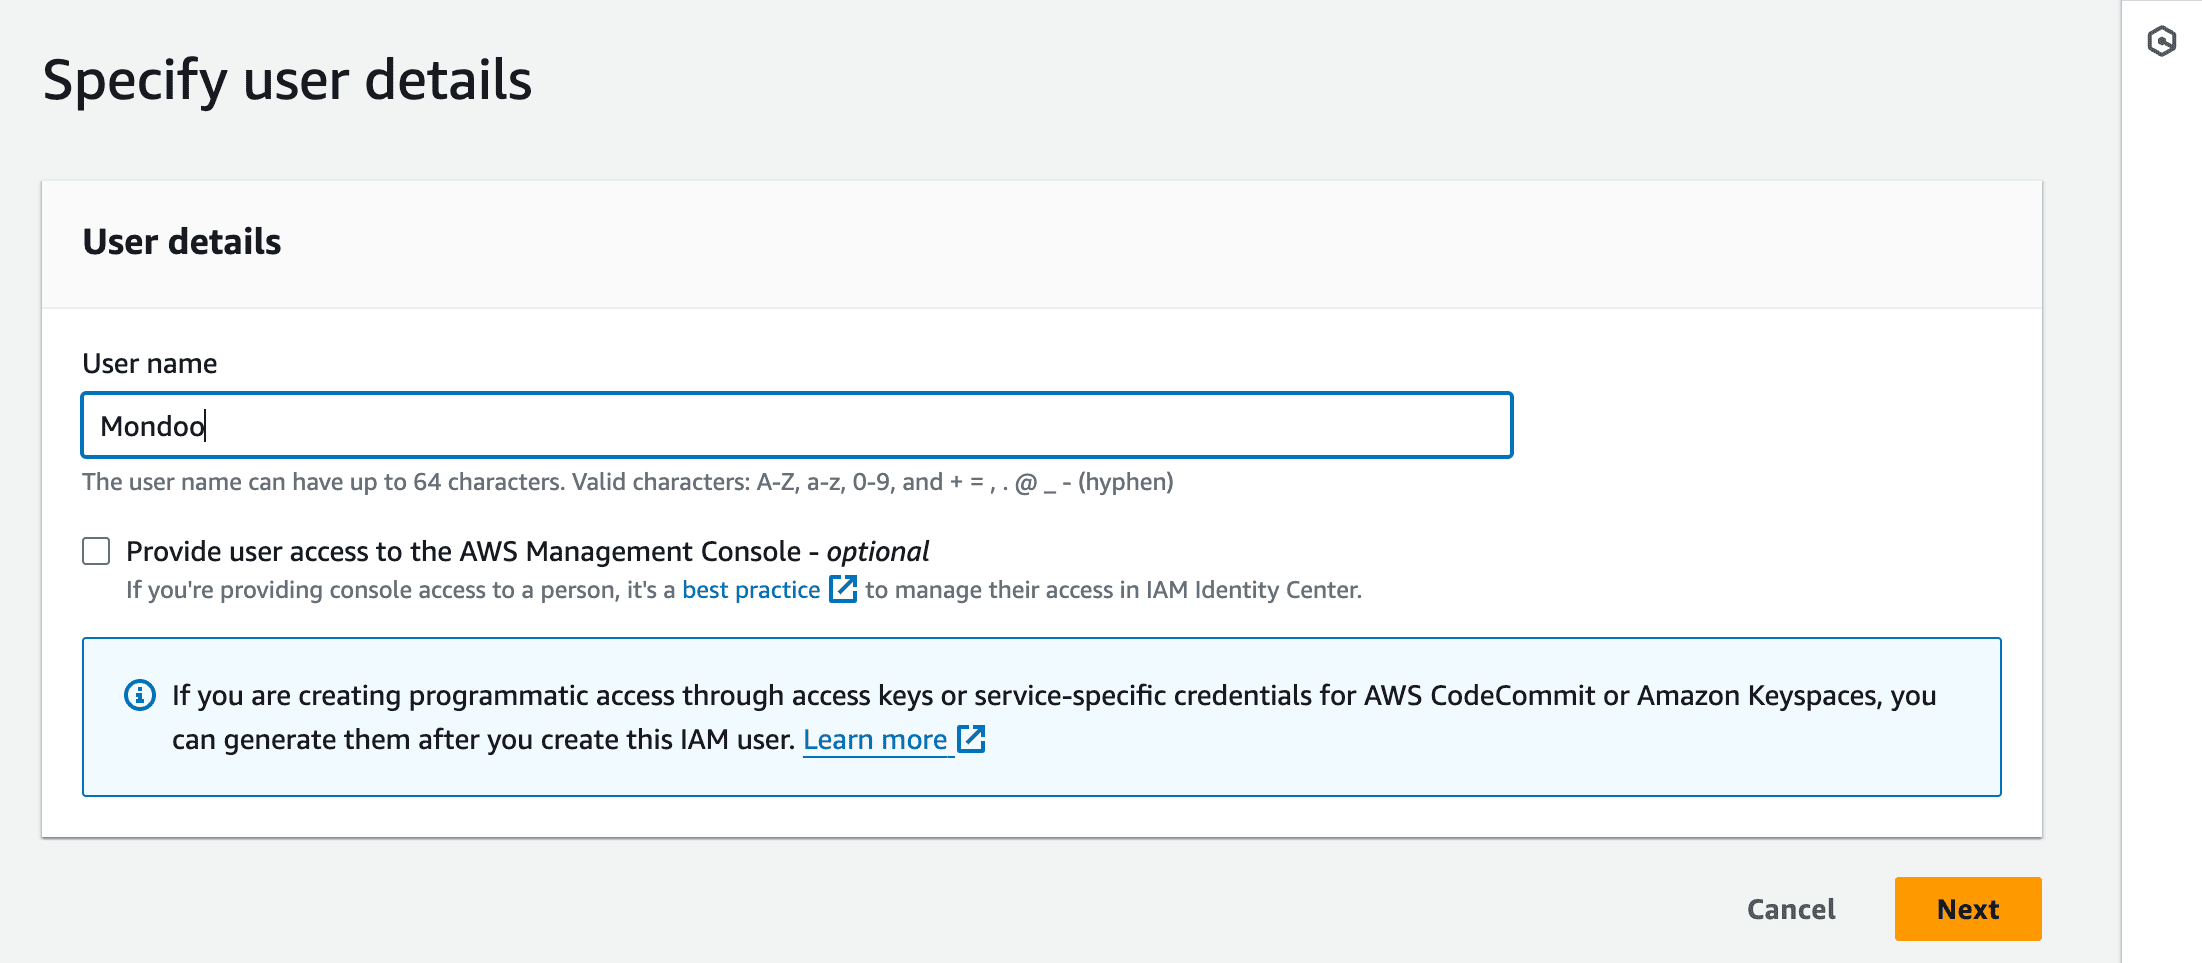
Enter the user name
Mondooand select the Next button. -
Select Attach policies directly.
-
Search for
ReadOnlyAccessand check the box next to the permission named simply ReadOnlyAccess. The ARN for this permission isarn:aws:iam::aws:policy/ReadOnlyAccess.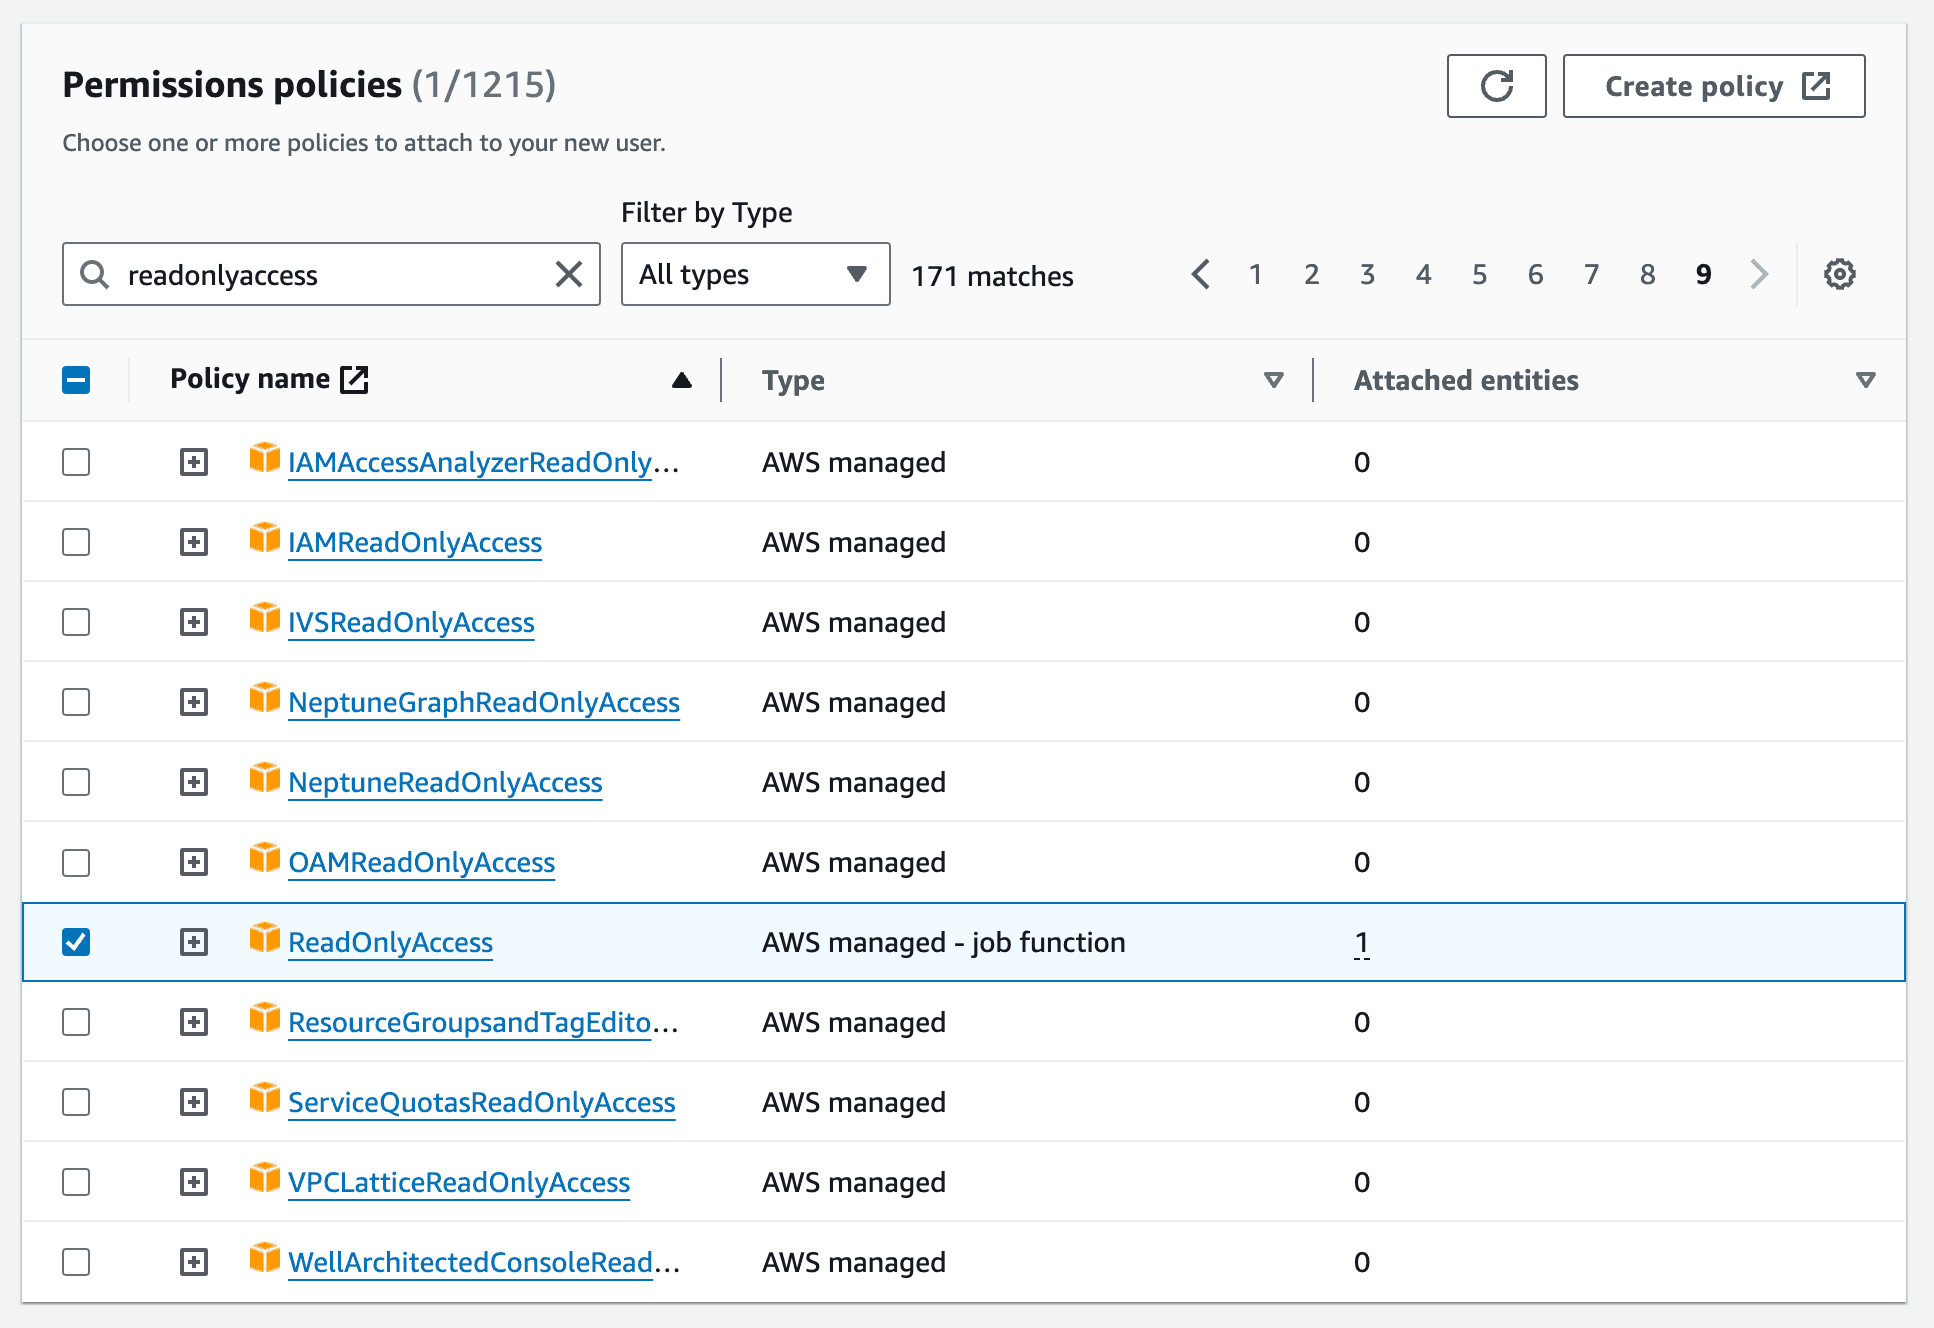
-
Select the Next button and then select the Create User button.

-
In the success confirmation message, select the View user button.
-
Select the Security Credentials tab.
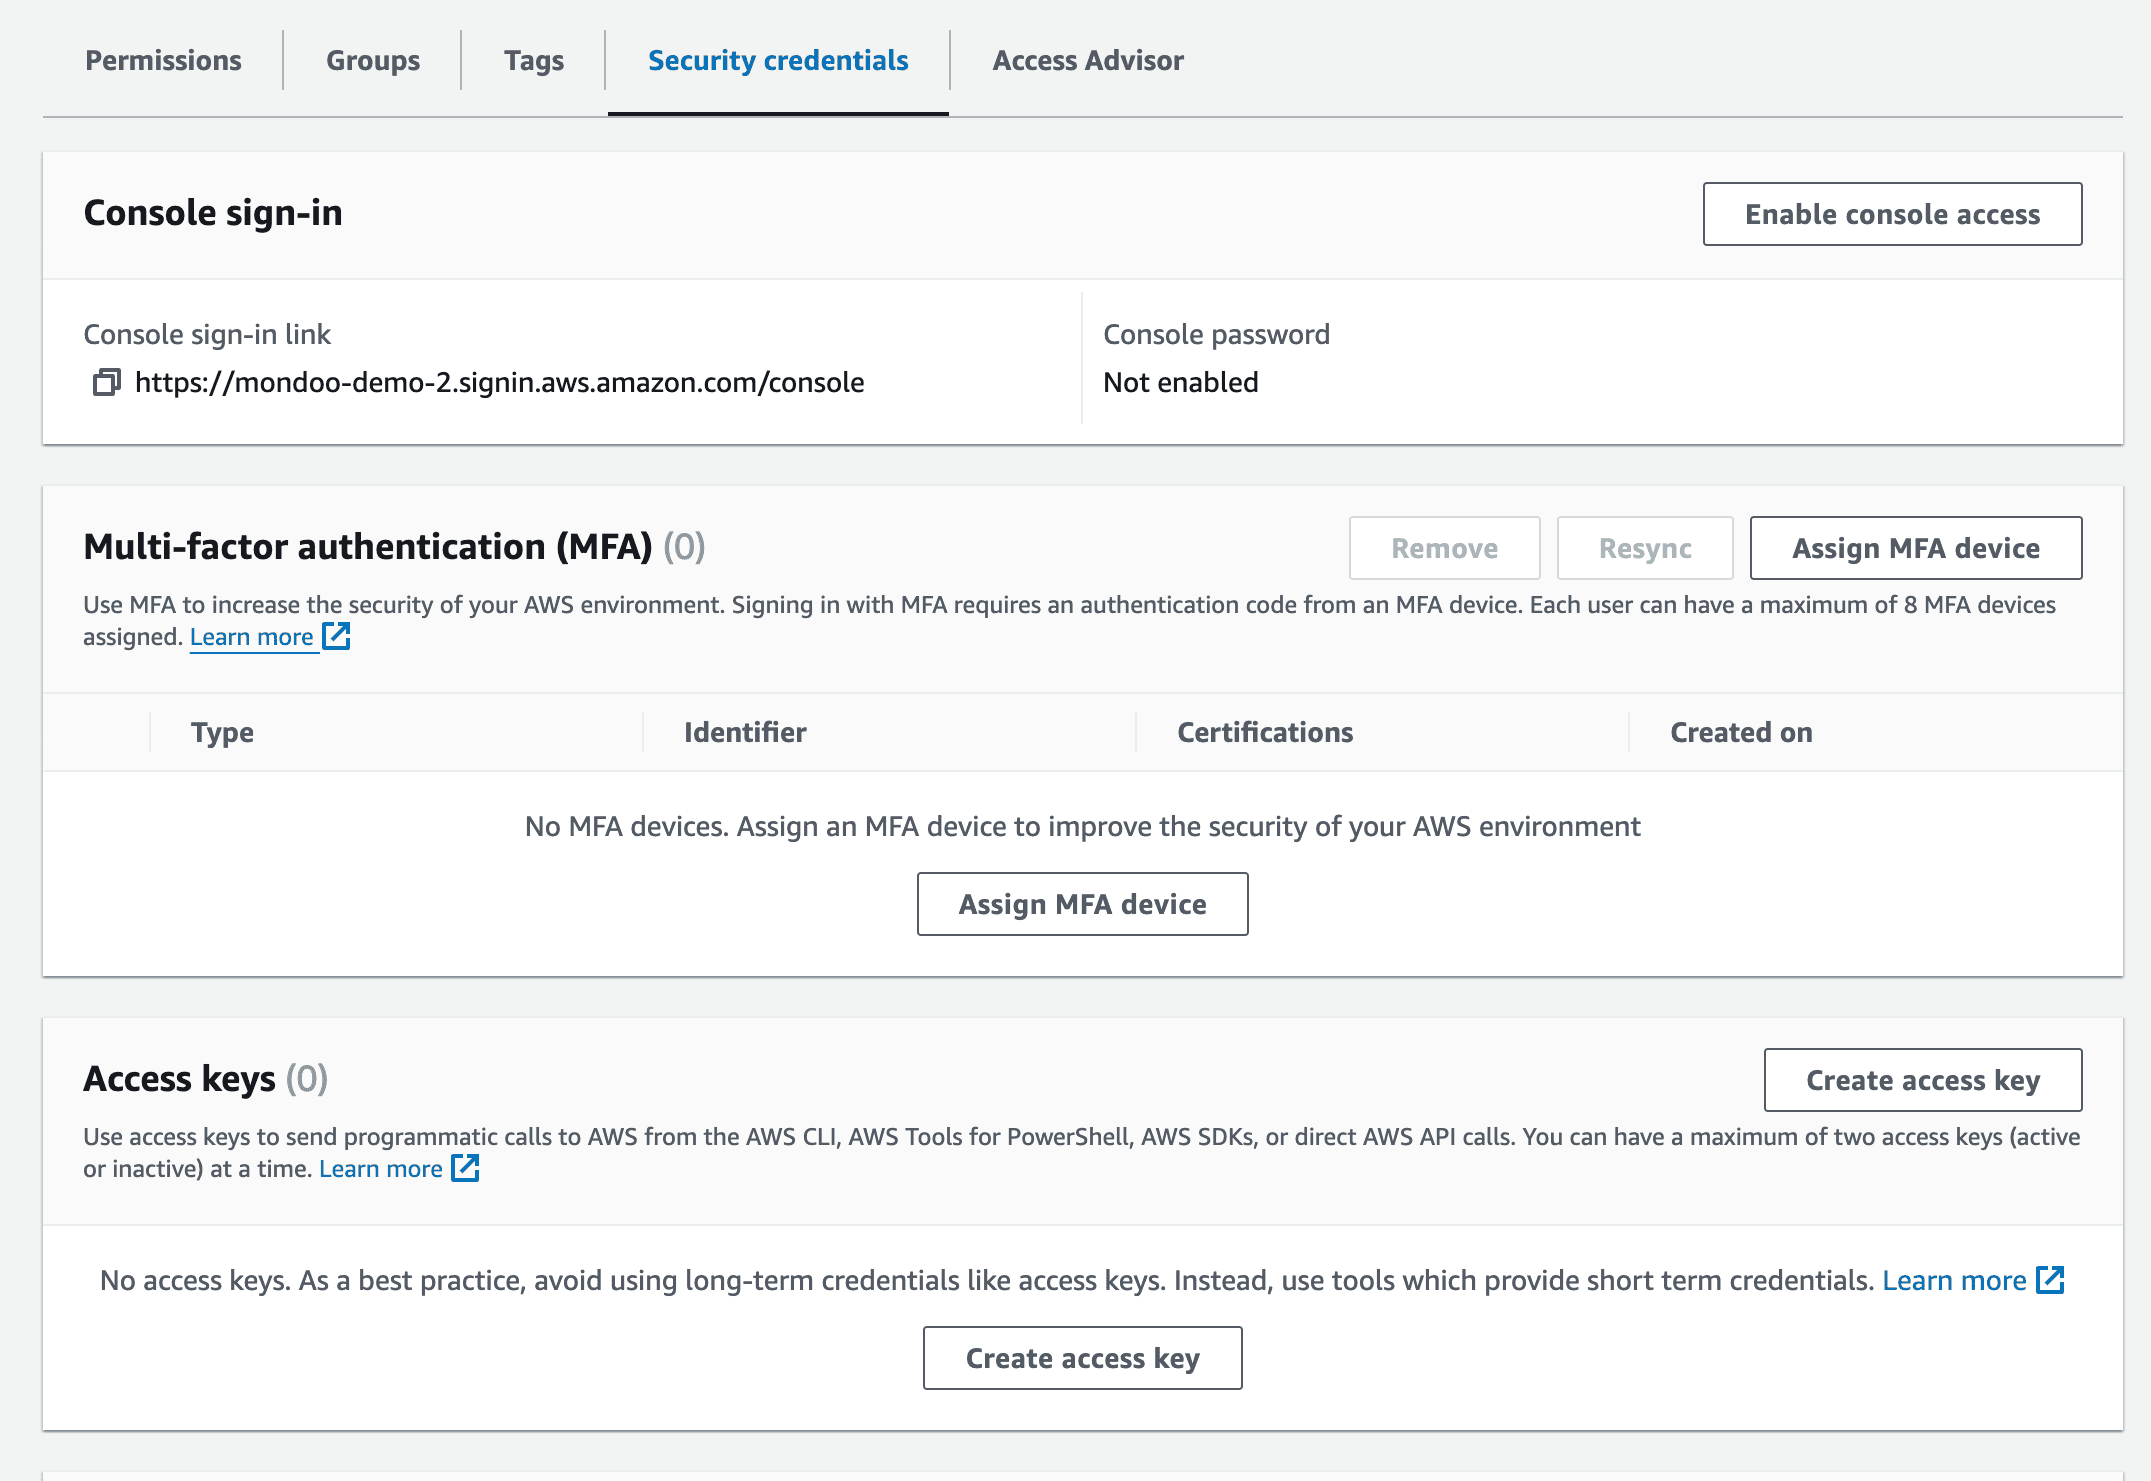
-
Under Access Keys, select the Create access key button.
-
Select Third-party service, check the I understand the above recommendation and want to proceed to create an access key box, and select the Next button.
-
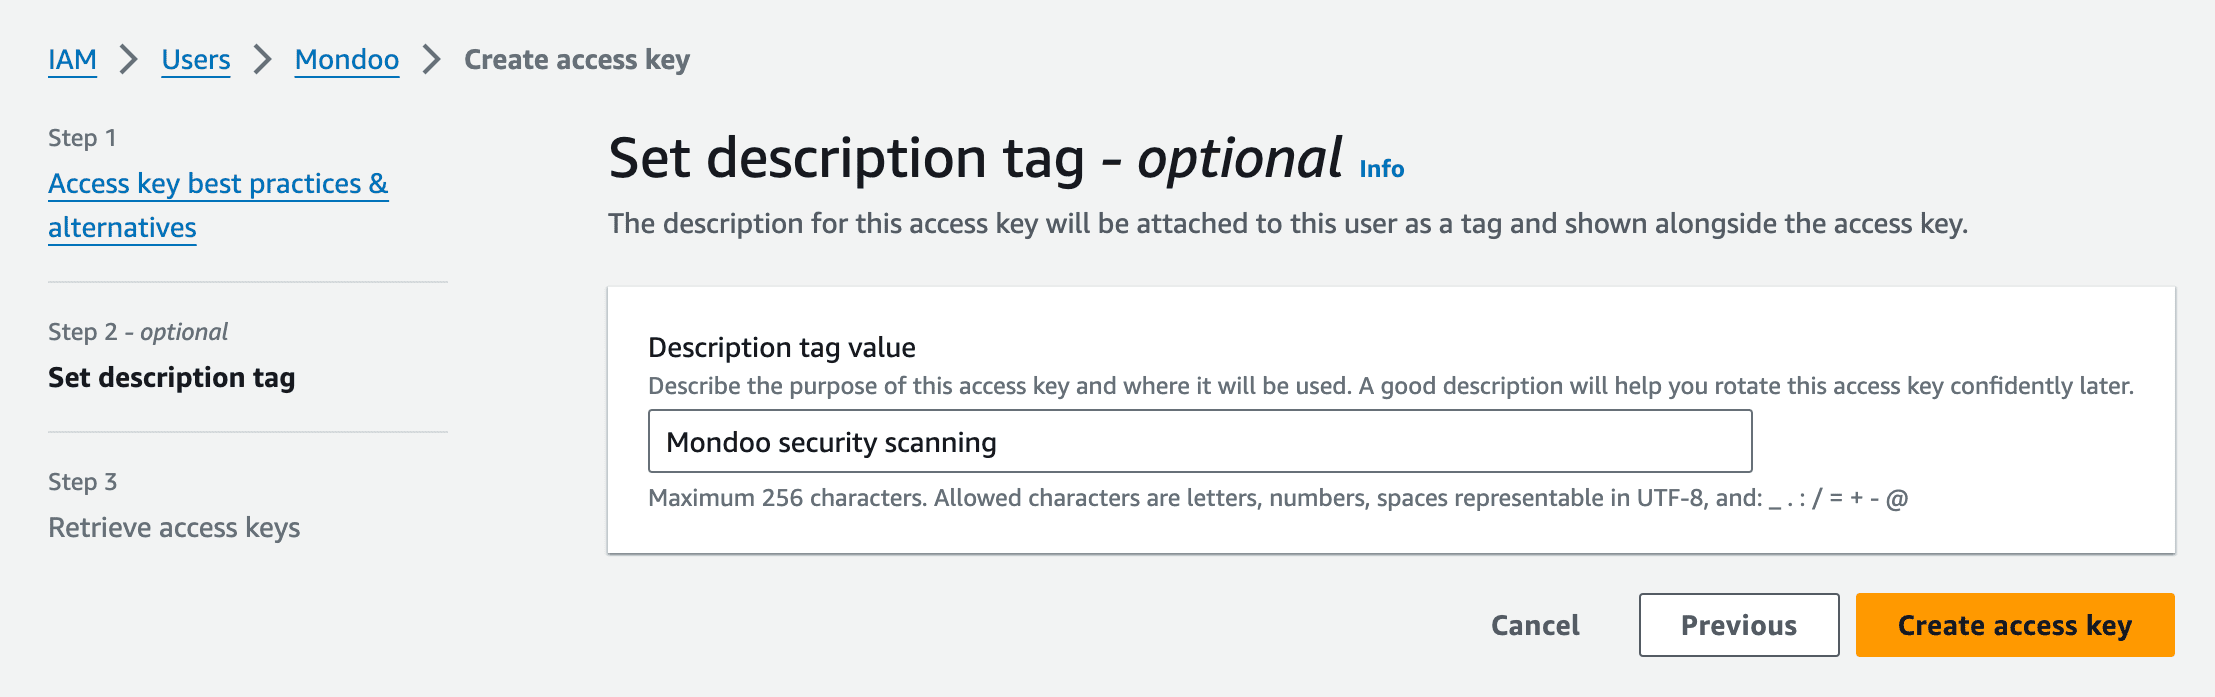
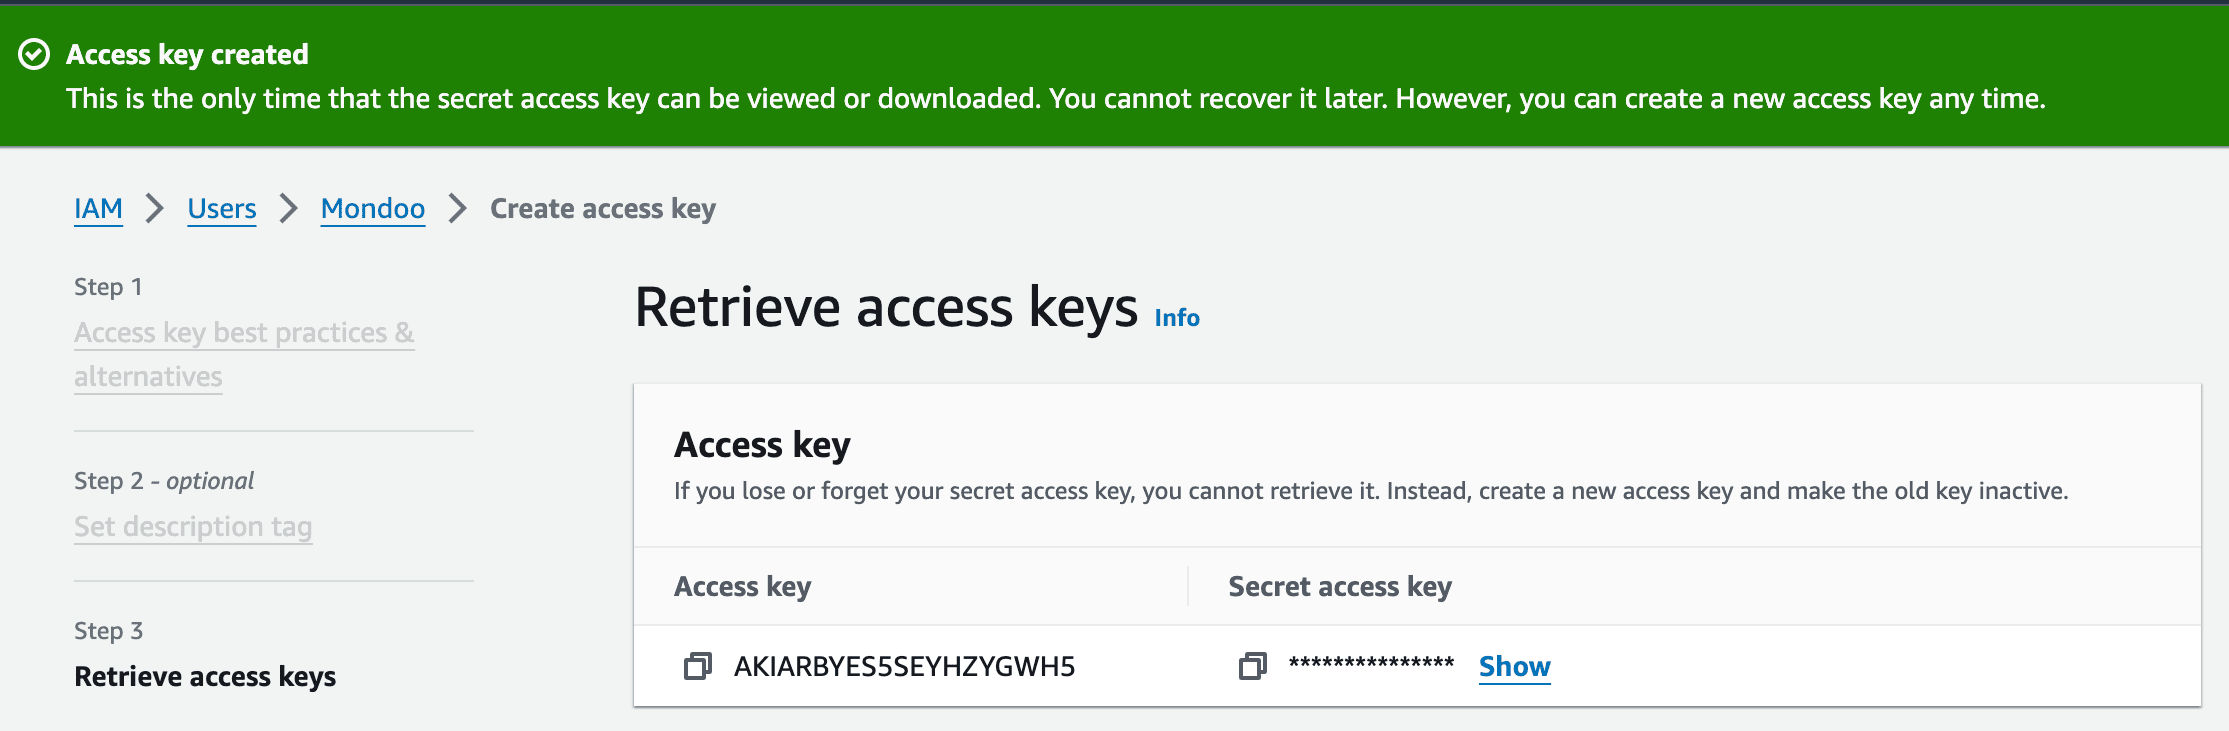
Enter a description for the key and select the Create access key button.
-
Keep the page with the key open in your browser as you continue to the next steps.
Step 2: Set up a new AWS integration
-
In the Mondoo App, navigate to the space where you want to add the integration. In the side navigation bar, select Integrations. In the top right, select + INSTALL. On the integrations page, find AWS by browsing or searching by name, then select it.
-
Select SELECT MONDOO-HOSTED INTEGRATION.
-
In the Choose an integration name box, type a recognizable name for this AWS asset.
-
Under Choose authentication, select Access Key.
-
Access the AWS IAM tab in your browser that shows the access keys you created in the steps above. Copy the Access key value.
-
In the Mondoo App tab in your browser, under Enter authentication details, paste the value in the Access Key ID box.
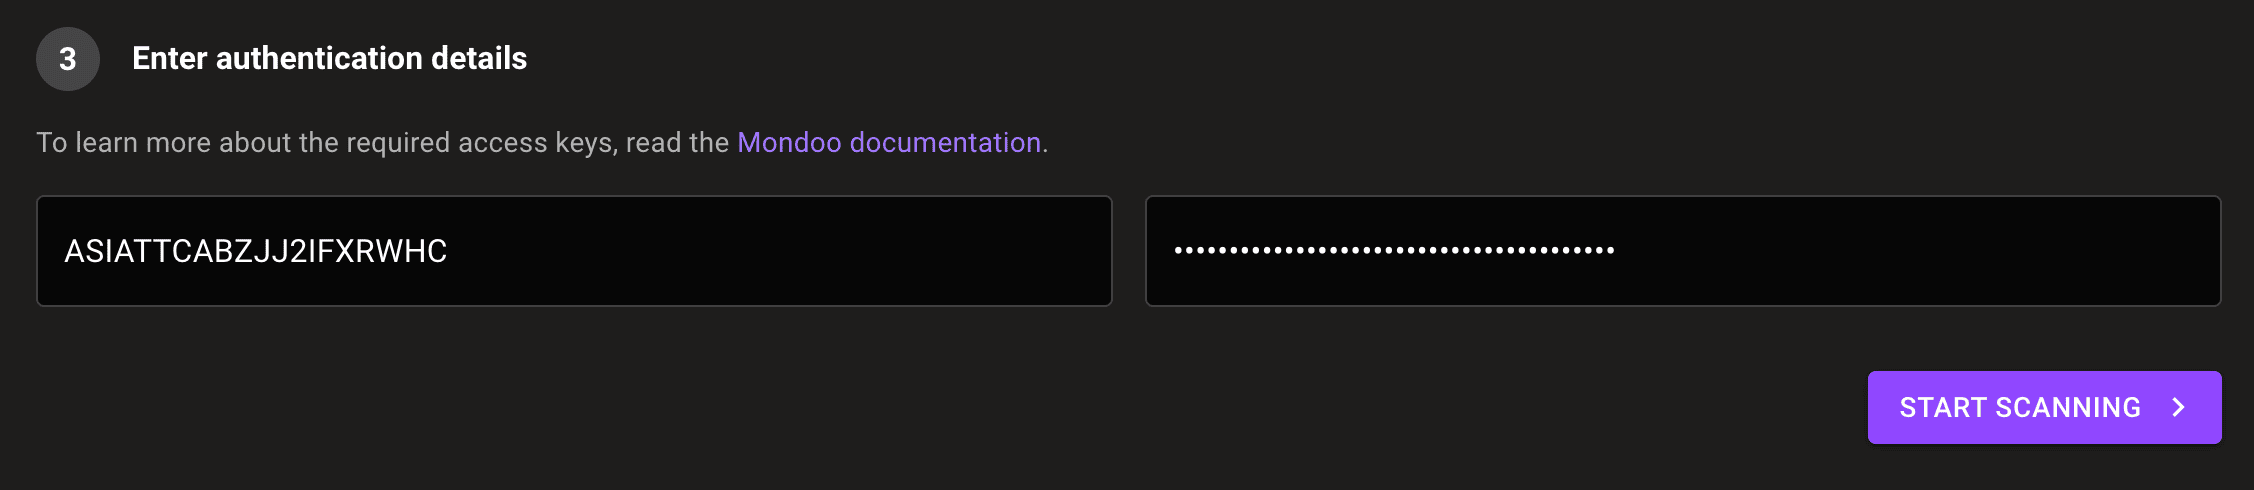
-
In the AWS IAM tab in your browser, copy the Secret access key value.
-
In the Mondoo App tab in your browser, under Enter authentication details, paste the value in the AWS Secret Access Key box.
-
(Optional) Under Asset annotations, add key-value annotations that Mondoo applies to every asset this integration scans. Annotations make it easier to filter assets later or build workspaces that include only the assets from this integration.
-
Select the START SCANNING button.
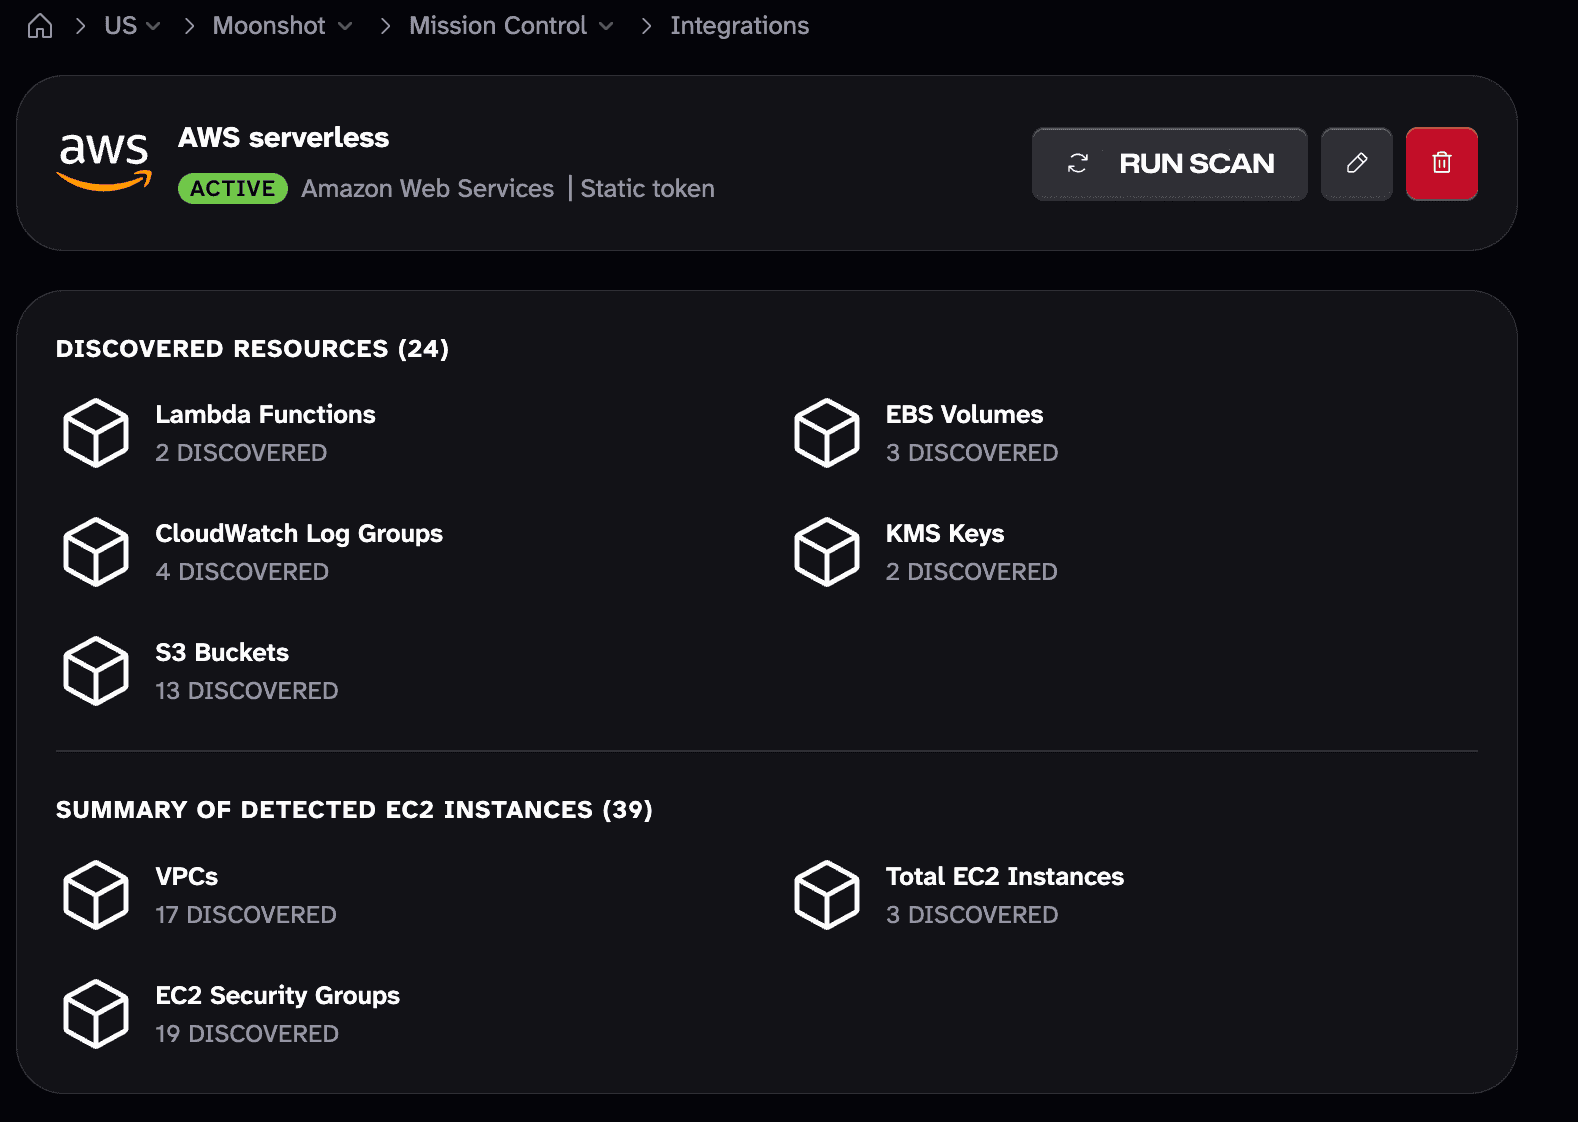
Manage an AWS integration
To open an existing integration, navigate to the space, select Integrations > AWS in the side nav, and choose the integration.
Integration status
| Status | Meaning |
|---|---|
| configuring | Mondoo is sending scan configuration to the integration and the integration is saving it. |
| active | The integration is active and healthy. |
| error | Mondoo detected an error during installation. |
| missing | Mondoo hasn't received a successful scan in over an hour. |
| deleted | The integration has been removed from Mondoo Platform. |
Request a fresh scan
Select RUN SCAN at the top of the integration page. Mondoo retrieves new results as soon as possible.
Remove an integration
Select the trash can icon at the top of the integration page and confirm. Mondoo stops API-based scans of your AWS account. The IAM role you created for Mondoo stays in AWS; remove it manually if you no longer need it.
After you connect
Once the integration is scanning, explore your asset inventory, then assess and improve your security to review and prioritize your findings.
Learn more
- Continuously Scan with an AWS Integration (compare hosted and serverless)
- Mondoo as an OIDC identity provider