Scan EC2 Instances Using EBS Snapshots
Scan EBS volume snapshots to evaluate the security and compliance of Linux EC2 instances without connecting to them.
Scan EBS volume snapshots with cnspec to evaluate the security and compliance of Linux-based EC2 instances. Snapshot scanning runs entirely outside the workload, with no agent, no SSH session, and no impact on the running instance.
When to use snapshot scanning
Snapshot scanning is a good fit when:
- You can't reach the instance over the network or don't want to.
- You want to assess an instance without affecting performance or availability.
- You need to evaluate a point-in-time copy of the filesystem (for example, during incident response).
If you'd rather scan a live instance, see Scan Instances Using SSM or Scan Instances Using Instance Connect.
What you'll set up
This guide creates a dedicated scanner EC2 instance that can attach and scan EBS snapshots from other instances in your account. You'll:
- Create a scanner VM: a small EC2 instance with cnspec installed.
- Create an IAM policy: permissions for EBS snapshot and volume operations.
- Create an IAM role: an EC2 role with the scanning policy attached.
- Attach the role and scan: connect the role to your scanner VM and run scans.
Prerequisites
- Access to the AWS console with permissions to create IAM policies, roles, and EC2 instances
- A Mondoo Platform account (for reporting results)
Step 1: Create a scanner VM
-
Launch a small EC2 instance (for example, an Amazon Linux instance with type
t3.micro) where you'll attach EBS snapshots for scanning.
-
Install cnspec on the new instance and register it with Mondoo Platform.
Step 2: Create an IAM policy for EBS volume scanning
-
Log in to the AWS console.
-
Navigate to IAM.
-
In the side navigation, select Policies.
-
Select Create policy.
-
Under Specify permissions, select JSON, paste the policy below, and select Next:
{ "Version": "2012-10-17", "Statement": [ { "Action": [ "ec2:AttachVolume", "ec2:DetachVolume", "ec2:DeleteVolume", "ec2:DeleteSnapshot" ], "Resource": "*", "Effect": "Allow" }, { "Action": [ "ec2:CreateSnapshot", "ec2:CreateVolume", "ec2:CopySnapshot", "ec2:CreateTags", "ec2:DescribeInstances", "ec2:DescribeVolumes", "ec2:DescribeSnapshots", "kms:Decrypt", "kms:ReEncryptTo", "kms:GenerateDataKeyWithoutPlaintext", "kms:DescribeKey", "kms:ReEncryptFrom" ], "Resource": "*", "Effect": "Allow" }, { "Condition": { "Bool": { "kms:GrantIsForAWSResource": "true" } }, "Action": "kms:CreateGrant", "Resource": "*", "Effect": "Allow" } ] } -
Under Policy details, give the policy a name (for example,
ebs-scanning-mondoo), add optional tags and a description, and select Create policy.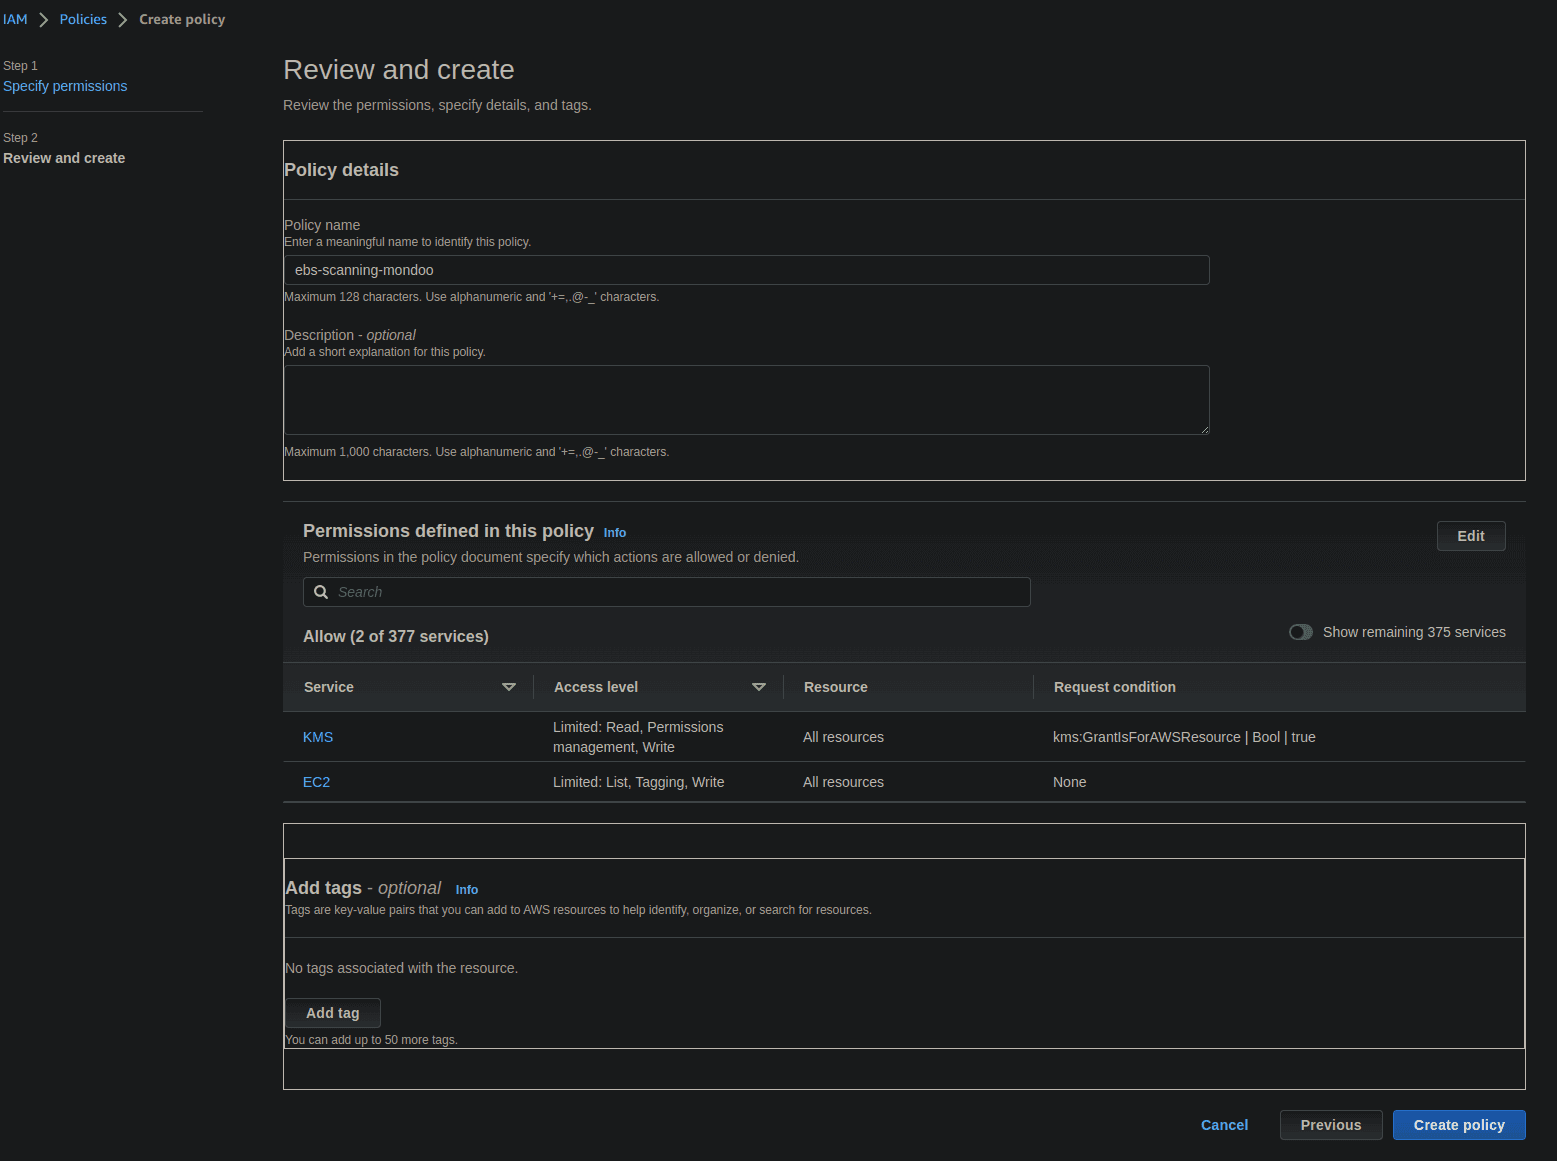
Step 3: Create an IAM role for EBS volume scanning
-
Log in to the AWS console.
-
Navigate to IAM.
-
Select Roles.
-
Select Create role.
-
For Trust entity type, select AWS service. For Use case, select EC2. Select Next.
-
In the Filter policies box, search for
ebs, select theebs-scanning-mondoopolicy you just created, and select Next. -
Under Role details, give the role a name (for example,
ebs), add optional tags and a description, and select Create role.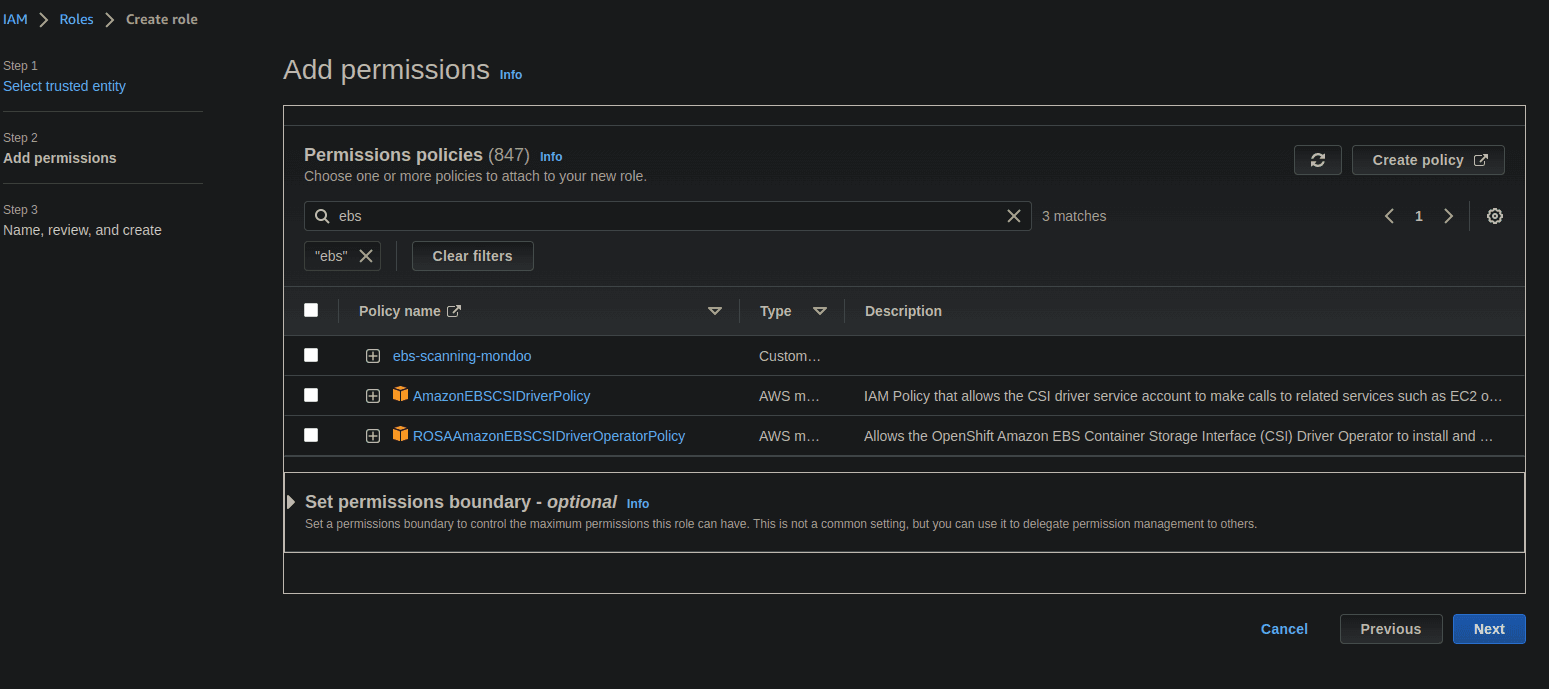
Step 4: Attach the role and scan
Attach the new IAM role (ebs) to your scanner EC2 instance. The role can be attached to existing EC2 instances or assigned as the instance profile when launching new instances.
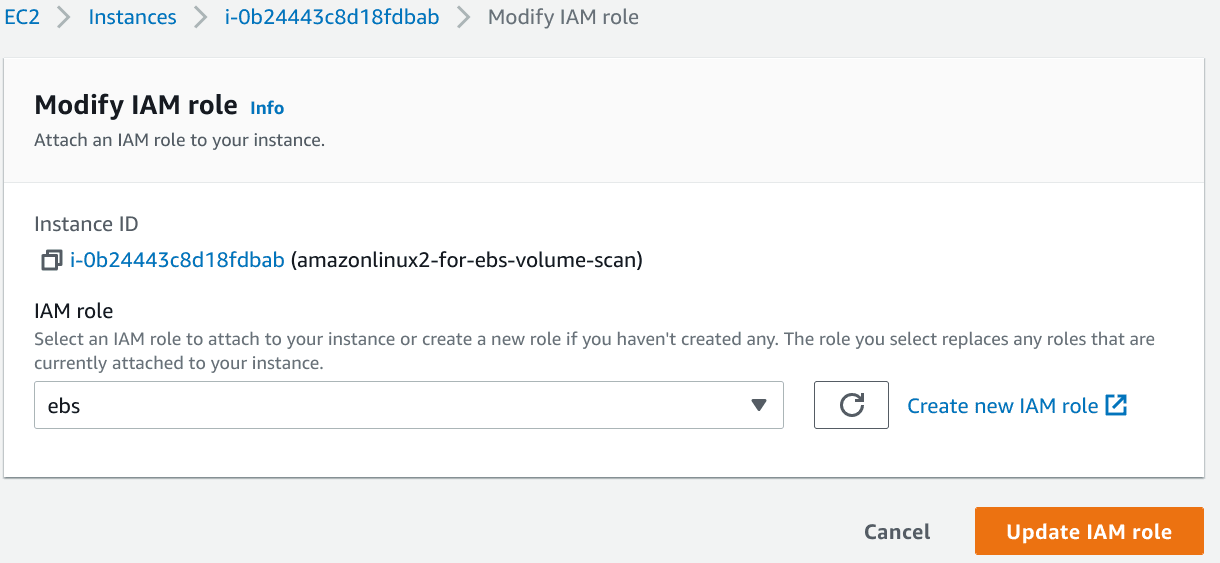
Once the role is attached:
-
Log in to your scanner EC2 instance.
-
Scan a snapshot:
cnspec scan aws ec2 ebs snapshot SNAPSHOT_IDFor
SNAPSHOT_ID, substitute the ID of the snapshot, for examplesnap-123456b123a123da2.If the snapshot is in a different region from the scanner instance, add
--region REGION. Without it, cnspec looks for the snapshot in the scanner instance's region.cnspec can also snapshot and scan a running instance's volumes or a single volume:
cnspec scan aws ec2 ebs INSTANCE_ID
cnspec scan aws ec2 ebs volume VOLUME_ID
To learn how to read the scan report, including scores and remediation guidance, see Understand cnspec Results.
Learn more
- Scan Instances Using SSM: agentless scanning through AWS Systems Manager
- Scan Instances Using Instance Connect: scan over SSH without long-lived keys
- Continuously Scan AWS: set up the Mondoo AWS integration
- The cnspec documentation: learn more about cnspec