Quick Setup - Microsoft 365 (MS 365) Continuous Scanning
The Mondoo Microsoft 365 integration lets you continuously scan your Microsoft 365 resources, such as users and applications. It finds misconfigurations and vulnerabilities that put your organization at risk. You deploy the integration once and always get the latest security assessments for new accounts and resources.
Prerequisites
Before you integrate Microsoft 365 with Mondoo, be sure you:
-
Have a Mondoo account with Editor or Owner permissions for the space in which you want to add the integration.
-
Have an Azure account with an active subscription and permission to manage applications in Microsoft Entra ID (formerly Active Directory). Any of these Microsoft Entra ID roles include the required permissions:
-
Global Administrator - Create and manage all aspects of app registrations and enterprise apps.
-
Application administrator - Create and manage all aspects of app registrations and enterprise apps.
-
Cloud application administrator - Create and manage all aspects of app registrations and enterprise apps except App Proxy.
-
-
Are logged into Azure using the Azure CLI.
-
If you use the Azure Cloud Shell, you don't need to also log into the Azure CLI. To learn more, read the Quick start for Azure Cloud Shell.
-
If you use a Linux shell or macOS shell, log into the Azure CLI.
If you're not already an Azure CLI user:
Install the Azure CLI.
Log into the Azure CLI from PowerShell or a Linux/macOS CLI by entering:
az login --allow-no-subscriptionsAzure opens your web browser and prompts you to log in. After you do so, you can return to the CLI.
-
Register an Azure app
Continuous scanning of Microsoft 365 requires a Microsoft Entra ID app registration in your Azure tenant. Registering Mondoo with Azure establishes a trust relationship between Mondoo and the Microsoft identity platform. The trust is unidirectional: Mondoo trusts the Microsoft identity platform, and not the other way around. The Azure app registration creates a service principal to represent Mondoo in any tenants and subscriptions in which it acts.
This section describes Microsoft's automatic app registration. This approach works in simpler Microsoft 365 environments and doesn't let you use your own certificates for authentication.
If you want to use your own certificate or if you have a very complex Microsoft 365 environment, use the manual app registration approach. Manual registration is more involved, but is a reliable way to implement a permanent, production-ready integration in all environments.
To configure your Azure resources, you must:
Step A. Create the app registration and certificate
Step B. Grant permissions to access Microsoft Graph (API permissions)
Step C: Assign the Global Reader role to the app
Like any service that integrates with Azure, Mondoo must have an app registration and service principal. To learn more about creating a new app registration and service principal, read App registration, app objects, and service principals in the Azure documentation.
You create and register the app using the Azure CLI.
Step A: Create the app and certificate
A single command in the Azure CLI performs these tasks:
-
Creates the application registration and service principal in Microsoft Entra ID.
-
Creates a certificate and assigns it to the newly created app.
- In the Azure CLI, enter:
az ad sp create-for-rbac --name "mondoo-ms365" --create-cert
When successful, the Azure CLI returns results like these:
"appId": "63c35483-c62f-2600-a097-a6e44d8dcdf6",
"displayName": "mondoo-ms365",
"fileWithCertAndPrivateKey": "/Users/stella/tmpkqyme3rm.pem",
"password": null,
"tenant": "e4e2600a-2d3d-2600-aa70-b9d8c8ec2600"
-
Copy your results and paste them somewhere handy; you'll need them later in this process.
-
Copy the created PEM file (in the example above, it's named tmpkqyme3rm.pem) and save it; you'll need it later in this process.
Step B: Grant permissions to access Microsoft Graph (API permissions)
- Copy this content and save it in a file on your local your system (in this example, the file name is app-manifest.json):
[
  {
    "resourceAppId": "00000003-0000-0000-c000-000000000000",
    "resourceAccess": [
      {
        "id": "e321f0bb-e7f7-481e-bb28-e3b0b32d4bd0",
        "type": "Role"
      },
      {
        "id": "246dd0d5-5bd0-4def-940b-0421030a5b68",
        "type": "Role"
      },
      {
        "id": "37730810-e9ba-4e46-b07e-8ca78d182097",
        "type": "Role"
      },
      {
        "id": "9e640839-a198-48fb-8b9a-013fd6f6cbcd",
        "type": "Role"
      },
      {
        "id": "5e0edab9-c148-49d0-b423-ac253e121825",
        "type": "Role"
      },
      {
        "id": "bf394140-e372-4bf9-a898-299cfc7564e5",
        "type": "Role"
      },
      {
        "id": "dc377aa6-52d8-4e23-b271-2a7ae04cedf3",
        "type": "Role"
      }
    ]
  },
  {
    "resourceAppId": "00000003-0000-0ff1-ce00-000000000000",
    "resourceAccess": [
      {
        "id": "678536fe-1083-478a-9c59-b99265e6b0d3",
        "type": "Role"
      }
    ]
  },
  {
    "resourceAppId": "00000002-0000-0ff1-ce00-000000000000",
    "resourceAccess": [
      {
        "id": "dc50a0fb-09a3-484d-be87-e023b12c6440",
        "type": "Role"
      }
    ]
  }
]
Show or hide descriptions of the above API permissions.
These tables show the permissions that the JSON file above grants. If you prefer, you can add them manually in the Azure Portal.
| Microsoft Graph | Type | Description |
|---|---|---|
| IdentityProvider.Read.All | Application | Read identity providers |
| Policy.Read.All | Application | Read your organization's policies |
| Policy.Read.ConditionalAccess | Application | Read your organization's conditional access policies |
| Policy.Read.PermissionGrant | Application | Read consent and permission grant policies |
| SecurityActions.Read.All | Application | Read your organization's security actions |
| SecurityEvents.Read.All | Application | Read your organization's security events |
| DeviceManagementConfiguration.Read.All | Application | Read Microsoft Intune device configuration and policies |
| SharePoint APIs | Type | Description |
|---|---|---|
| Sites.FullControl.All | Application | Read items in all site collections |
| Office 365 Exchange Online | Type | Description |
|---|---|---|
| Exchange.ManageAsApp | Application | Have full control of all site collections |
- Run these commands to grant the permissions in the JSON file and give administrator consent:
az ad app update --id YOUR-APP-ID --required-resource-accesses @app-manifest.json

az ad app permission admin-consent --id YOUR-APP-ID
For YOUR-APP-ID, substitute the ID of the app you created.
Step C: Assign the Global Reader role to the app
-
In the Entra ID portal, go to Identity (Roles & admins).
-
Use the search box to find the Global Reader role. Select the name of the role (not the check box). THe Assignments page opens.
-
Select + Add assignments.
-
Find and select the newly created app, mondoo-ms365.
-
Assign the mondoo-ms365 app the Global Reader role.
-
When you return to the Assignments page, select Refresh and verify that the mondoo-ms365 app has been assigned the Global Reader role.
Add a new Microsoft 365 integration in the Mondoo Console
After you've created and granted permissions to a new app registration, you can create a Mondoo Microsoft 365 integration. You need some values from the app registration you created in the instructions above.
-
Access the Integrations > Add > Microsoft 365 page in one of two ways:
-
New space setup: After creating a new Mondoo account or creating a new space, the initial setup guide welcomes you. Select BROWSE INTEGRATIONS and then select Microsoft 365.
-
INTEGRATIONS page: In the side navigation bar, under INTEGRATIONS, select Add New Integration. Under Cloud Security, select Microsoft 365.
-
-
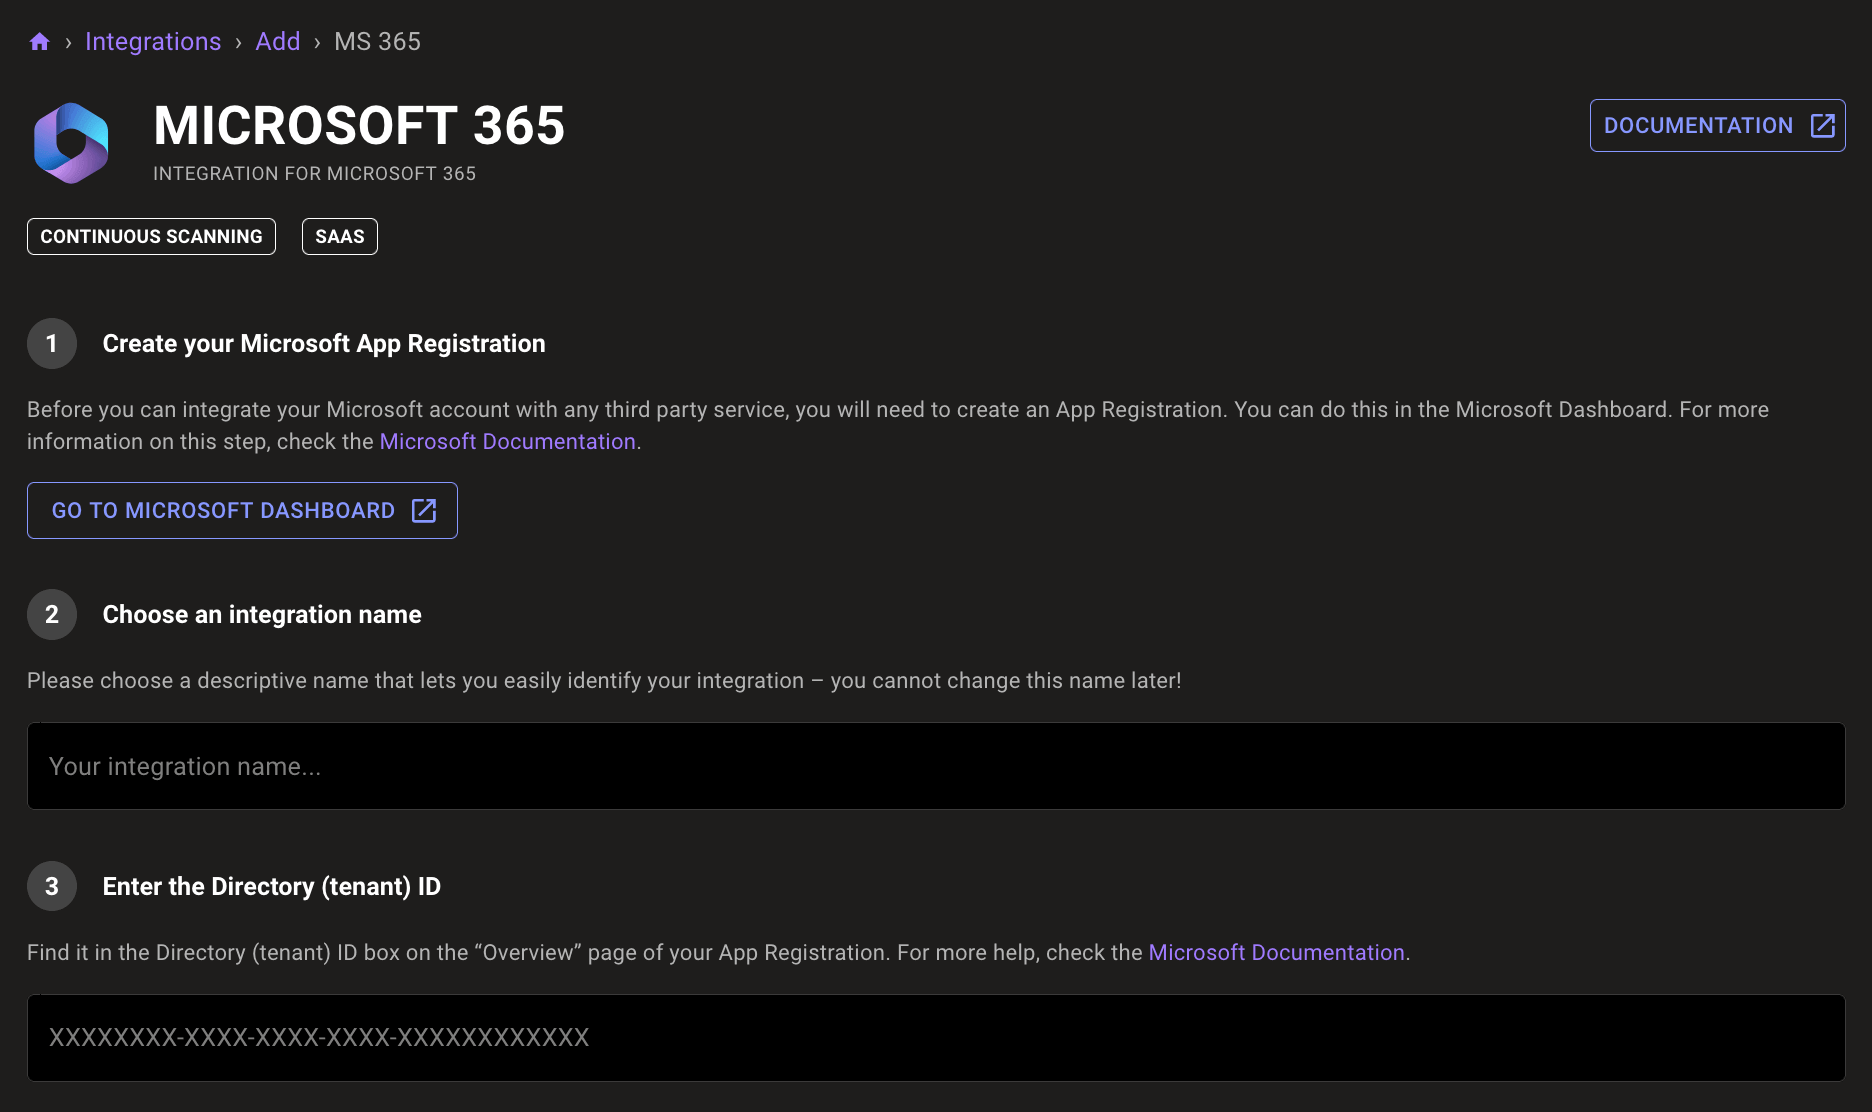
In the Choose an integration name box, enter a name for the integration. Make it a name that lets you easily recognize the Microsoft 365 tenant.
-
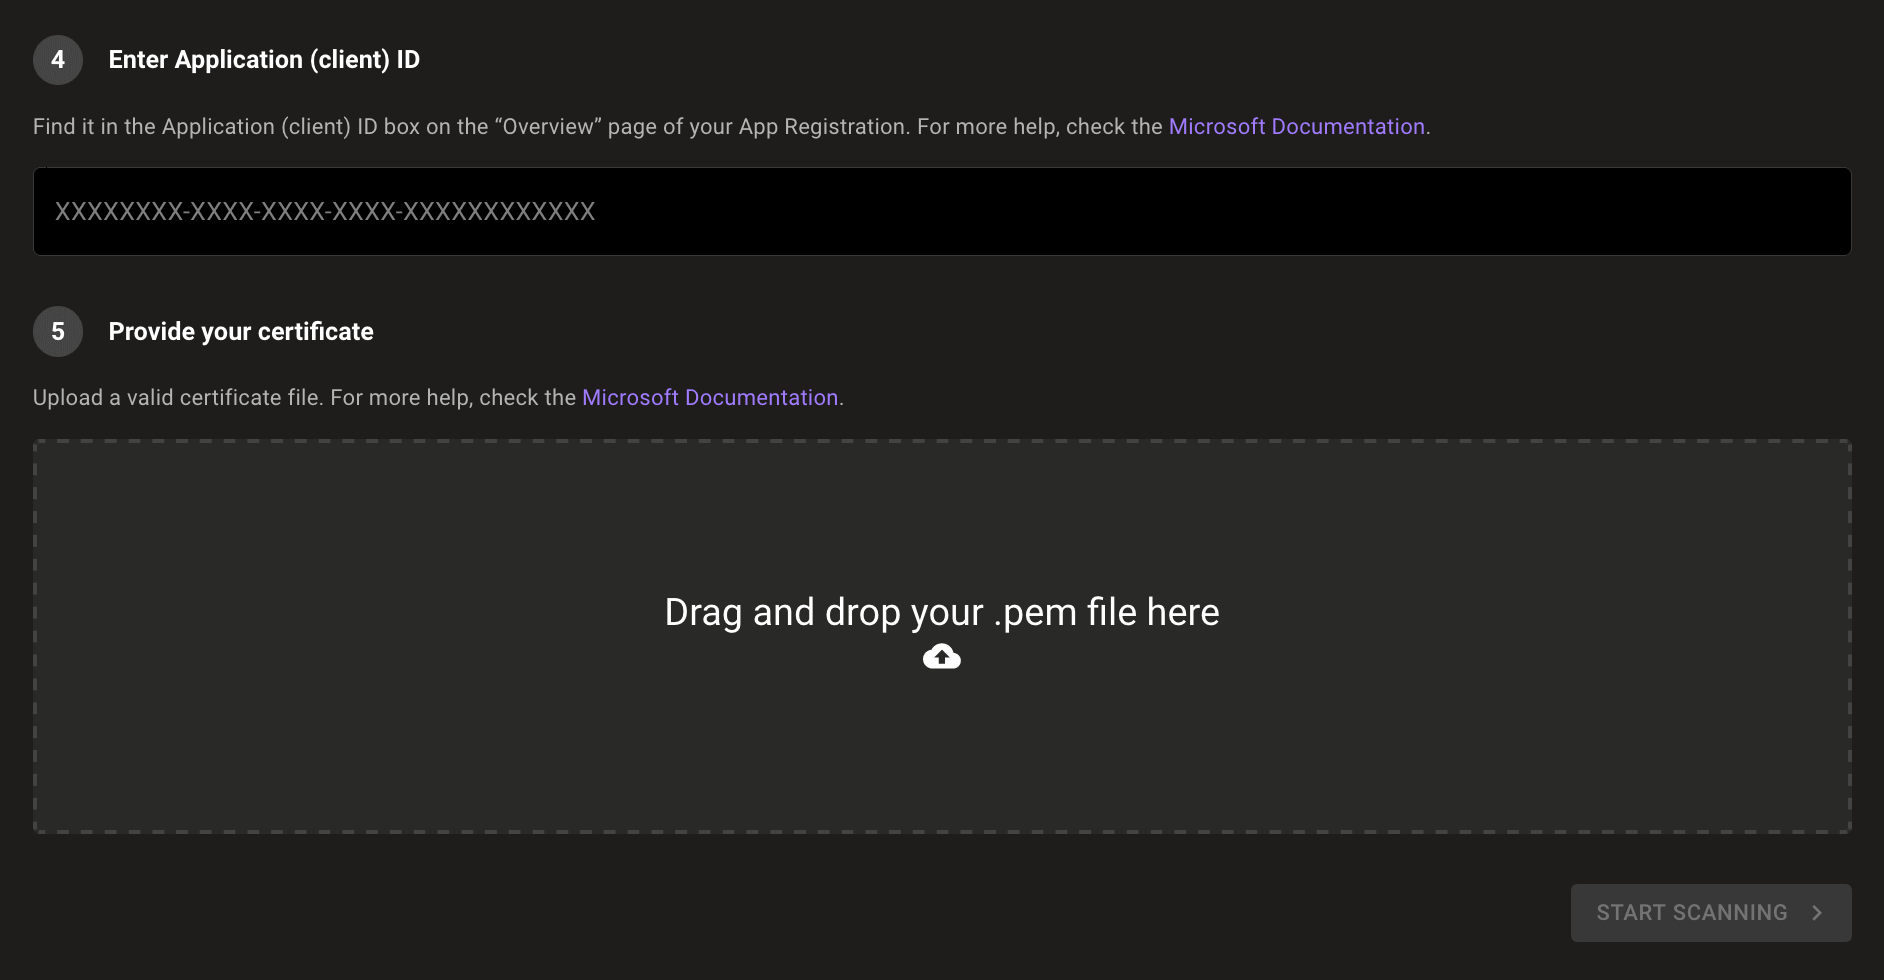
In the Enter Application (client) ID box, enter the value from the app registration's Application (client) ID box.
-
In the Enter the Directory (tenant) ID box, enter the value from the app registration's Directory (tenant) ID box.
-
Specify the subscriptions for Mondoo to continuously scan.
-
To continuously scan all subscriptions in the tenant, leave the Scan all subscriptions connected to the Directory (tenant) ID toggle enabled.
-
To choose the subscriptions to scan, disable the Scan all subscriptions connected to the Directory (tenant) ID toggle, select Allowlist, and enter the subscription ID to scan.
-
To scan all subscriptions except those you specify, disable the Scan all subscriptions connected to the Directory (tenant) ID toggle, select Denylist, and enter the names of the subscriptions you don't want Mondoo to scan.
-
-
Provide a certificate (a PEM (privacy-enhanced mail) file) for Mondoo to securely authenticate with the app (service principal) you created.
The certificate file must have the .pem extension and must contain both the private key and the certificate in this order:
-----BEGIN PRIVATE KEY-----
key goes here
-----END PRIVATE KEY-----
-----BEGIN CERTIFICATE-----
certificate goes here
-----END CERTIFICATE-----
Upload the certificate to Mondoo: In the Drag and drop your .pem file here box, select the cloud icon and choose the file to upload.
-
To complete the integration, select the START SCANNING button.
-
On the Recommended Policies page, enable the policies on which you want to base assessments of your ms365 environment. To learn more, read Manage Policies.
Mondoo begins scanning your Microsoft 365 resources. When it completes, you can see results on the INVENTORY page. To learn more, read Monitor Your Infrastructure Security.